Let’s start 2020 with something positive – reflecting on the awesomeness of 2019. 2019 was a productive year for us at SelfCAD. We listened to your feedback, fixed bugs and other nasty things and improved most of our tools. We added a bunch of useful new features. Which one do you like the best?
Here are 10 SelfCAD improvements of 2019 graded by how much they added to your modeling experience. If you’d like to learn more, please visit our FAQ and the SelfCAD Manual.
#10 – Revolve tool can make objects with holes now
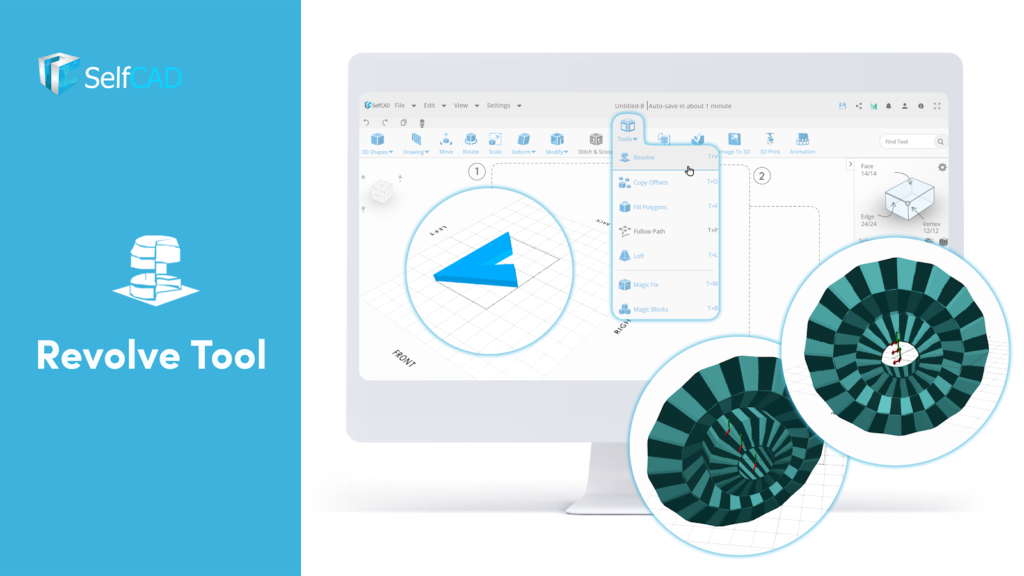
2018 Revolve tool closed all the holes. 2020 revolve tool doesn’t. You get the gist. We took a long, hard look at this tool, which creates a new shape out of revolving (for example) a plane. We realized it doesn’t make sense to automatically plug all the holes, and it sometimes makes creating the shape you want unnecessarily difficult.
You can also revolve around any shape by selecting Revolve Around Edges/Profiles or even guides in the ‘Settings’ section. You no longer need to merge objects to revolve around them.
#9 – Snap Tool
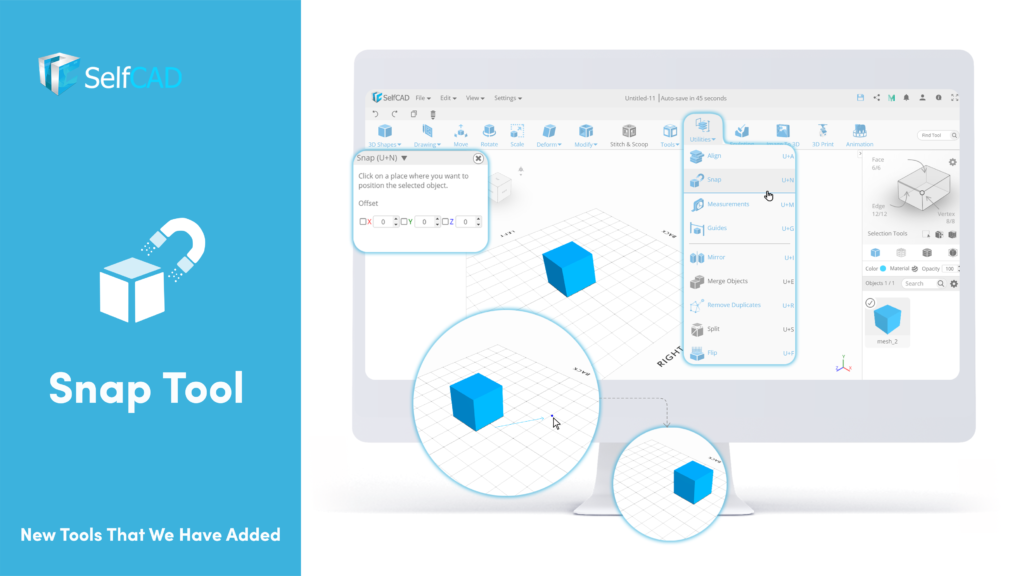
Snap tool is another quality of life tool. You can use it to snap any shape to any location in the workspace. You can also use it to snap and collapse vertices. When used with ‘Remove Duplicate’ tool found in the Utilities section it will remove details in the vertices.
#8 – Drawing Tool Improvements
We’ve made a lot of changes to our drawing tool in 2019.
We’ve added smoothness to the text tool and real-time intersection. Real-time… what?
Before, when you drew something which has a hole in it, you were losing that hole after generating a 3D object from the drawing. Now, this tool creates a hole automatically if you indicate your object should have one!
Additionally, when you use the FreeHand Tool and set the height settings to zero, it will automatically create a profile.
#7 – Flatten, Inflate
SelfCAD added some crucial tools to your toolbox. Flatten and Inflate do exactly what it sounds like – Flatten makes the object gradually flatter, while Inflate will inflate the selected area like a balloon. Flatten is useful for quickly slicing a sphere, among other things.
#6 – Gear Generator
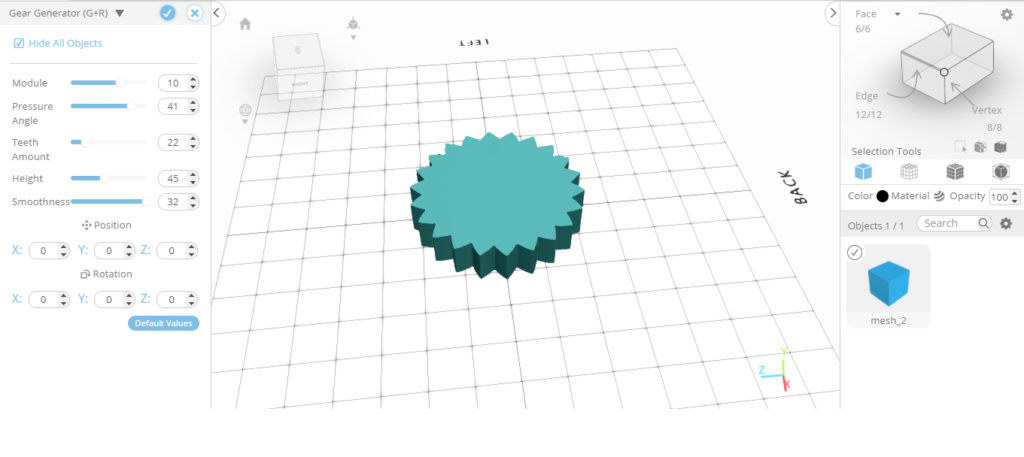
Our (relatively) new Gear Generator is located in the ‘3D Shapes’ category. No need to model your gears by hand, this flexible tool is here to save your time.
#5 – The Marquee Selection Tool
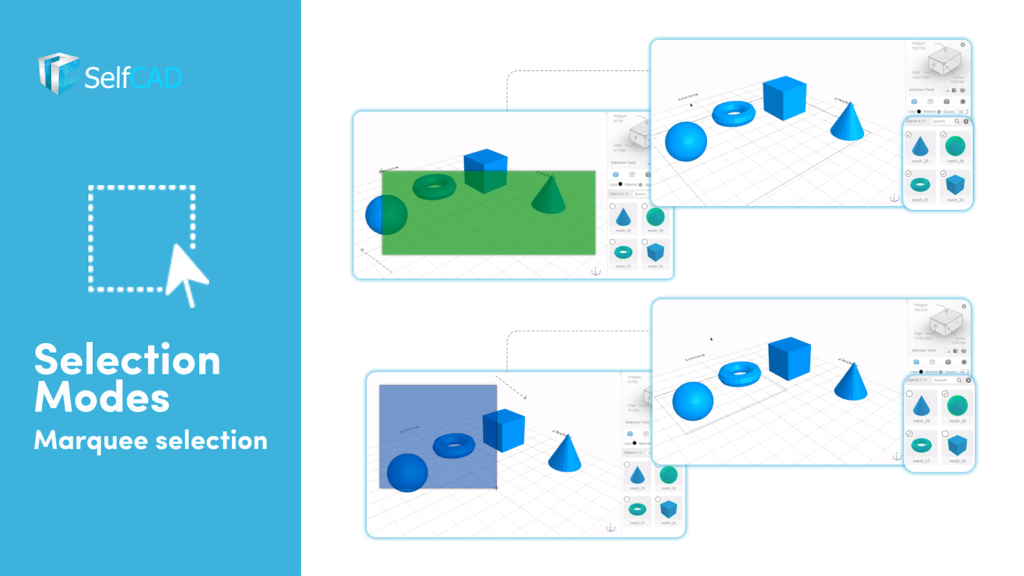
You can now select polygons by dragging your mouse.
If you drag towards the right, it will select only the included faces. But if you drag towards the left you will select everything. We wanted selection to be as convenient as possible.
#4 – Part Selection Tool
This is a nifty tool that allows everyone to select specific parts of the model.
#3 – New Material Section ( including Shadows, Shininess, Light Sources and Targets )
In 2019 we added additional features to make SelfCAD models look even better while you model. You can now control shadows, shininess of the material, decide if the model is a light source etc. It will work even better with rendering!
#2 – Improved Slicer
The new and improved SelfCAD slicer, we’ve practically remade it. The new menu, more options than ever and you can now get you a preview of how your model will be 3D printed. Which is pretty neat, you have to agree.
#1 – Animation
In October, we added an animator to SelfCAD. It’s our first step to make SelfCAD a choice for every creator.
When you click the record button, you can change the color, move or transform your 3D model to make a clip and then put these clips together to create something unique.
Up next: we are planning to add rendering in 2020 and a rigger in the future, making this feature feel more complete.
I hope you enjoyed reading this list – create your free SelfCAD account by clicking here.
The post The Top 10 SelfCAD Improvements of 2019 appeared first on 3DPrint.com | The Voice of 3D Printing / Additive Manufacturing.