3DPrint.com Review of the Creality CR-6 SE

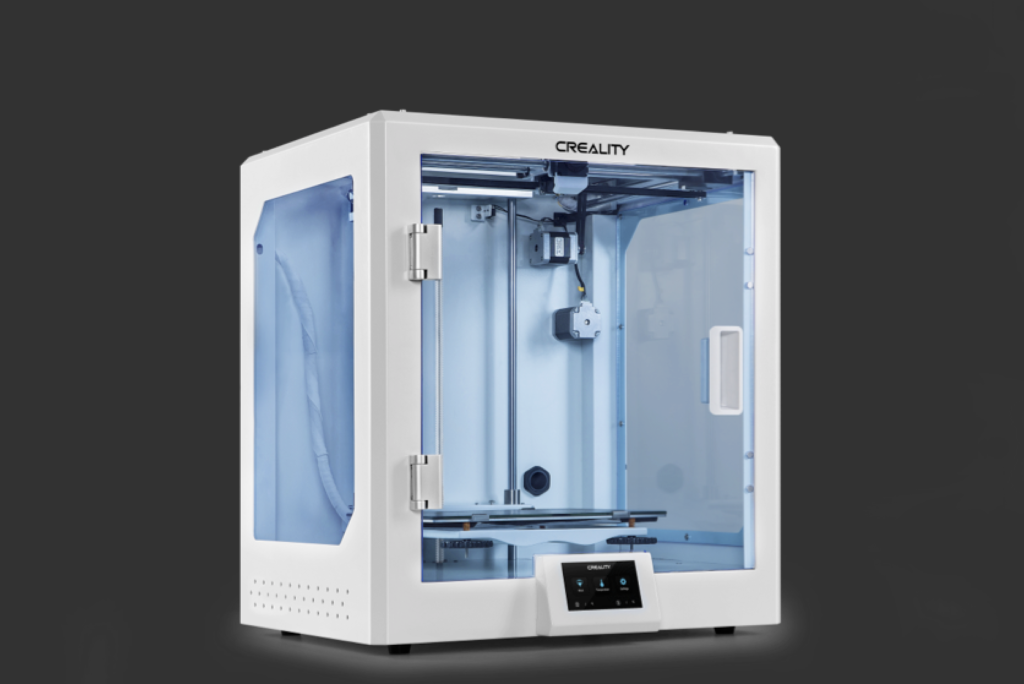
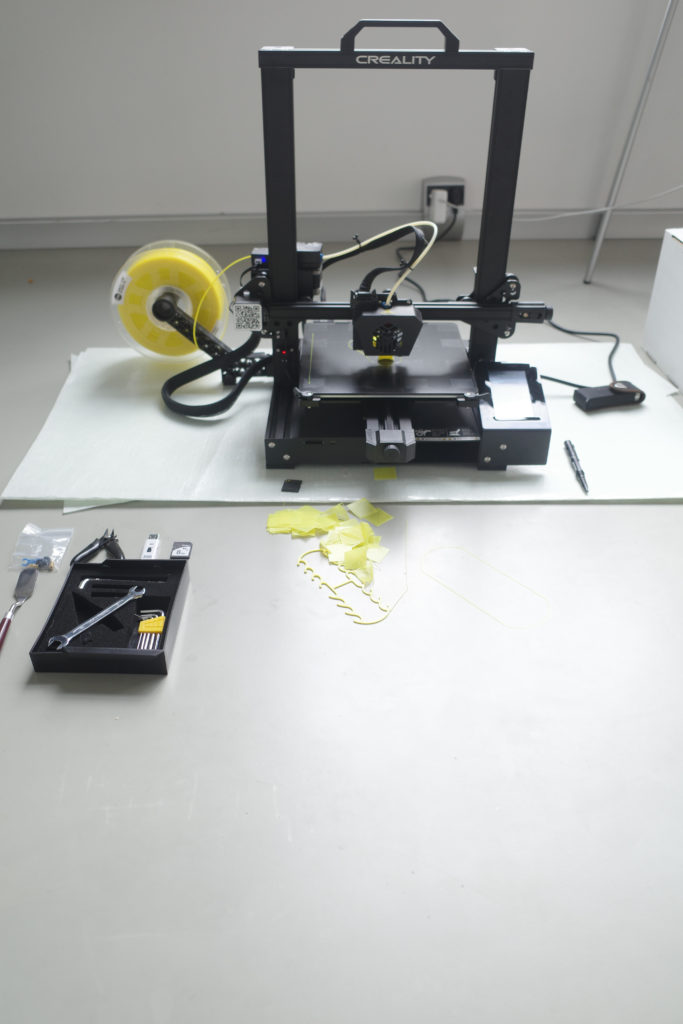
I received a pre-production version of the Creality CR-6 SE 3D printer for review a few weeks ago. I’m pleasantly surprised with this solid printer which is currently on Kickstarter for $339 and will be $429 later. It’s a step up from earlier Creality offerings, is relatively easy to use, and dependable. It’s a value for money machine that is an improved version of an Ender with some better components. Safety features, an improved extruder, and a better feeder make this a better printer, suited for beginners and everyday use.

Specs 

  • 235 by 235 by 250mm build volume.
  • Auto-leveling
  • Filament end detection
  • Touch screen
  • Mini USB/SD Card
  • Carborundum glass bed

Unboxing

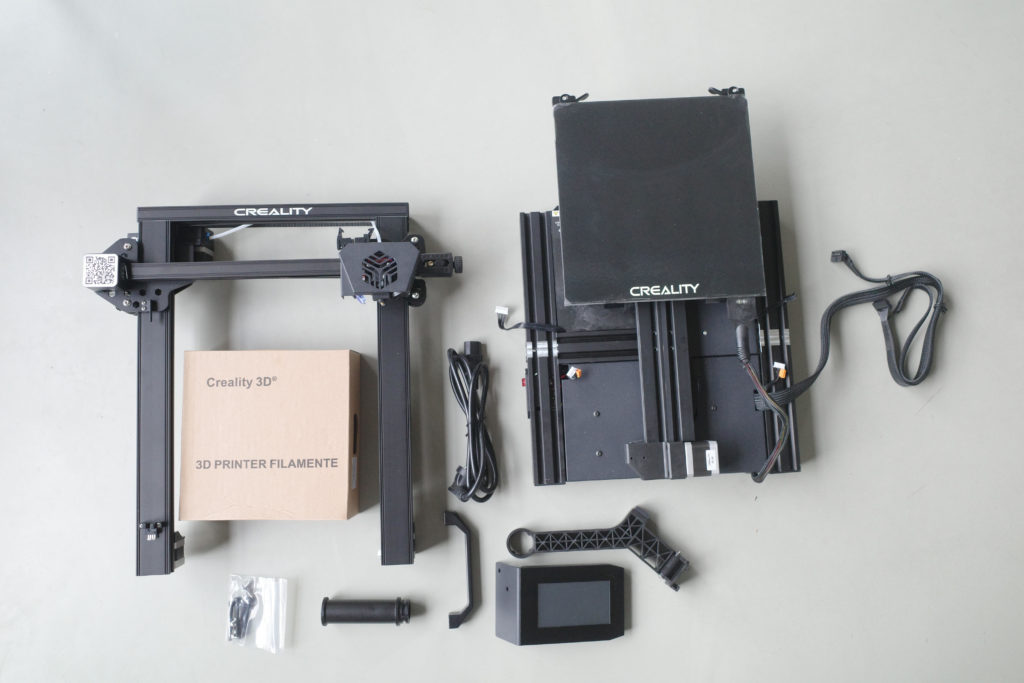
Unboxing the CR-6 was easy and the most difficult thing was the manual. I also didn’t know about the handy little tool drawer beforehand but actually that is quite handy once I managed to find it. The toolset is alright with the little pliers being very handy indeed. I had the printer set up and printing within 15 minutes of unpacking it. One of the only parts where you have to pay attention is in placing the Z stage correctly, so just take some time to make sure that this is perpendicular and that it is placed absolutely level. The other part where you have to pay attention is when placing the main plug on the front of the printer the right way.

Software 

I had to update the firmware and the Creality software worked well for the printer. I also tried just regular Cura with a modified Ender profile and this worked well also. I did some prints with Slic3r and this was fine as well. The Creality software is relatively easy to use and easy for beginners as well. There were some issues with saving to the SD cards with my own SD cards not working and certain file names being too long or having exotic characters and not working either. The workarounds were to format my SD cards and to shorten the file names.

Touchscreen 

I had some issues with the touchscreen crashing but this was due to me having a preproduction version and was fixed. Other than that, the touchscreen works well and is super simple to use every day. Menus that you need are very accessible. Part of me wanted more accessible tuning options but that would make it more complex to understand.

Leveling & Filament End Detection

Bed leveling worked like a dream on the printer and was super easy. Filament end detection and pausing prints worked as well. I also ripped out filament and the software paused the print and let me feed new filament back in again. These features are all very handy and work well.

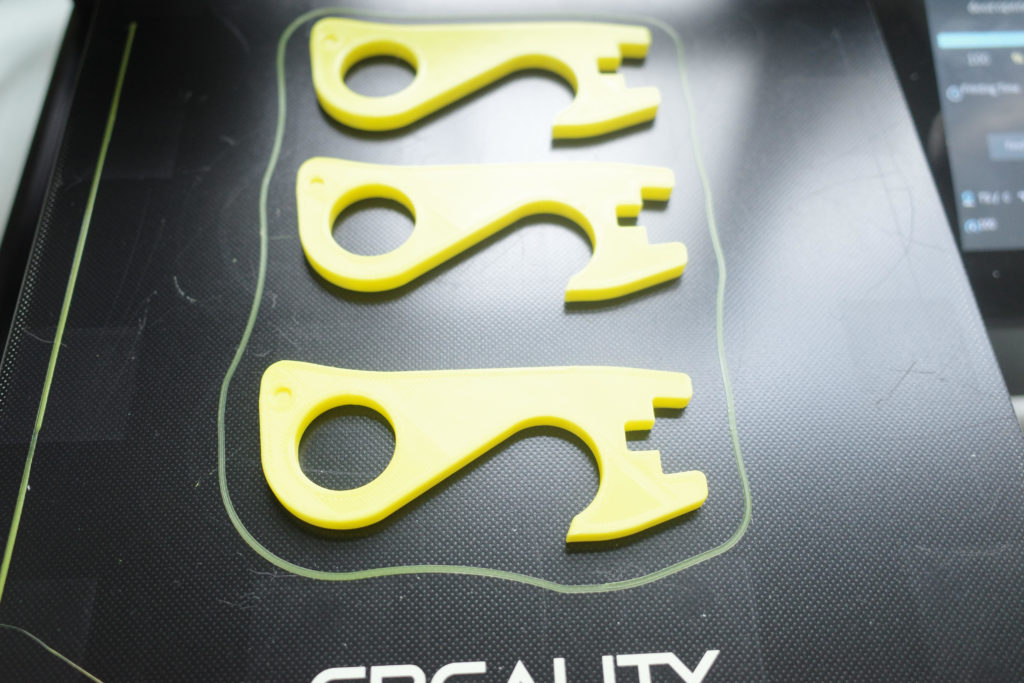
Carborundum glass build plate 

This part really threw me. The first week I totally completely loved the build plate which is a coated glass plate that works like a dream for PLA. I tried several PLA variants and they all worked well. After intensive use however, there were some adhesion issues especially with prints that had little initial surface area. I found it more difficult to clean this plate compared to regular glass also. I had real issues with the adhesion of ASA, ABS and PETG variant materials on the build plate. I’d recommend another build surface if you’d like to vary your materials. If you don’t damage the plate it works wonderfully with PLA though, so do be careful when removing prints.
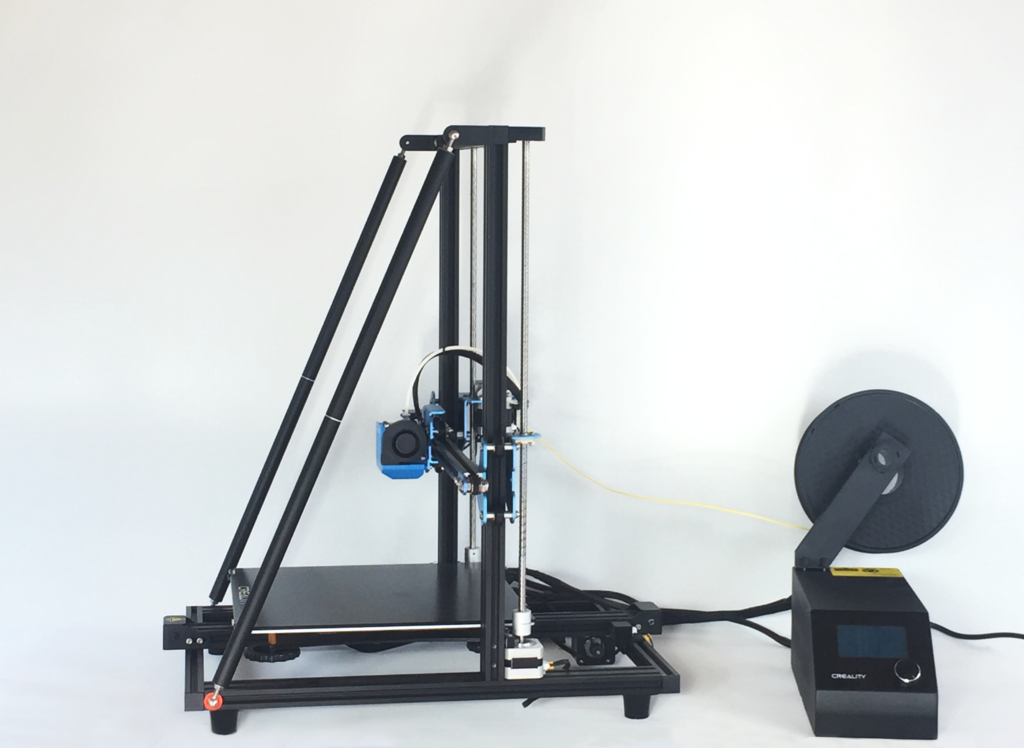
Chassis 

The aluminum extruded profile chassis of the printer with the power supply in it makes for a solid base and reduces vibrations and misprints when compared to other similar printers. On the whole, components are more well made than we expect in this price category. Machining and finishing was, on the whole, better than comparable printers as well.
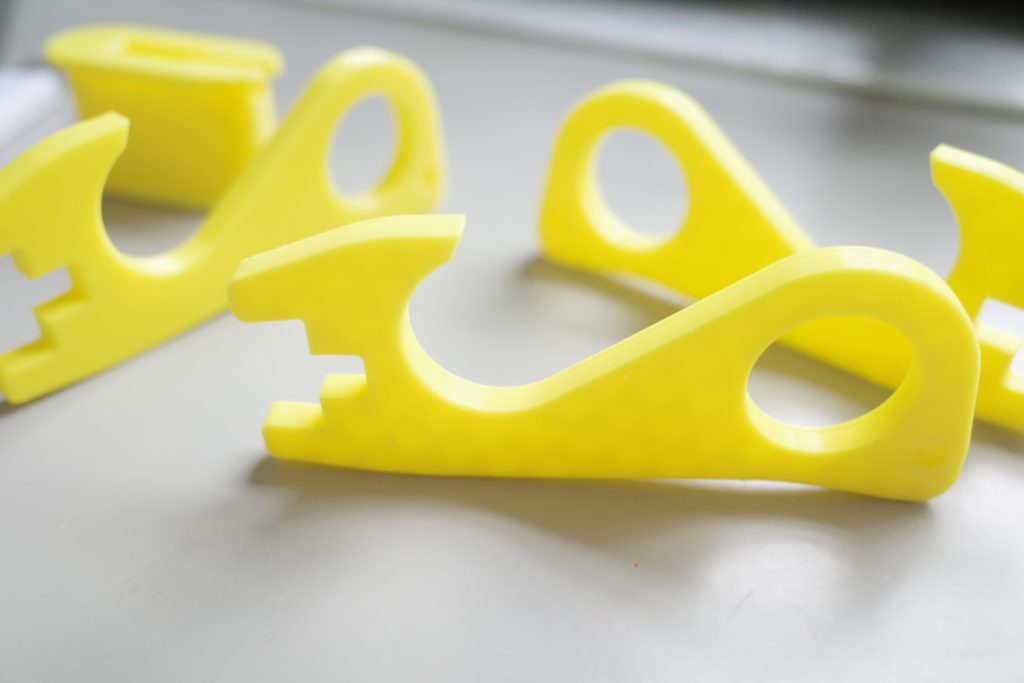
General operation 

It’s a simple system to use and general maintenance stuff such as belt tensioning, leveling, and printing is straightforward. Compared to similarly priced systems it is quiet and just pumps out print after print in PLA. You can hear the fans work but little else. After my testing, I started making dozens of ear savers for friends and acquaintances and it just kept on working well. For PLA it’s a dream at this price point. Feeding in filament was easy as was removing it. I found that for me it worked better with an external spool holder.
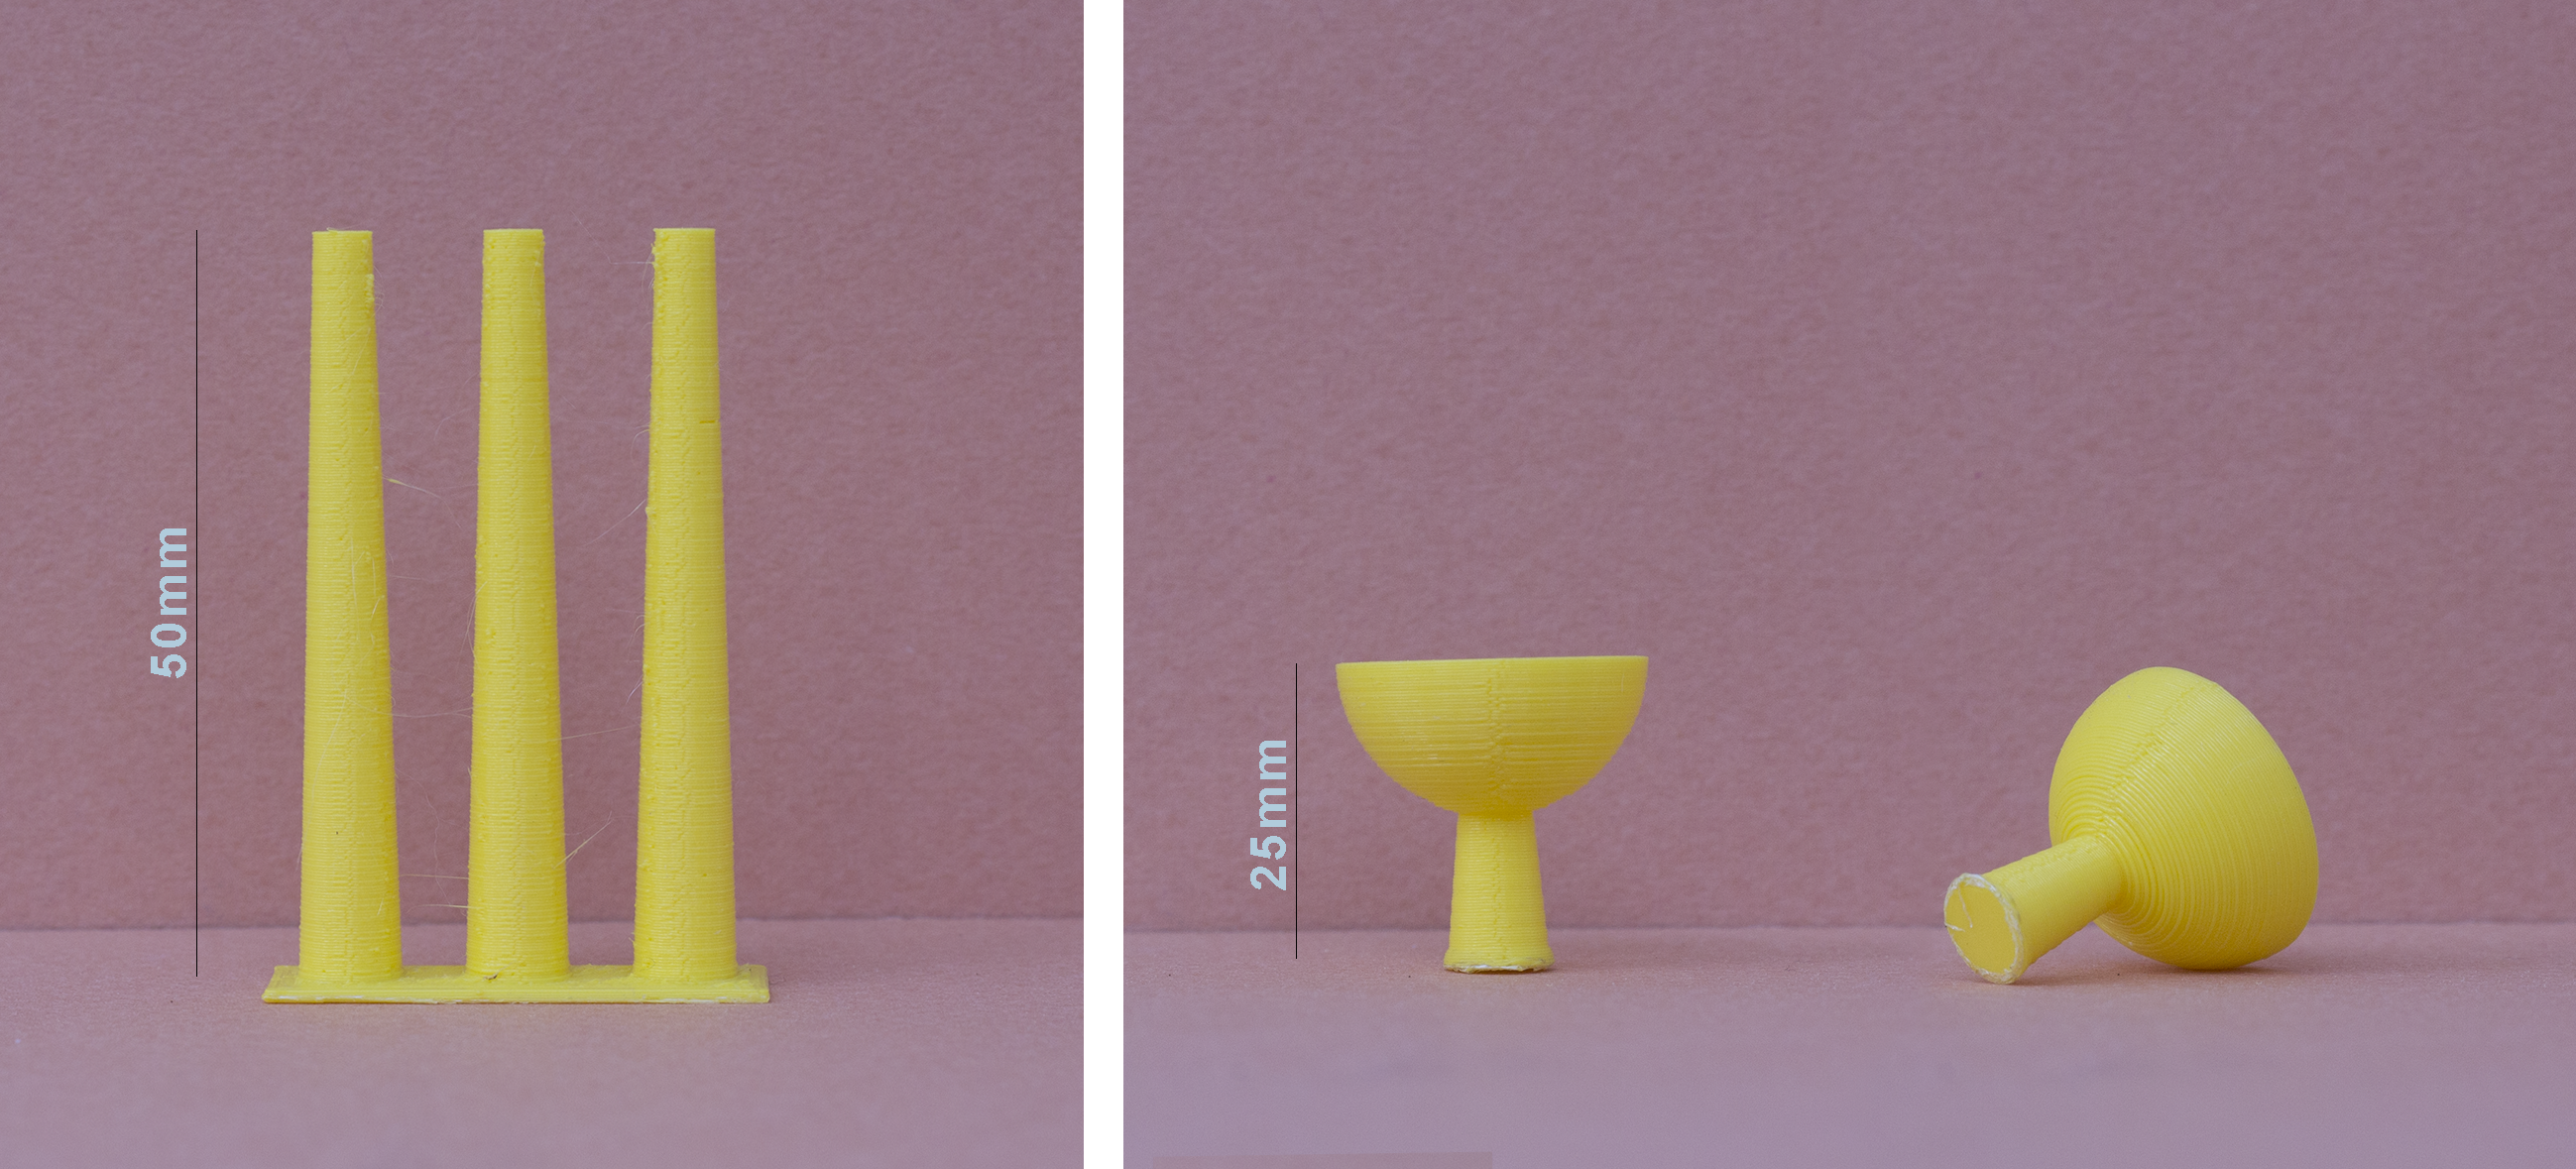
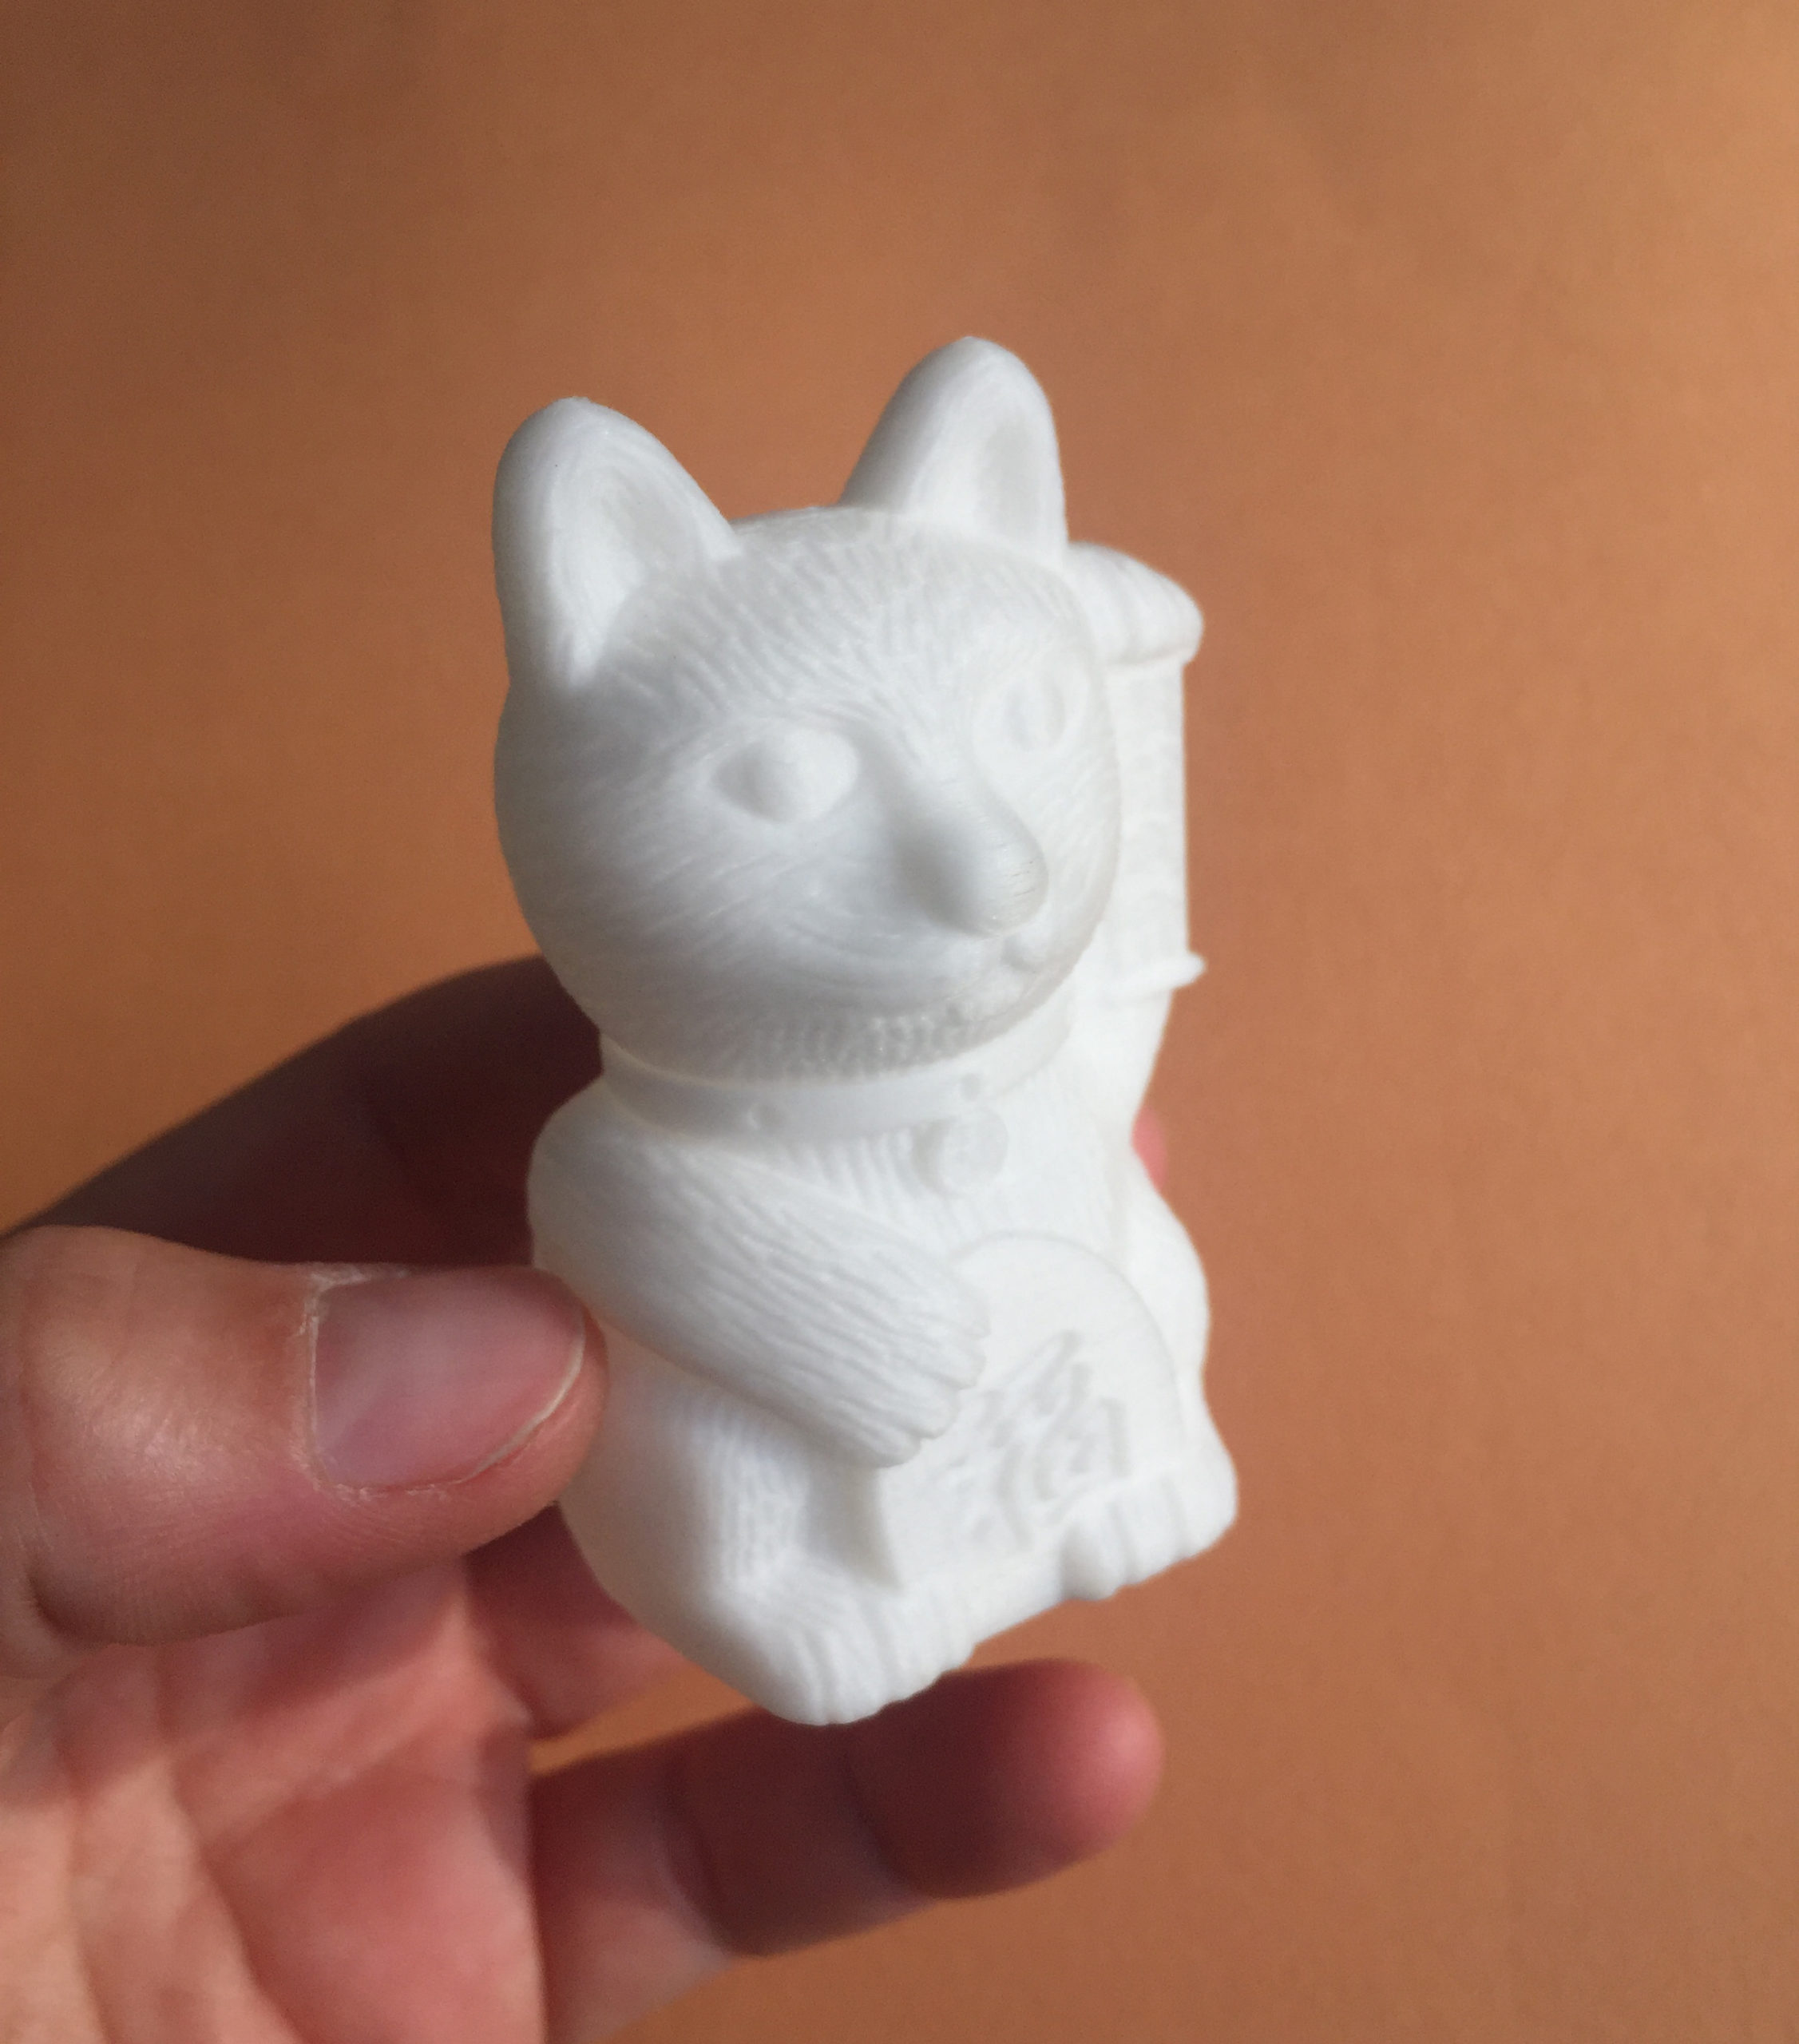
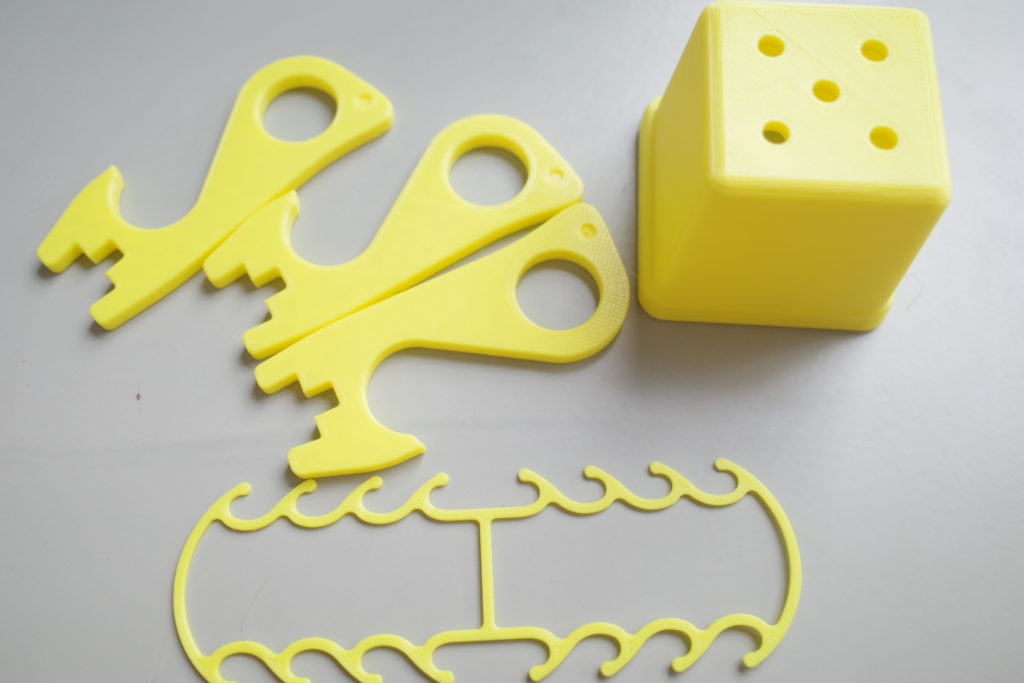
Prints 

Prints for PLA were good with the default settings and default operation working well. The printer was reliable and gave a good surface finish straight out of the box. Small tweaks improved this so that one could reliably make PLA prints that looked good.

Opinion

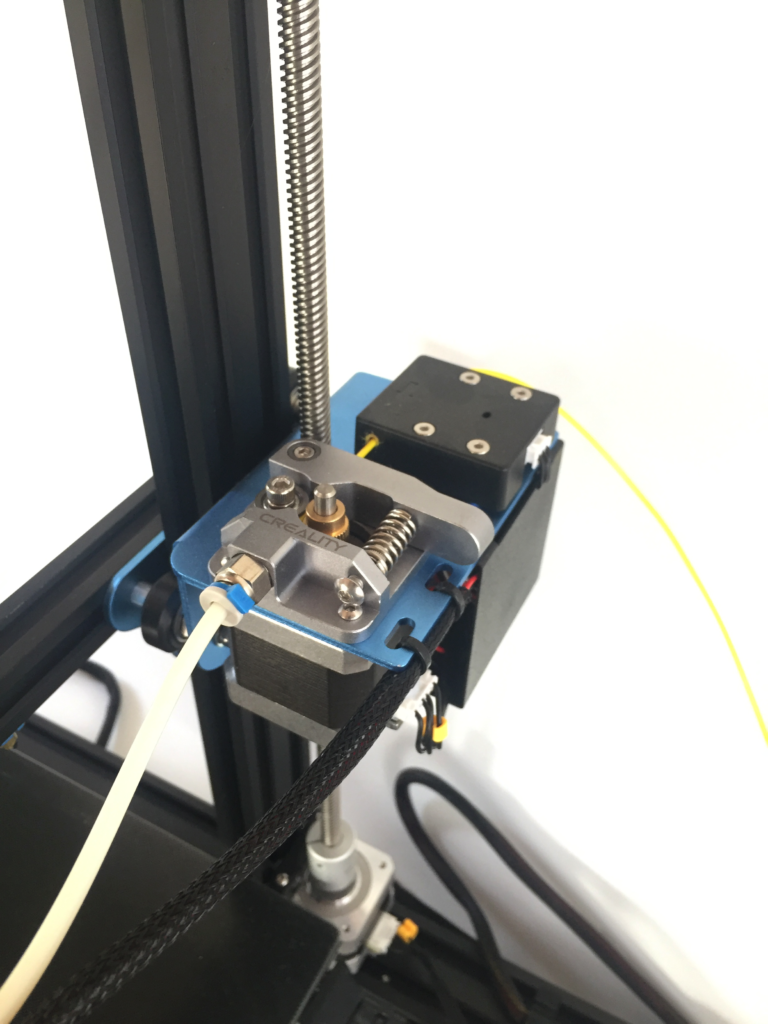
This is a surprisingly solid 3D printer for the price. For entry-level systems this is a step forward in ease of use, components, the chassis, and in general operation. All of the leveling and day to day operation features work well. Both the feeder and nozzle are significant steps up from previous Creality designs. For PLA it works well but with the standard build platform, ABS and other materials are just not possible. Also, I’m not sold on the longevity of the coating on the platform either. This can be remedied through a BuildTak or other build plate though. All in all this is a good printer that offers a lot of value for money for the price.

The post 3DPrint.com Review of the Creality CR-6 SE appeared first on 3DPrint.com | The Voice of 3D Printing / Additive Manufacturing.

3D Printing LED Strip Lighting Mounts for a 3D Printer #3Dthursday #3Dprinter

Many people wish to light their 3D printer frame, to see better or for photography. MSRaynsford posts:

After sorting out a sturdy camera mount for my timelapse videos I needed to sort out the lighting to go with it. I was using a large lamp wedged in front of the printer and then diffused with a sheet of paper, the trouble is every time I went near the machine it would blind me. I had some cool white 24V LED strips that could connect directly to the PSU in the printer and be mounted on the framework. I printed some mounts that angle the strips in towards the print, these were done in two parts; the 45 degree angle to point the lights in black to match the framework and a white light cover to hold the strips in place and diffuse the light some more. (stl here)

See the blog here.

CREALITY to Release CR-5 Pro 3D Printer Delivering Industrial Accuracy on the Desktop

Creality has announced the launch of a new FFF desktop 3D printer: the CR-5 Pro. With enhanced improvements of hardware, the CR-5 Pro is designed to be a consumer-friendly machine that incorporates a number of important features, making it fit for families, schools, and individual makers alike.

“We are noticing a growing demand for better print quality and more supportive printing materials from consumers, so the CR-5 Pro is here to meet the challenge of making professional-quality 3D printing more accessible. Users will get exact end-use parts from the CR-5 Pro, without sacrificing affordability.” said Creality R&D Engineer Andrew Deng.

The CR-5 Pro is composed of a cartesian axis system, more rigid and accurate than a delta or polar configuration. With an appearance totally different from its predecessor, the CR-5, the enclosed structure of the CR-5 Pro is more formidable with an all-metal, white chamber. Transparent acrylic plates are added on the front, right and left sides, convenient for monitoring real-time printing and helpful for maintaining a constant temperature within the print area. A top enclosure is optional for a DIY upgrade to make the machine completely sealed. Utilizing a single Bowden extrusion system as the filament feeding mechanism, the CR-5 Pro ensures highly stable filament transmission through a PTFE tube to the nozzle in the hot-end, allowing users to increase print speed and precision, without being burdened by a heavy hot-end. Moreover, the hot-end has been upgraded with a newly designed nozzle structure with a powerful cooling fan, which makes it possible to 3D print more flexible filaments such as TPU as well as difficult materials such as ABS. 

Furthermore, the electrical components on the CR-5 Pro include a silent motherboard with an ATMEL 2560 master chip to guarantee smooth motion, effective heat dissipation, and precise voltage control. The quality 24V/350W MeanWell power supply supports voltage adjustment between 115V and 230V, allowing for rapid heating and electrical safety at the same time. The CR-5 Pro leaves users with a silent and safe printing experience.

Operating in a print area of 300*225*380MM, the CR-5 Pro reaches print precision up to 100 microns and XY axis positioning precision of up to 0.012mm, which means there is nothing but flawless smoothness and exacting details on the print surface. The Carborundum glass platform installed on the CR-5 Pro enables final prints to better adhere to the print bed and to be removed with ease, producing final prints without any defects even at its bottom layer. CR-5 Pro can be relied upon to 3D print aesthetically pleasing 3D models for hobbyists as well as professional-grade end-use parts for engineers, artists and researchers.

Other smart supportive features making the CR-5 Pro more attractive include the filament run-out sensor, pause and resume printing mode, and a LED light reminder, leaving users with little hassle during printing process.

The CR-5 Pro will be released next week,  at an affordable price. Reflecting Creality’s pioneering 3D printing industry spirit, the CR-5 pro is sure to build on Creality’s reputation of making 3D printing more reliable and accessible.

About Creality

CREALITY 3D has accumulated more than 5 years of experience in 3D printer research, production, and trading since its establishment in 2014. Our factory is certificated with BSCI and ISO, covers an area of 20,000 square meters, achieving an annual production capacity of over 500,000 pieces. Consisting of professional researchers and skilled engineers, our R&D team has been constantly striving for quality and excellence. Our products, all certified CE, FCC, ROHS, have exported to more than 100 countries including but not limited to France, USA, Australia, Russia, Britain, Germany, Singapore, Egypt, and India, bringing convenience to all walks of life.

For more information, please access to CREALITY official website: http://www.creality.com

The post CREALITY to Release CR-5 Pro 3D Printer Delivering Industrial Accuracy on the Desktop appeared first on 3DPrint.com | The Voice of 3D Printing / Additive Manufacturing.

3D Printer review: 100 hours with the Creality CR-10 V2

Creality CR 10 V2

Along with competitors Anet and XYZPrinting, Creality form a trio of manufacturers that dominate the low-cost 3D printing segment. Only a few years ago 3D printers under $500 were rare, but these firms have made them accessible and have sold hundreds of thousands of them.

In this segment, there are often a lot of issues with print quality and printer reliability. The Creality CR 10 v2 is the upgraded version of the very popular CR 10 and retails for around $500. Creality in the past has also had quality issues and even some safety issues with some components and models. The CR 10 was known to in some cases catch fire. Subsequent safety improvements have made Crealitys safer. We would not recommend running these types of machines unattended, however. Whereas Creality machines tend to work well out of the box, low-cost components do mean that after a few months you will need to replace components.

After testing it for over 100 hours of print time, we can conclude that CR-10 V2 is a value-engineered machine with a large build volume that works surprisingly well.

Unboxing and Set Up

Unboxing is easy and there is some assembly required. This process is simple if you follow instructions. You can find a video showing you how this is done. Most people should be able to do the assembly and set up of the printer.

The printer has a separate console for controls. For some this may mean that your printer takes up more space on your desk but it could also make it more accessible because you could place the console closer to you. Physically separating the main electronics and controls from the motors and frame could make the machine safer though, so that’s a positive. The filament is placed on top of this console, this seems a bit weird initially but works ok. When running the printer for a long time this does mean that you can prevent tangling by placing your filament spool at the correct angle. You can also place the spool closer to you so you can easily see if there is tangling or problems with unspooling.

Controls

Controls work through a wheeled button. It is easy to navigate through the menu screens. Do not confuse easy with intuitive, however. Menu structure and operations are far from perfect and can be time-consuming and confusing.

Structure

A nice design element is that it has an extra set of diagonal arms that gives the printer more Z-axis consistency. These arms also make the printer more stable overall and seem to have a handle in improving print quality generally. These arms also help when moving it to a new location. The arms make it much more steady overall and makes it is easy to grasp, move and re-position. Build quality on parts looks better than previous models as does overall attention to details such as cable placement. Machined parts also look like they’re better quality than before.

Operation

The ultra-quiet TMC2208 motherboard does not make the printer that quiet. It is actually annoying if you work in the same place that you print. The printer sounds like an old PC and is much too loud. This is an important point for me and actually made me use the printer less often than I would have liked to.

It has a dual-port hot end cooling fans. This is a refinement over some other clones and seems to improve the surface quality of prints. The printer warms up fast enough. Both the nozzle and the bed preheat quickly enough.

Bed leveling is still a semi-automated process. I did it manually with a piece of paper, but I only had to do it 2 times for a 100 hours of printing.

The resume printing function works extremely well. Several simulated stops and starts worked well and I was able to resume prints without incident. During normal operation, I ran out of filament and was able to replace it easily while print was automatically paused. I also really like doing gradients in colors so I like this feature a lot. It helped me play with gradient colors and gave me more confidence in the machne.

Specs

  • Build Volume 300 X 300 X 400mm
  • Weight11.5 K
  • Movement speed ≤180mm/s, normal 30-60mm/s
  • Positioning Accuracy ±0.1mm
  • Layer thickness 0.1-0.4mm
  • Heated bed temperature  ≤100℃
  • SD slot
  • File format STLOBJAMF
  • Slicing software: CuraRepetier-HostSimplify
  • OS: Mac, Linux, WindowsXPVista7810
  • Power supply AC Input 115V/230V
  • Output: 24V Power rating 350W
  • Auto leveling Optional Extra
  • Filaments: PLA/ABS/PETG/TPU (Would only recommend TPU with the optional Titan Direct Drive unit added).
  • Filament diameter1.75mm

Overall it’s well equipped for the price and especially the build volume is comparatively good.

Results


Test 1 and 2: Not bad! Some light stringing. Cura: Layer hight: 0.2 – Print speed: 60mm/s – No Supports

Test 3: This shape is not possible to get right a 100% because the tube has a 1cm diameter and is very sensitive to vibrations, but I use it as a test for the Z axis. Cura: Layer hight: 0.2 – Print speed: 60mm/s – No infill

Verdict 

Pretty good at details. Cura: Layer hight: 0.2 – Print speed: 40mm/s – No Supports

Higher than initial Creality price points of around $200 or $300, this is still a good value machine at around $500. Build and parts quality is not stellar so I will expect to have to replace parts in the long run. Machined parts and build quality does seem superior to previous models, however. Day to day this printer is adequate for an entry-level user. Operation is not super intuitive but you will get the hang of this machine. It is easy to unbox, set up and organize. An issue that I have with it is that it is surprisingly noisy, also when compared to other similarly priced machines I have. The CR-10 V2 is a value-engineered low-cost machine with a large build volume that works surprisingly well. I was happy with the print results overall and the printer let me customize enough through settings that I could dial in new materials, new colors and optimize prints. The print detail is actually quite good. If you’re willing to take the time to understand the process and variables this could be a good first printer for you.

The post 3D Printer review: 100 hours with the Creality CR-10 V2 appeared first on 3DPrint.com | The Voice of 3D Printing / Additive Manufacturing.

3D Printing Services vs Owning an Industrial 3D Printer: How to Choose

In today’s modern world, businesses have access to more technologically-advanced devices than ever before, which can be used to expedite certain processes of each business. One such device is an industrial 3D printer, a machine that gives manufacturers a quick way to prototype.

Gone are the days of waiting for the production of the first prototype to see your creations come to life. Now you can have the first sample in your hands within a few hours.

Now you just have to make a decision between two options: either purchase your own industrial 3D printer or use a 3D printing service. As with anything else in business, both options have their advantages. Here is a definitive layout of both.

Advantages of Using a 3D Printing Service

Outsourcing is a tremendous option for many aspects of your business, and using it for your 3D printing needs is no different. Here are several advantages that come with hiring a 3D printing service for your innovative products.

Experience Is on Your Side

Anytime you can add years of experience to your team, it’s a good thing. Buying a 3D printer on your own means going through the bumps and bruises of learning the model that you purchase. If neither you nor your employees have much experience with 3D printing and all that it entails, expect a learning curve with it.

Rather, you can hire a 3D printing service that has several employees with the years of experience you need. That means you can hit the ground running with 3D printing as soon as you hire them; no setbacks!

As your business grows, so will the demands of your 3D printing needs. Whether it’s adding a new product to your line or making a few moderations to current ones, you’ll need the 3D printing to keep up.

There can be instances where the specifics that you send over for printing won’t meet the expectations you have for it. Your 3D printing service can use their knowledge of printing similar items in the past to alert you of any potential setbacks ahead of time.

That way, you can gameplan whether to proceed with the current specifics or quickly return to the drawing board before printing it out. This will save you a fortune over reprinting the same product after a setback with the initially-printed prototype.

Access to the Latest Equipment

Companies that purchase a 3D printer for their own use do so with the intention of having it for several years down the line. However, the model they purchase could become outdated as early as the following year, when a new edition of that same model rolls out and has even better features. Now, because they bought it, that company is stuck with the model they purchased and succumbing to its limitations.

On the other hand, companies tat utilize 3D printing services may have more access to the latest and greatest equipment that money can buy. 3D printing services are always looking to streamline their process and provide their clients with the best equipment.

Now, instead of being stuck with this year’s model 5-10 years down the line, you and your manufacturing processes will have access to the optimum 3D printers in the industry.

No In-House Overhead

As previously mentioned, it’s unlikely that your current employees have enough 3D printing experience to run the process for your company. That means that if you’re going to buy a 3D printer for yourself, you’ll also need to hire for positions that know how to run the software, monitor any maintenance needs, and stay in the loop with the latest trends and products.

In addition to spending money to hire new employees, you’ll also be spending $20,000-$100,000 on a single industrial 3D printer. Considering you’d need to hire several new employees to maintain the 3D printing, it’s much more cost-efficient to hire an all-encompassing 3D printing service.

That way, you’re paying for access to the brightest minds in the industry, experience, and the best 3D printers on the market. What’s better than that?

Premium Manufacturing and Order Fulfillment

If you purchase a 3D printer for your company, you’re just hoping that becomes streamlined and produces the end results you were hoping for. Even if it does, you now have to worry about the processing and assembly of each part that you’ve printed. That can be overwhelming for those that don’t have previous experience in doing so. It’s a lot of pressure to configure something the very first time that it’s created.

Get your company teamed up with experts that handle those situations day in and day out. They can assemble your product together and use the resources at their disposal to send it to you in custom packaging.

You’ll never have to worry about it arriving in one piece ever again, and that in itself is worth the investment.

Advantages of Owning an Industrial 3D Printer

Who doesn’t enjoy having something to call their own? After all, it’s your business, and you want to claim that industrial 3D printer as your own. Does it make sense for your specific situation? Read below and figure out whether it’s the best choice for you or not.

Quicker Turnaround

Once you’ve purchased the industrial 3D printer and hired the right staff to monitor its processes, you can have the products made in-house. Depending on the size of the item you’re printing, it could take a few minutes, a few hours, or a day or two for completion. Regardless, you’ll have access to it the moment it’s finished.

No need to hold off production until the item comes in from your third party 3D printing service. You’ll have the end result in your hand to determine what needs to be fixed and what doesn’t.

The key here is that you’ll need a high resolution industrial 3D printer to optimize this process. Without one, you’re wasting precious time on production.

Hands-On Printing

Perhaps you’re the type of person that feels more comfortable being more hands-on with every aspect of your business. Even if you don’t have any prior experience, you enjoy the process of learning and going through trial-and-error to maximize production. If that’s you, owning your own 3D printing service could be the best fit.

You’ll have the opportunity to oversee the integration, processing, and finalization of the methods you use for your in-house 3D printing. And with enough time, you’ll figure out the best ways to modify your printing software to yield the best results. Does your company have that kind of time on its hands?

After you and your team figure out the best methods, you’ll be able to grow your 3D printing team and teach them your ways of processing and manufacturing.

Getting Yourself Ahead of the Curve

Even though it’s becoming more and more modernized, 3D printing is still a relatively new feature in the business world. As time progresses, and the 3D printing industry continues to grow, more businesses will start to own their own 3D printers. You can get ahead of that trend by going through the learning curve now.

If you feel as if it’s a great advantage for you over your competitors then spending the time and money now can set yourself up for success down the line. However, your competitors may beat you out by going with a 3D printing service to expedite the learning curve and yield results in the quickest.

3D printing software is going to continue to advance, so you and your staff will be tasked time and time again to get up-to-speed on those changes. If you feel up to that challenge, the reward can be well worth it.

As long as you’re prepared to invest in new software and new industrial 3D printers every few years, the payoff can be substantial.

Make the Right Industrial 3D Printer Decision for Your Company

No one knows your business operations better than you do. Buying an industrial 3D printer means having some setbacks to set yourself up for the future. On the other hand, you could hire a 3D printer service and never skip a beat on your production.

Be sure to read this article on how big a role that design thinking plays in 3D printing for your business. For more inquiries, please reach out via our contact us page and we’ll be happy to assist you further.

The post 3D Printing Services vs Owning an Industrial 3D Printer: How to Choose appeared first on Shapeways Magazine.

Eindhoven University of Technology: Researchers 3D Print Microvascular Structures with Carbohydrate Glass

As we go about our busy lives each day, it is easy to forget what a miracle the human body is—and when you are feeling tip-top, you can thank the well-oiled machine in the form of the human body that keeps you breathing, talking, and walking. While you are probably familiar with the vascular system (in relation to your circulatory system), you may not also realize that the microvascular system is a vital player in your body, formed of tiny vessels that are, not surprisingly, responsible for microcirculation.

The microvasculature is made up of arterioles, capillaries, metarterioles, and more—and the vascular system overall has been connected with 3D printing numerous times over the past few years from bioprinted vascular scaffolds to 3D printed models for microvascular surgery to viable 3D printed tissue.

Today, researchers are still challenged to find ways to imitate and re-create the microvasculatur system with fabrication in 3D printing trending toward using devices such as an “organ-on-chip.” A team of scientists at Eindhoven University of Technology has been exploring this route further, as they explain in ‘3D printing of round microfluidic channels to mimic the microvasculature,’ presented last year in Montreaux at the Nano Bio Tech Poster Sessions.

Obviously, many parts of the human body are complex and hard to mimic; for example, consider that we still are not able to 3D print human organs. We may be getting closer, but it will be the holy grail of bioprinting when it happens. Just trying to make something like microvascular ‘components’ is a substantial undertaking, and the researchers explain this because of the difficulty in translating the cross sections, smaller diameters, and network architectures that are intricate.

Free-standing structure of carbohydrate glass inside a printed casting frame mimicking the vascular architecture. Insert: Perfused network with dye solution after dissolving carbohydrate glass cast in PDMS. Scale bar 500 µm.

3D printing with carbohydrate glass is one viable option that has been suggested by researchers, but the Eindhoven scientists want to use multiple types of materials in fabrication, along with making the parts smaller:

“Our main focus was to reduce the diameter to a size closer to the microvasculature, namely in the 10-500 μm range and be able to engineer hierarchical 3-dimensional branching networks that can change diameter along the vessel.”

The team set up a 3D printer with a heated barrel connected to a Nordson EFD performus III pressure control system. Standard nozzles were applied with a .4 mm diameter, and the researchers were able to adapt the diameter limits through limiting or speeding up the movement. In using self-supporting carbohydrate glass as the material of choice, there is greater latitude in printing complex geometries. As in so many 3D printing research projects, temperature is a significant consideration—and is often an obstacle when it cannot be manipulated properly, resulting in deformation of parts.

Carbohydrate fibers strung from droplets horizontally across a
printed frame with a speed of 600 mm/min. Insert: Microscopic image of 3 fibers, top and bottom strung left to right and middle right to left at 600 mm/min. Fibre diameter ~100 µm

The researchers state that a great portion of their work in 3D printing microvasculature will be centered around controlling the thermal elements in fabrication.

“This will offer even greater freedom in network design, and it will give the possibility to exactly control reflow of fibers to form a single in-plane junction,” conclude the researchers. “In the end, the printed models will be used to investigate the flow of blood and particles inside the blood through a microvascular network, leading to a better understanding of perfusion and particle distribution/interaction in the microvasculature.

What do you think of this news? Let us know your thoughts! Join the discussion of this and other 3D printing topics at 3DPrintBoard.com.

Boxplot of diameter for different movement speeds of the stage. Increasing speed reduces variance and average diameter of the fiber insert: The high variance of the diameter at 300 mm/min can be explained by the strong tapered shape of the fibers, resulting in a different diameter at the start and end of the fiber. This is probably caused by solidification of the droplet at the nozzle tip leaving less material to string from.

Carbon Releases the L1 3D Printer

Carbon has been making progress rolling out its 3D printers worldwide. The company has new directors, expanded its partnership with Ford and boldly reduced the prices on its resins. The company now takes a new step with the release of its L1 3D printer. The L1 has ten times the build volume of the M1 printer and five times the build volume of an M2 and is meant to be a manufacturing device. Interestingly the company says that “Products need to be validated by Carbon in the design phase in order to be printed on an L1 to ensure quality.” For certain industries not being able to validate their own designs could be a limitation. We reached out to the company for comment and they responded to tell us that,

“Validation is comprehensive and addresses all parts going into production. For adidas, that means different sizes and left and right models of the same shoe. For Riddell, every helmet is custom designed, so a broad array of designs are validated. For other applications, validation of one part could be sufficient to validate a closely related family of parts. Validation is an integral part of designing each Carbon Solution and is included in pricing the solution.”

Carbon’s power washing tools and the integrated software that comes with the system can be used in conjunction. Carbon’s materials will also be available. The solution comes replete with QA tools and monitoring to assure that you can control your production. Carbon’s products are developed in lockstep with each other and this level of tight integration means a tightly controlled ecosystem and should entail better ease of use. Carbon has always done this kind of thing in a very Apple-like way. This does mean that firms can go from a standstill to volume quickly but once we start targeting hundreds of thousands of parts wouldn’t companies want more control and more ability to use their own materials, settings, and procedures?

The company reports that:

“adidas and Carbon partnered to design and manufacture the adidas 4D midsole, and the L1 printer was one of the key innovations that made this possible. Together, we produced 100,000 pairs of the 4D midsoles in 2018. Our plan is to further scale the production of 4D shoes to millions in the coming years.”

If they pull off making millions of shoes then this indeed would be quite the coup for the technology. Only a few years ago I was very skeptical of Carbon being able to make 100,000 midsoles. I appear to stand corrected on that front, and with regards to Carbon apparently having made 100,000 midsoles for shoes that people are wearing today I congratulate them. I still am skeptical of Carbon being able to make shoe soles and midsoles that work in the real world, however. One firm that may make me partially more positive on this is Riddell. The American Football gear group is turning to Carbon to make helmet liners.

“Riddell and Carbon have partnered to be the first to bring customized, digitally printed helmet liners to market. Riddell’s SpeedFlex Precision Diamond is the first football helmet to have a digitally manufactured football helmet liner.”

The SpeedFlex Precision line is customized precision fit football helmet and indeed liners would seem to be a more doable application for the technology. It is precisely this kind of a combination of using 3D printing to develop mass customized higher functionality products that will deliver a lot of value for 3D printing in the future. Riddell itself has been working on custom made football helmets for a number of years now. By making a conventionally manufactured helmet and custom liners the company has a separation of concern which means that the process will not be costly and be relatively straightforward to implement. This paradigm is an excellent way of thinking about enabling mass customization for consumer goods.

The seven custom 3D printed pads that make up the liner.

Carbon definitely seems to be making progress in delivering increased yield and throughput to customers. On the business development side, the company also seems to have laser-like focus in finding those clients on the cusp of significant mass customization initiatives and partnering with them. What do you think? Is my caution unwarranted and should I be more optimistic?

Copymaster3D Unveils First Lineup of 3D Printers

Copymaster 3D is the latest new brand to venture into the world of 3D printing. The price and extensive list of features that the three new models offer, suggest that Copymaster is a name to keep an eye out for. Due to launch worldwide on the 27th August, the Copymaster 3D looks to be a compelling alternative to the likes of Creality and Wanhao in the budget-mid range sector. So what does Copymaster 3D do that makes it a great option?

High Performance & Affordable

When you are looking to buy a cheaper 3D printer, normally you have to sacrifice high performance for affordability and vice versa. The Copymaster 3D claims to be no compromise.

The Copymaster 3D is available in 3 models:

  • Copymaster 300 – (300 x 300 x 400mm) – £499 ($637)
  • Copymaster 400 – (400 x 400 x 400mm) – £599 ($764)
  • Copymaster 500 – (500 x 500 x 500mm) – £699 ($892)

The model numbers are relative to the build size of the printer, with the 500 having the largest build volume of the three. Having a bigger build size to play with immediately increases the scope of the things that you can print. Reducing that limitation makes the Copymaster so much more accessible to those who just want to print what they want.

Print Flexible As Standard

The Copymaster 3D is compatible with a wide range of different filaments as standard. The direct drive integrated extruder head can print with flexible filament straight out of the box with no additional modifications or upgrades needed.

The extruder head has also been created to be incredibly precise. Copymaster claims to have a print accuracy that is within 50 microns – thinner than a single human hair – so finished prints should be very accurate to the design files that are used.

Intricate UK Design

When you see a Copymaster 3D printer first hand, you clearly notice the thoughtful details and the nice touches throughout the design. Copymaster was designed by a small team of people who love 3D printers and actually use them on a day to day basis, at home and at work, so they knew how to make the Copymaster 3D stand out.

The Copymaster 3D is an open design, all in one unit made from industrial grade aluminum. This makes it very strong and stable when printing, which attributes to the excellent print accuracy. It is simple to assemble and only takes about 20 minutes so it’s not as daunting for beginners.

The Copymaster 3D also comes with a magnetic and flexible heated print bed as standard. It is very easy to use and has been specifically designed to take the hassle out of print removal so you can expect more consistent results for a variety of different filaments. A diamond black glass print surface upgrade is also available.

Another great feature of the Copymaster is the no-filament sensor. Running your printer for several hours only for the print to fail because you ran out of filament is probably one of the biggest frustrations you can ever experience in 3D printing. But the no-filament sensor will rescue countless 3D print jobs as it automatically pauses the printer if it detects that the filament has run out. This allows you to swap out the filament and it automatically resumes printing as normal. You’ve still lost a little bit of time, but at least you haven’t ruined your print.

“Making 3D Printing Easier and More Accessible”

The founder of Copymaster 3D and CEO of Technology Outlet, the UK’s leading online retailer for 3D printers, Tim Gray, gave a brief explanation of why he wanted to create the Copymaster 3D:

“Ultimately, I wanted to make 3D printing easier and more accessible for more people. I wanted to let people experiment with a range of different filaments without running into incompatibility issues with their printer or finding out that the print size of their printer isn’t big enough to make the project they want. After working at Technology Outlet for several years, I have seen a lot of demand and have been regularly asked for an affordable printer that offers this functionality. So I thought I’d make the solution. I’m really happy with how the Copymaster turned out.”

Copymaster 3D printers will start shipping worldwide from the 27th August and all preorders will get any two filaments for free. Also, as a celebration for the launch, Copymaster 3D is selling its first 50 pre-orders with a 20% discount, which means you could get one for as low as £399!

To find out more details and preorder a Copymaster 3D printer, visit Copymaster3D.