Making Injection Molding Cost-Effective: How Many Units Do You Need to Order?

Injection molding is typically described as a cost-effective manufacturing process… when ordering large quantities of parts.

The reason for this is simple: with injection molding, the initial tooling costs are very high, while the actual plastic molding costs are very low, which means the effective cost-per-unit becomes lower when more units are required.

For example, imagine that a stainless steel mold for a toy car costs $5,000, and each plastic toy car made with the mold costs $0.50. In this scenario, ordering 1x unit of the toy car would cost $5,000.50, ordering 2x units would cost $5,001, and ordering 1,000x units would cost $5,500.

In all of the scenarios, the mold accounts for the bulk of the cost, so the total cost does not vary greatly.

However, in these three scenarios, the effective cost-per-unit does vary greatly:

Scenario in which mold costs $5,000 and each molded part costs $0.50
Units Total cost ($) Cost-per-unit ($)
1 5,000.50 5,000.50
2 5,001.00 2,500.50
1,000 5,500.00 5.50


As you can see, there is a dramatic reduction in cost-per-unit when the unit quantity increases, since the extra units amortize the high cost of the mold.

Ordering more units of the toy car clearly represents better value for money. (In fact, ordering a single unit would appear to be a colossal waste of money.)

But just how “large” do we mean when we say that injection molding is suited to large quantities of parts? 100? 1,000? 10,000? A million? As a company deciding between multiple manufacturing processes for a medium-size order of prototypes or end-use parts, we want to know at what point injection molding becomes more cost-effective than the alternatives such as 3D printing.

And while there is no simple formula for determining the point at which injection molding becomes more cost-effective than 3D printing, there are certain factors we can take into account that will help us make the right decision.

3ERP, an expert in injection molding and other on-demand manufacturing services, here provides advice on choosing between injection molding 3D printing based on the required order size.

Injection molding vs 3D printing: First considerations

For companies looking to complete prototyping or production of plastic parts, both injection and 3D printing may seem like tempting options, and it may seem hard to weigh up the respective benefits of each.

However, before getting into any precise calculations, it’s worth pointing out some situations where one manufacturing process is clearly preferable to the other.

Let’s start with a scenario in which a company needs a very small number of prototypes (perhaps just one), and the material and aesthetic properties of the prototype(s) are of negligible importance. Perhaps the in-house R&D team simply wants to see, very loosely, how a yellow plastic casing looks on its new electronic device.

In such a scenario, 3D printing would be the obviously preferable choice: it would be significantly cheaper, and any technical deficiencies in the prototype would not matter.

Alternatively, imagine a scenario in which just a handful of prototypes (perhaps just one) are needed, but the company is looking to pitch its product to an investor, who needs to be convinced that the end-use part (to be made with injection molding during mass production) will function properly for its intended purpose.

In such a scenario, while 3D printing the prototype may be cheaper, it might still be worthwhile for the company to create an injection molded prototype in order to demonstrate the viability of its end-use product.

Key economic differences between injection molding & 3D printing

It is difficult to compare the costs of injection molding and 3D printing because the processes are fundamentally different — not just in terms of how they work, but in how their respective costs are determined.

In general terms, injection molding is a process with high startup costs: metal molds are expensive to make, and that preliminary step can be an insurmountable hurdle for some small businesses. However, once a mold has been fabricated, the cost of each injected “shot” of plastic is very low.

3D printing is different because, unlike injection molding, it is a one-step process. No tooling is needed, and the finished part comes straight out of the printer. This means there are no obstructive startup costs.

That being said, the cost of a single plastic 3D printed part is generally higher than a shot of injected plastic. This is because 3D printing filament (for FDM printers) is more expensive than plastic pellets, and because the sheer slowness of 3D printers means that service providers must charge more for their operation.

With that in mind, the most importance difference between the two processes is that the cost-per-unit of injection molding is dynamic: it decreases as the number of units increases. With 3D printing, on the other hand, the cost-per-unit is static: parts will usually cost the same amount whether you order one or 1,000 of them.

This means that 3D printing in small quantities is cheaper than injection molding, while injection molding in large quantities is cheaper than 3D printing. That also means, logically, that there is some specific quantity at which the “best value” option switches from 3D printing to injection molding.

Finding that quantity depends on several factors.

How many parts to be cost-effective: Factors to consider

The mold

When evaluating the potential costs of injection molding and 3D printing, it is worth starting with potentially the most expensive part of the project: the mold.

Molds can cost thousands of dollars, since they are machined from metal and need to last a long time — potentially hundreds of thousands of plastic shots. However, it is possible to drastically reduce the cost of molds through rapid tooling, the creation of prototype-grade molds with CNC machines or metal 3D printers.

The cost of molds can also be reduced by using aluminum instead of steel. Aluminum is less durable than tool steel, but is still capable of producing high-quality molded parts from non-corrosive materials.

If the cost of the mold can be reduced, the number of molded parts required to be cost-effective decreases.

As an example, imagine that a steel mold for a toy car costs $5,000, that an aluminum mold costs $1,000, and that the cost per plastic shot with either mold is $0.50. Imagine, also, that a 3D printed version of the toy car costs $20.

In this example, the potential costs of the project would be as follows:

Steel mold IM Aluminum mold IM 3D printing
Units Total cost ($) Cost-per-unit ($) Total cost ($) Cost-per-unit ($) Total cost ($) Cost-per-unit ($)
1 5,000.50 5,000.50 1,000.50 1,000.50 20 20
2 5,001.00 2,500.50 1,001 500.50 40 20
50 5,025.00 100.50 1,025 20.50 1,000 20
60 5,030.00 83.83 1,030 17.17 1,200 20
300 5,150.00 17.17 1,150 3.83 6,000 20


In this scenario, a 50-unit order is cheaper with 3D printing, but a 60-unit order is cheaper using injection molding with an aluminum mold. (Meanwhile, the more expensive steel mold becomes more cost-effective than 3D printing just above the 250-unit mark.)

Plastics

Another consideration that will affect the calculation is the plastic used to make the part, and there are several variables to consider here.

One factor to consider is that not all 3D printable plastics are moldable, and vice versa. Another is that 3D printing filament is by and large, more expensive than the plastic pellets used for injection molding, since it must be precisely shaped by the material manufacturer.

Importantly, the cost of plastics may not be consistent between pellet and filament formats: materials like Nylon and Polycarbonate, for example, remain relatively premium products in the 3D printing filament market, so a relatively small number of Nylon parts would be required to make injection molding more cost-effective than 3D printing. (A common 3D printing material like ABS, however, would require a much larger number.)

The type of plastic used to make the parts may therefore determine which manufacturing process is more economical for a given order volume.

Part shape and size

The design of the part may also affect its potential cost for injection molding and 3D printing. A part with overhangs, for example, may be significantly cheaper to 3D print, since injection molded parts with overhangs require more complex tooling.

In other words, if your part design is not suited to injection molding, you’ll probably need to order more parts to make injection molding cost-effective.

Manufacturing process

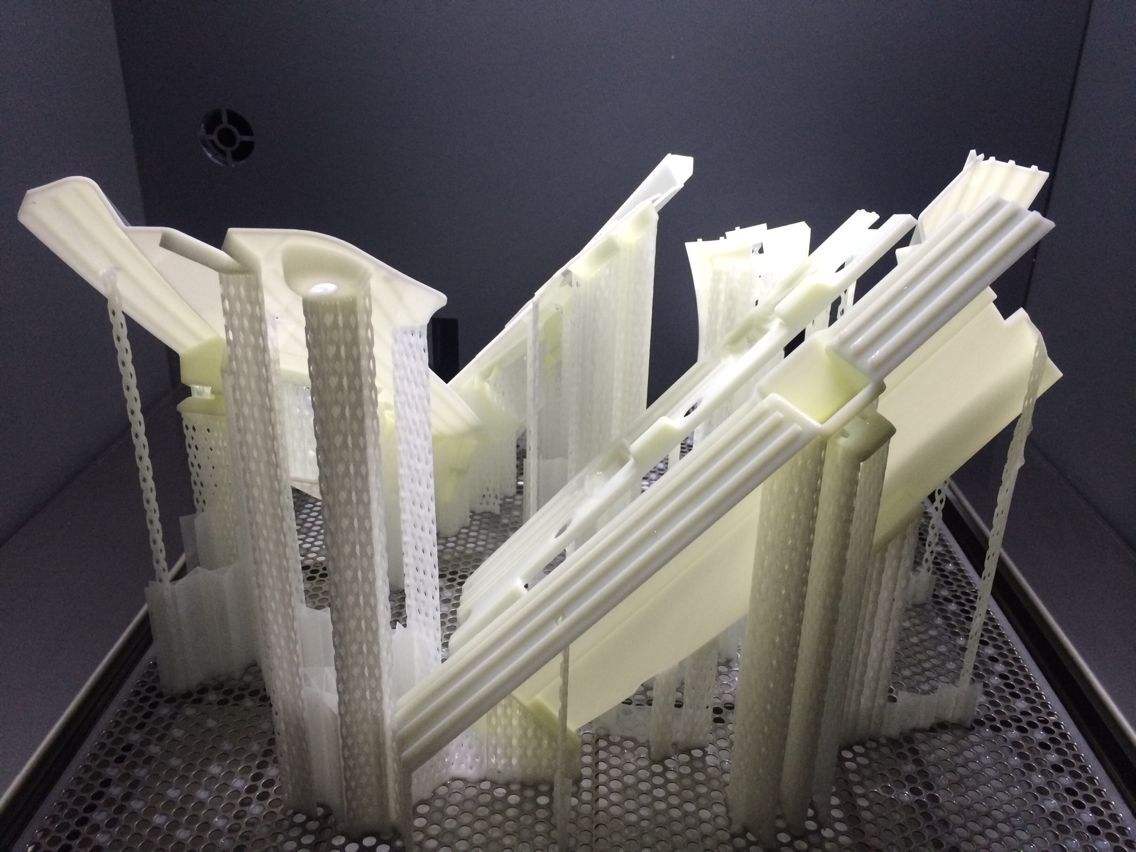
FDM remains the most common 3D printing process, but alternative options include Stereolithography and Selective Laser Sintering. These other processes are more expensive than FDM, which naturally affects their affordability in comparison with injection molding.

For example, 200 FDM parts may be cheaper than 200 equivalent injection molded parts, but 200 SLS parts may be more expensive than 200 injection molded parts.

Conclusion

Since the cost-per-unit of plastic parts is dynamic for injection molding and static for 3D printing, it can be difficult to assess which option is the best value for money for a given order.

Numerous factors, including mold creation, part material and part shape can affect the cost of the order — and to different degrees depending on the manufacturing process.

With that in mind, the best solution to the dilemma may be simply requesting a quote for both processes.

3ERP has expertise in both injection molding and 3D printing, and can assess projects on a case-by-case basis to see which represents the best value for money.

Get in touch and we’ll get your project up and running.

The post Making Injection Molding Cost-Effective: How Many Units Do You Need to Order? appeared first on 3DPrint.com | The Voice of 3D Printing / Additive Manufacturing.

SLA Parts Are Cheaper than You Think

Stereolithography, widely known as “SLA,” is one of the most exciting forms of 3D printing technology on the market. It’s precise, it can produce smooth and detailed parts, and it can even be used to make parts indirectly via patterns for casting and injection molding.

Much more than an obscure cousin to FDM, Stereolithography is a practical, versatile process for a wide range of applications.

So why isn’t SLA as widely used as FDM? In a word: cost. Though companies like Formlabs have driven down the cost of desktop Stereolithography 3D printers for the mass market, resin printing machines are generally far more expensive than their polymer-extruding counterparts. So unless your parts and prototypes demand the use of SLA, it is often more economical to go with FDM. Besides, the range of FDM 3D printers out there is far greater than the range of SLA machines.

But what if you’re not investing in a 3D printer at all? What if you simply have a project that requires one, five or 500 SLA-printed parts? What if you could get somebody else — an expert in additive manufacturing — to invest in and operate the machinery for you?

SLA parts may be less common than FDM parts, but the cost-prohibitive nature of SLA printers does not make SLA parts cost-prohibitive. In fact, with an on-demand manufacturing partner like 3ERP, ordering resin parts and prototypes can be comparable in price to ordering FDM parts.

What Is Stereolithography?

Stereolithography is an additive manufacturing process in which a light-emitting device — usually a laser — is used to solidify a photosensitive resin in a layer-by-layer fashion. This unique approach offers numerous advantages over other 3D printing methods.

Most SLA machines use an ultraviolet laser, which, like the nozzle of an FDM printer, is controlled by computer instructions. Following those instructions, the laser “draws” a 2D shape onto the photosensitive resin, which is stored in a vat in the lower section of the printer. When the 2D shape has been drawn onto the resin (either on its surface or at the bottom of the vat), that thin section of resin solidifies. A build platform then moves the solidified layer up or down, allowing the laser to draw the next “layer” of the part onto the resin. When every layer has been created, the end result is a fully 3D printed object.

Having been invented in the 1980s by 3D Systems founder Chuck Hull, Stereolithography is actually one of the oldest additive manufacturing technologies around — despite being less widely used than several other processes.

Why Is Stereolithography So Desirable?

There are several reasons why SLA 3D printers may be preferred to FDM 3D printers.

Some of the advantages of Stereolithography include:

  • Accuracy and precision
  • Typical layer heights of 25-100 microns
  • Extremely detailed features
  • Strong adhesion between layers
  • Isotropy (parts strong in all directions)
  • Watertightness

SLA parts can be made with detailed features and a smooth surface finish, and they sidestep some of the more common issues associated with FDM 3D printing, such as visible layer lines and anisotropy (weakness along certain axes because of gaps between layers).

3D printed parts made with Stereolithography can also be useful for specific functions such as maintaining air flow or water flow, since they are highly watertight. And SLA can even be used to create master patterns for casting and molding process, which makes the technology popular in fields as diverse as dentistry and jewelry making.

Affordable SLA Parts with 3ERP

Ordering Stereolithography parts is more affordable than you think. That’s because 3ERP, an established manufacturing company with a fleet of manufacturing machines and experienced engineers, does not need to subsidize the cost of its SLA 3D printers by charging high prices to customers.

When you order SLA 3D printed parts from 3ERP, you pay for the resin, the labor and not much else. That means your resin parts and prototypes can be comparable in price to simple FDM parts.

Above all, ordering parts through 3ERP is a risk-free way of incorporating SLA into your production cycle. Since even a consumer-level machine may cost around $5,000 to purchase, and since engineers need to be trained to get the most out of a complex 3D printer, it may be more financially viable to use a third-party manufacturer to carry out production or prototyping of SLA parts.

With 3ERP, you even have several resin options at your fingertips. 3ERP can make SLA parts from Resins 8119, 8118H, 8228 and 8228, giving you the options of nylon-like parts, ABS-like parts and even parts that are resistant to temperatures up to 120°C.

Request a free quote from 3ERP to see for yourself how SLA parts are cheaper than you think. Asides from Additive manufacturing, 3ERP also offers:

CNC Machining Parts

Urethane Casting

Rapid Tooling

Injection Molding

Rapid Metal Casting

Sheet Metal

Low Volume Extrusion

The post SLA Parts Are Cheaper than You Think appeared first on 3DPrint.com | The Voice of 3D Printing / Additive Manufacturing.

5 Professional Finishing Options for FDM parts

Despite the advances of other technologies, Fused Deposition Modeling (FDM) remains the go-to 3D printing process for prototypes and simple plastic parts. It’s fast, it’s cheap, and there are thousands of filament options to account for projects of all kinds. When people talk about 3D printing, they’re often talking about FDM.

But there are limitations to extrusion-based printing technologies. While FDM is a highly effective and versatile process, it has often lagged behind comparable technologies — Stereolithography, SLS, etc. — in terms of surface finish. Layer lines can be severe, and FDM parts aren’t always usable when taken straight from the print bed.

Fortunately, FDM parts don’t have to remain in their as-printed form. There are several professional post-processing techniques that can be used to remove layer lines, improve the overall surface finish of a part, or even add color and other aesthetic features.

3ERP, a global rapid prototyping company that specializes in on-demand 3D printed parts, recommends the following five finishing options, all of which can turn ordinary FDM parts into high-quality components.

Sanding

It might not sound complicated, but sanding is one of the most important techniques for achieving a professional finish on FDM printed parts.

Using textured sandpaper, it is possible to smooth the surface of a part in a way that clears imperfections (such as support marks) and removes visible layer lines. It is a manual process, however, which means care must be taken to apply the sandpaper evenly across the part.

Sanding 3D printed parts generally involves using sandpapers of varying grit levels. This means starting with a coarse sandpaper (100 grit or higher) that will remove large bumps and blemishes and gradually moving up to a very fine sandpaper (up to 5,000) to achieve a polished finish.

Although sanding is difficult when dealing with finer details or thin walls, it is highly effective for improving part smoothness and is a great way to prepare parts for coating or painting.

Bead blasting

While sanding is widely used for improving the smoothness of FDM parts, the process of bead blasting may offer a more comprehensive solution, especially for complex parts with hard-to-reach areas.

The bead blasting process involves firing an abrasive substance at the plastic part in a controlled manner, rather than rubbing it manually with sandpaper. It is much faster than sanding, and is also adjustable in terms of pressure and bead hardness.

The abrasive substance is blasted at the FDM part with a motion similar to spray painting, allowing for an even coating across the part.

Polishing

Polishing is an important finishing procedure for aesthetic parts, and follows naturally from sanding: once a part has been sanded with a very fine grit, it is ready for polishing if necessary.

While sanding is used to improve the smoothness of an FDM part, polishing takes things further by giving the plastic a shiny or mirror-like appearance. This may be necessary for aesthetic parts such as models, or for functional parts that require minimal friction.

During the polishing process, a cloth or buffing wheel is used to consistently apply polish to the surface of the part, giving the plastic a durable shine. Although it can take some time, the polishing process effectively transforms FDM parts, giving them the appearance of injection molded components.

Painting

There is a huge variety of materials available for FDM 3D printing, from standard PLA and ABS to more specialist engineering composites designed for functional applications. Many of these materials are available in a range of colors.

Nonetheless, FDM parts often require a coat of paint after the 3D printing stage. This might be because the filament is unavailable in a specific shade, or because a part requires different colors in different sections.

At 3ERP, we offer a variety of painting options, including matte, satin, high-gloss, textured and soft-touch coatings. Shades can be color-matched for branding purposes, while priming (before) and polishing (after) is also provided.

Painting should be considered for any parts used in consumer products, with the only potential pitfall being a slight adjustment to dimensions. (Mechanical parts with exceptionally high tolerances may be better left unpainted.)

Metal coating

A dramatic rise in metal additive manufacturing technologies has made 3D printed metal parts more accessible to companies of all sizes. However, thin metal coatings can also be added to plastic parts made with FDM — a cheaper option when a metallic appearance is the main requirement.

There are several options for adding a metal coating to FDM parts, many of which are difficult or impossible to achieve without professional equipment. These include metallization, chroming and zinc plating, all of which can radically transform the appearance of a printed part.

Electroplating options use a vat of plating solution and an electric current add the metal surface layer, producing a professional-grade metallic surface finish in a very short space of time.

Contact 3ERP to find out how your 3D printed FDM parts can be improved with post-processing treatments.

The post 5 Professional Finishing Options for FDM parts appeared first on 3DPrint.com | The Voice of 3D Printing / Additive Manufacturing.

Reducing the cost of 3D printed prototypes with 3ERP

3D printing has given businesses the ability to create prototypes quickly and at a low price. Using a 3D printer, it is now simpler than ever to turn a digital 3D design into a physical object: desktop 3D printers are affordable and relatively easy to operate, while online 3D printing services allow non-experts to have their prototypes printed by those with a more in-depth knowledge of the process.

But while 3D printing is often cheaper than traditional manufacturing processes, it can still represent a significant investment. For young businesses in particular — those looking to develop their first products — forking out on a 3D printed prototype can eat up a large chunk of budget.

Fortunately, help is at hand. By observing a few simple rules regarding materials, design features and different 3D printing processes, the cost of 3D printed prototypes can be reduced without sacrificing quality. Prototyping specialist 3ERP knows how to deliver professional-quality 3D printed prototypes on a budget, and is here to offer advice for prototyping on a budget.

Why 3D printing can be cheaper than the alternatives

While there are particular ways to reduce the cost of a 3D printed prototype, it is important to know why 3D printing or additive manufacturing is, in general, an affordable means of creating prototypes.

One of the fundamental advantages of 3D printing is its economy with material. Where other processes like CNC machining and injection molding require excess material — CNC machines turn part of the workpiece into waste metal chips; injection molding requires the creation of a mold — 3D printing uses only the amount of material needed for the object itself. A small amount of material may be sanded or cut away during post-processing, but 3D printing generally uses the bare minimum of raw material.

3D printing can also help to save money over the entire product development process. Since no tooling is required, businesses can modify their digital design to create radically new iterations of a prototype at no extra cost. By contrast, amending an injection molded prototype would require the creation of a new mold — at a much greater cost than a single 3D printed prototype.

Ways to reduce the cost of 3D printed prototypes

Material selection

The simplest way to reduce the cost of a 3D printed prototype is to select a low-cost material for the project. This needn’t have an adverse effect on the outcome: if the prototype will only be used for display purposes, affordable materials like PLA or ABS are perfectly capable of producing a quality-looking prototype that can later be developed into something more robust.

Of course, material selection is directly linked to the type of 3D printing process that will be used. The most common 3D printing process, Fused Deposition Modeling (FDM), allows for the cheapest materials, such as PLA. More expensive processes like Stereolithography (SLA) are not compatible with materials like PLA, but have their own range of low-end materials. Prototyping with a standard SLA resin, for example, will be cheaper than prototyping with a durable or rubber-like resin.

Remember that prototypes do not necessarily need to be made from the same material as the finished part. For example, a carbon-reinforced nylon automotive part could be prototyped using a standard nylon for display purposes; the carbon version would only need to be made at the testing or pre-production stage.

Design considerations

Hollowing out

A huge advantage of 3D printing is its ability to create objects with hollow or partially hollow interiors. Since a 3D printed part is built up layer by layer and not simply flooded with a liquid material, businesses can use the technology to create hollow or near-hollow 3D printed prototypes.

Creating a hollow 3D printed part can entail designing the prototype in such a way using CAD software. Alternatively, most FDM 3D printer software has an Infill setting, allowing the user to modify the density (and effective material usage) of a 3D printed part. Using less material by hollowing out the inside of a part naturally reduces material costs.

Supports

Complex 3D printed parts — those with features that jut out, for example — often require support structures: sections of material that are printed solely to act as scaffolding, used to prevent the main structure of the part from collapsing during the printing process. These support structures are often necessary, but careful consideration of the design makes it possible to reduce their number.

While compromising on a design is not ideal, it can be beneficial to think of the 3D design in terms of how it will be printed. If overhanging features are not entirely necessary, or if their angles can be adjusted to reduce the size or number of supports, the material usage and eventual cost of the print job can be reduced.

Scaling down

A seemingly obvious (but often forgotten) way to reduce the cost of a 3D printed prototype is to simply scale it down. Non-functional prototypes can often be created in scaled-down form if the smaller version is still able to demonstrate the appearance and function of the product.

By scaling down a 3D printed prototype, money can be saved by reducing the total material usage and cutting down the operation time of the printer.

Finishing

3D printed parts can be post-processed in various ways, from a rough sanding of the printed part to more complex processes such as coloring, epoxy coating and metal plating. In general, simpler finishing options will be cheaper to accomplish, resulting in a lower total cost.

Working with a budget-conscious prototyping service

For companies looking to create a 3D printed prototype via a third-party service, it is beneficial to select a partner with expertise in additive manufacturing and one that knows how to keep costs to a minimum.

Prototyping specialist 3ERP is one such company. Not only does the prototyping service provider offer a range of services including 3D printing, CNC machining, injection molding and vacuum casting, it also has experience working with a wide variety of clients, from internationally recognized companies like BMW, Lamborghini and Thyssenkrupp to young startups creating their very first prototype.

Because of this experience at both ends of the spectrum, 3ERP knows how to deal with companies working on a budget. Its staff are happy to work with a client to decide on material, design and process options, finding a solution that is both practical and cost-effective.

Contact 3ERP to discuss the possibilities of 3D printed prototypes.


Why young businesses need prototypes

Prototyping is an important process for businesses that make things. Without prototypes, many parts, products and machinery would be difficult to make, difficult to test and may not work as they are supposed to. Prototyping is the all-important midway point between concept and manufacturing, used to ensure that a designer’s vision can, in fact, be turned into reality.

Although prototypes are used by companies of all shapes and sizes, they represent a particularly important part of the development process for young businesses. For young businesses, a successful prototype can be the difference between success and failure.

3ERP, an international prototyping specialist based in Guangdong Province, China, has created countless prototypes for young businesses, and can provide a high-level prototyping service whatever the need.

What is a prototype?

A prototype is, in short, a preliminary version of a thing. It is more than a concept but less than a finished product. It is an early-stage iteration of something that fulfills some purpose, but that isn’t intended to be sold in shops or be permanently utilized for its end purpose.

A prototype electronic device, for example, might contain most of the features of the finished product, but be missing certain aesthetic touches or complex features. A prototype engine may be made from a cheaper metal than the metal chosen for the racetrack-ready vehicle. It may not even need to work.

In general, prototypes serve some kind of behind-the-scenes function. They allow the companies who make them to carry out physical refinements, testing, evaluation and marketing in a way that designs on a piece of paper would not.

What kinds of prototype are there?

Not all prototypes serve the same purpose, and it is very important to distinguish between the different kinds. Some prototypes are simply supposed to look like a finished product; others need to function as a finished product. Businesses decide which kind of prototype they need depending on their product and the stage of the development process they are at.

Looks-like prototype

A looks-like prototype is exactly what it sounds like. Rather than attempt to mimic the function of a product, a looks-like prototype is made simply to visually represent something. Looks-like prototypes therefore do not need to contain internal detailing or functionality, and need not be subject to the most costly manufacturing processes or materials.

While this kind of prototype can’t undergo physical or functional testing, it has other very important uses. For example, a looks-like prototype can be used for market research: businesses can present their looks-like prototype to potential customers, asking for feedback on the appearance of the product.

Functional prototype 

A functional prototype (or works-like prototype) is more than just a visual aid. Although such a prototype will differ to a finished product in various ways, it is designed to mimic the functional role of the product it represents. This means that if the product must, for example, bear a load or perform a motorized function, the functional prototype must be able to do those things to the same degree as the finished product.

By creating a functional prototype, businesses can achieve several things. For one, they can carry out extensive testing on the prototype to ascertain whether their product will be fit for use. This also means the engineers can experiment with functional modifications on the prototype, adapting the product as testing reveals new facts about it.

A functional prototype does not always need to be aesthetically pleasing. However, some businesses will choose to make a hybrid prototype that combines the aesthetic features of a looks-like prototype with the functional aspects of a functional prototype.

Pre-production prototype

While looks-like and functional prototypes tend to be made relatively early in the development process, pre-production prototypes tend to be made — as the name suggests — when the product is nearing completion.

Prototypes of this sort are usually created to test for any further problems that may arise during production. Because of this, pre-production prototypes are usually made using the same materials and manufacturing processes that will be used during production.

A pre-production prototype can also be used to acquire the necessary certifications for the manufactured product.

Why are prototypes important for young businesses?

Prototypes are particularly important for young businesses. Although established companies must also create prototypes for their parts and products, there is perhaps greater pressure on new companies to make preliminary versions of their creations before jumping off the deep end.

To see why prototypes are so valuable for startups and young companies, let’s first look at the advantages of looks-like prototypes and why they are particularly important for businesses in their infancy.

For startups, one of the most important routes to success — more important than simply having good ideas — is raising money. Without financial backing, it can be virtually impossible to introduce a product to the market. To acquire financial backing, startups must present their product to potential investors, venture capitalists, angels and other such figures. They must be persuasive, they must demonstrate the value of their product and they must be able to seal a deal.

But startups can expect far better results from these encounters if they can physically demonstrate their product. A looks-like prototype can be infinitely more effective than a slide show or lecture, since it allows the potential investor to hold the ‘product’ in their hands.

That’s not to say that young businesses should forego functional prototypes. Although all businesses need to ensure that their products work properly, startups who are launching one of their first products arguably have more at stake: put out a device or machine that doesn’t do the job, and the company could ruin its reputation before it has a chance to make amends.

Functional prototypes are essential for ironing out any problems with a product long before it goes to market. The more thorough the prototype, the greater the chances of removing any lingering flaws.

How can 3ERP help?

With expertise in a range of prototyping services, 3ERP is able to create all kinds of prototypes for young businesses. Its professional finishing services are perfect for looks-like prototypes, while its diverse arsenal of machinery allows for functional prototypes of all varieties.

More importantly, 3ERP understands the importance of communication, and will always strive to help inexperienced companies get the most out of their prototypes.

Not sure where to start? Get in touch with 3ERP and take the first step toward the perfect prototype.

Why Use Rapid Prototyping in Product Development?

3ERP not only does 3D Printing but also CNC turning and milling.

Rapid Prototyping at 3ERP. 3ERP is a 3D printing and rapid prototyping company based in China. 3ERP is a full-service bureau that not only does 3D prints for customers but also has CNC services, Vacuum casting and injection molding. This means that 3ERP can be your service partner from prototype to small series right through to production. By working with the same team throughout you don’t waste time trying to find a new partner at every stage of your product’s development. 3ERP can build up a relationship with you and understand your needs from one product to a hundred to thousands. 3ERP can scale with you as your needs scale as well.

A highly detailed 3D Printed Rapid Prototype.

Using 3D printing for prototypes is the bedrock of the 3D printing industry. Rapid prototyping was the first application on the technology. Widely used today rapid prototypes let you get from an idea to a physical representation of that idea quickly. CAD files are printed into a model. This 3D printed model can also be manually finished to a very high standard and painted to accurately represent your intended final part. For many organizations, rapid prototyping is an essential part of their design process. Already ingrained for many years these companies are used to working with outsourced companies to provide them with timely prototypes. Other firms have never really tried the technology before. What are the advantages exactly of using rapid prototyping in your product development process?

Rapid Prototyping makes ideas visible and discussions concrete. Companies can save a lot of time because everyone can now see and discuss the next product. A very abstract idea that may be confusing to people becomes much more clear when it can be seen by all simultaneously.

Rapid Prototyping ads a tactile element to meetings. Furthermore, a future product can be truly experienced through holding it. By touching and passing around a product a better memory and a deeper understanding is formed. This is especially valuable when pitching products at external or internal meetings.

Sheet metal prototypes can also be made by 3ERP.

Rapid Prototyping can be used to test and validate ideas. Focus groups, co-workers, clients, and distributors can all be shown a rapid prototype. They can be asked how they feel towards the product and whether they like the design or experience of it.

Rapid Prototypes can be used to make marketing materials and photos. Many companies use rapid prototypes for the initial photography for brand campaigns, campaigns to distributors, internal literature and manuals. By having the photos months before the product is ready teams can concurrently work on speeding up the design process.

Rapid Prototyping reduces mistakes. Major blunders, mistakes, design errors and problems can be avoided by using rapid prototyping. A team can early on discover for example that their product will never work as anticipated. Something that very well may look OK on a screen could be hideous or completely oversized in real life. Designs can be iteratively improved through several stages of prototypes and discussions to get much more feedback on products. In this way, rapid prototypes let teams iron out and perfect parts before production.

If you are interested in learning about rapid prototyping services, contact 3ERP today.