
Predicting the future is impossible. But that doesn’t stop us at 3D Printing Industry from inviting CEOs, CTOs and other AM experts to give us 3D printing predictions for 2020. If you want to stay up to date with the latest 3D printing news, subscribe to our free 3D Printing Industry newsletter. You’ll be among […]
Interview with Dynamism and Desktop Metal on the Ultimaker S5 and DM Studio System
Dynamism has been a retailer of 3D printing technology for over two decades, and the company always does well at keeping up with the latest, most talked-about 3D printers. Currently, one of its featured products is the Ultimaker S5, which was released last year and designed for industrial 3D printing. Another is the Desktop Metal Studio System, released in 2017 and designed for metal 3D printing in an office setting. Both systems exemplify two of the largest trends in 3D printing, more sophisticated desktop systems and binder jetting metals. Dynamism itself is at a crossroads as well. We’ve been talking to resellers around the world these past weeks to figure out what the 3D printing market is like for resellers today. What is a reseller to do? Do they move towards industrial or wait for the consumer market to grow? Dynamism gives us some interesting insight that points to them not only becoming more of business-focused firm but also looking at being more of an integrator.
Both the Desktop Metal and Ultimaker 3D printers have made a big impact on the 3D printing industry since their respective releases, and Dynamism is excited about their futures as well as its own. Recently both were showcased at CES, which wrapped up last week. We were able to talk with Dynamism CEO Douglas Krone about the Ultimaker S5 and its role in manufacturing.
Do you believe that the S5 will be used for manufacturing? What is holding it back from manufacturing now?
“On this point, I’d to point out that both the Ultimaker 3 and S5 are already widely used in manufacturing globally, for producing tools, jigs and fixtures.
To talk about end parts, are early use cases of customers printing end parts used in low volume products like machines or robots—grippers on robotics is a prime example. In these cases companies have looked at their BOMs (Bill of Materials) and found non-critical parts, often replacing metal with advanced 3D printed plastic. This provides short terms savings, but an even larger long-term advantage: far more efficient spare part production, though the life cycle of the product, and beyond. (Even after products are discontinued, companies must maintain a spare parts inventory—usually for years.)
I think that’s where Ultimaker’s Open Material strategy is a big win. These machine/robot producers require specific materials from leading chemical companies (certification, procurement risks) not from 3DP producers themselves (with the resulting lock in). Having said this, Ultimaker is focused prototyping, tools, low volume production and spare parts made on location.”
Do you foresee people using Ultiwalls (clusters of desktop printers) to manufacture parts? Will you need to automate more things on the printer or Ultiwall? Such as part removal?
“The current S5, and what we expect to see next from Ultimaker (the next-generation of ‘concrete floor’ machines), can be deployed in wall-formations. (And Cura’s CuraConnect supports that use.) But space, health, and safety requirements differ so much per factory and country, it would not make sense for Ultimaker to do a standard ‘Ultiwall’ product. You can expect 3D printing solutions providers like Dynamism to create these types of customized arrangements for larger customers.”
What are instances of Ultimaker adoption in the automotive industry?
“We see almost every automotive company, not just OEMs, but also in second, third and fourth tier now using Ultimaker. Uses are part development, tool design, and tool production. Ford and Volkswagen have especially impressive showcases.”
Are there any product announcements or other news from the show?
“The next news we expect from Ultimaker will be later this year. Look for innovative accessories that will work with all existing Ultimaker S5s, and make a great 3D printer even better. And of course Ultimaker is always iterating and improving Cura.”
To learn more about Desktop Metal’s Studio System, we spoke with Desktop Metal VP of Product Larry Lyons.
How well is the Desktop Metal Studio System doing?
“As our office-friendly systems are making their way to customers throughout the country, we recently announced the launch Studio System+ and Studio Fleet which together offer enhanced features for metal prototyping and low volume production. Engineers and designers who are looking to push the limits of metal 3D printing with small parts or parts with fine details can now achieve even higher-resolution, with a customizable system configuration for greater process efficiency and throughput right on the shop floor. The new Studio System+ retains all the key features of the original Studio System with advancements that allow customers to build to scale and offer high-resolution printing. Studio Fleet adds a custom-configurable, in-house metal 3D printing solution to support a variety of production scenarios and scales for a wide range of low- to mid-volume applications across industries. For the first time, on-demand metal 3D printing will be able to deliver accessible and scalable manufacturing that adapts to diverse business needs, part requirements, production volumes and cost constraints. We have received hundreds of reservations for our Studio System and are now shipping in volume to our customers in the USA. The Studio System is available in 45 countries, and we expect to begin international shipments in mid-2019.”
How well (and how) does the system compensate for shrink in all directions in different part sizes?
“Shrinkage is dependent on a number of factors, including alloy used, geometry of the part and size. As part of the Desktop Metal design, printing and sintering process, our software analyzes all of the factors that impact the approximate 18-20 percent shrinkage and automatically adjusts scaling factors in each dimension to yield the intended part size.”
How much can one Desktop Metal Studio System make?
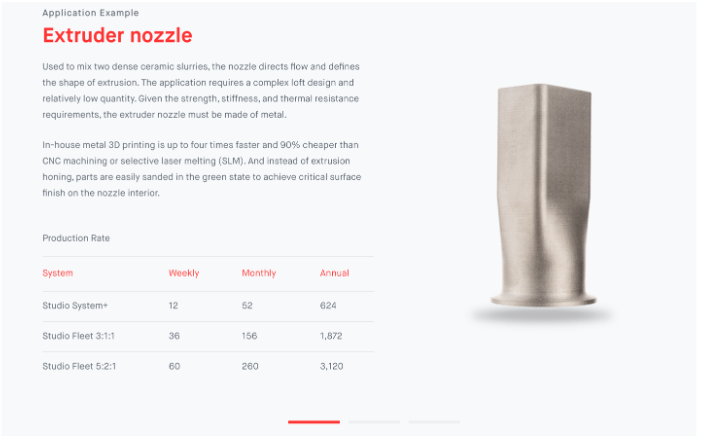
“With one Studio System printer, 12” x 8” x 8” is the maximum build volume, so any part that fits in that box can be printed. The Studio printer has a maximum print rate of 1 in 3/hr so the throughput of parts printed depends on the volume of the part you are printing. The debinder and furnace have the same build volume, but offer adjustable trays to batch process many parts at once, which is exemplified by our Studio Fleet offering.
For customers needing a higher throughput, Studio Fleet is a custom-configurable solution for in-house metal 3D printing—supporting a range of applications for low to mid-volume production. Built to scale, it leverages Studio System+ technology—including a software-controlled workflow and stackable shelving for batch processing—for the rapid production of high-quality, complex metal parts. For the first time, on-demand metal 3D printing will deliver accessible and scalable manufacturing that adapts to diverse business needs, part requirements, production volumes, and cost constraints. The Studio Fleet is available to be built in two configurations:
-
3:1:1 – With 3 printers + 1 debinder + 1 furnace, customers can realize a 300 percent improvement in throughput for only a 50 percent increase in system cost.
-
5:2:1 – With 5 printers + 2 debinders + 1 furnace, users will be able to realize 500 percent improvement in throughput for only a 100 percent increase in system cost.”
For automotive, what kinds of parts are your customers targeting?
“Our automotive customers are targeting parts across all stages of product life cycle. For Studio, most applications are in the product development, prototyping and tooling (jigs/fixtures/molds) areas where lower volumes and quick turnaround times match well with the Studio’s capabilities. For the Production System, which will be available to ship in 2019, early applications we are seeing are in the replacement / aftermarket parts, customization and serial production where volumes requirements range from mid-to-high throughput. Many customers are developing end-use parts that will appear in new cars that have yet to hit the market and will deliver higher performance at a lower cost than the traditional manufactured alternative in today’s cars.”
How much faster is it than MIM? How much cheaper is it than MIM?
“For the Studio System, the time it takes to produce the initial part is 2-3 days. This compares to several weeks or even months with MIM due to the mold that needs to be designed and manufactured before the MIM process can begin. This allows customers to dramatically accelerate the time it takes to get an initial prototype for testing and validation work compared to the traditional MIM process. It also allows customers to iterate on their design and test each iteration before ordering the mold to be manufactured, which can save thousands in costly mold changes if a change is needed.
Because of the expense associated with manufacturing the mold in MIM, most MIM companies will not bid on any job that is less than 10,000 units due to the mold cost making the parts too expensive. The Studio System provides a more cost-effective solution for low-to-mid volume applications in the MIM industry, especially when leveraging the throughput and cost advantages of a Studio Fleet installation.”
What kinds of part sizes can I reliably print with the Desktop Metal Studio?
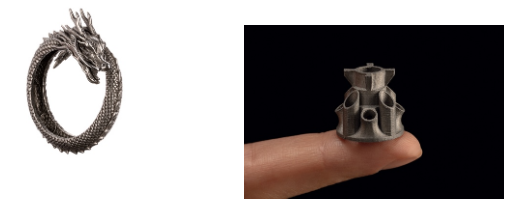
“With the Studio System printer, 12″ x 8” x 8” is the maximum build volume, so any part that fits in that box can be printed. In addition, we recently introduced a new swappable high resolution printhead with supporting software profiles allows for smaller parts with finer features and animproved surface finish. This creates opportunities for new geometries and applications with the ability to print parts similar to those produced with metal injection molding (MIM)—parts featuring sintered voxels as tiny as 240um in XY by 45um in Z, which is smaller than a grain of table salt—making it ideal for a variety of applications such as parts for consumer electronics, medical devices and automotive.”
Discuss this and other 3D printing topics at 3DPrintBoard.com or share your thoughts below.
Nexa3D’s Ultra-Fast NXE400 3D Printing System Making North American Debut at CES 2019
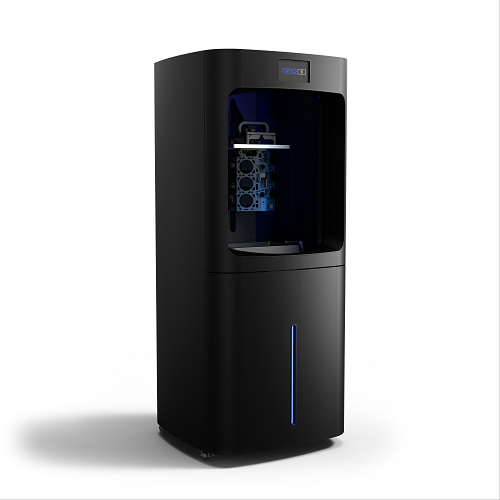 This week at CES 2019 in Las Vegas, production-grade stereolithography 3D printer manufacturer Nexa3D will be displaying its new NXE400 3D printer for the first time in North America. The NXE400 is impressive indeed, with reported print speeds of up to six times faster and 2.5 times the build volume of comparable hardware, making it the fastest large-format 3D printer in the industry.
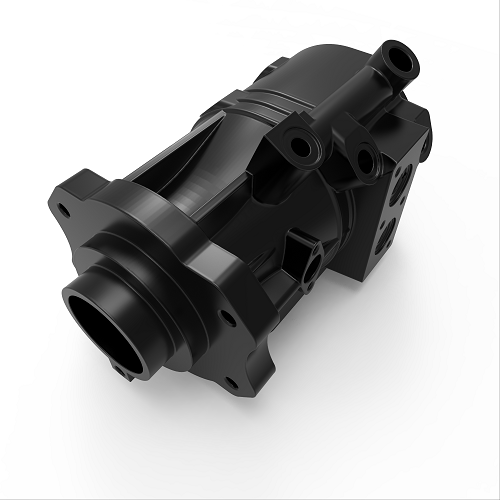
Water pump housing
Like the other 3D printers in the company’s newest line, the NXE400 leverages Nexa3D’s proprietary Lubricant Sublayer Photo-curing (LSPc) technology and patented structured light matrix, and can continuously print up to 16 liters of parts at high speeds of up to 1Z centimeter a minute. This lowers the production time for prototypes and other functional parts from hours to just minutes, at injection molding levels of tolerance, repeatability, and quality, which also saves on money.
The new, highly accurate NXE400 comes with integrated sensors and cognitive software, which combine to offer continuous print monitoring, optimize part performance, and give detailed diagnostics. In addition, it also comes equipped with tough materials in order to enable ultra-fast 3D printing of production tooling, casting patterns, functional prototyping and end-use parts, and dental restoration.
Speaking of the dental industry, Nexa3D is planning on commercializing its new NXE 3D printer series this year through a multi-channel arrangement with its current partners: 3D printer manufacturer XYZprinting and digital and traditional dental materials provider BEGO. The three-way collaboration will go a long way in transforming the world of digital dentistry, as it will access the demand for expensive digital dentistry printers and industrial production, and the partnership could also end up being a major dental competitor to both EnvisionTEC and 3D Systems.
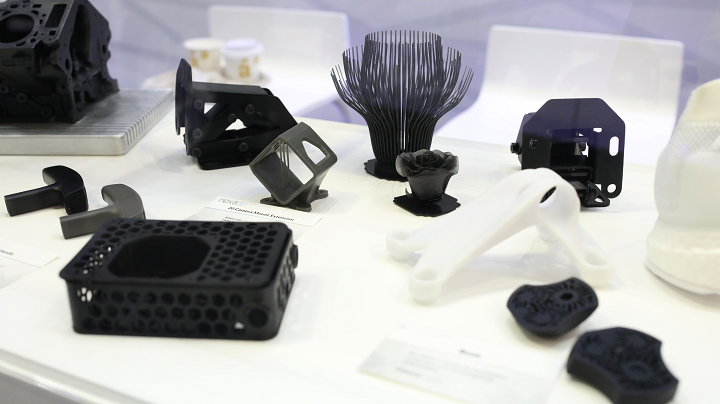
Various parts and assemblies 3D printed by the NXE400. Electrical assembly, pull handle, GoPro mount, bracket assembly, topology optimized brackets designed by ParaMatters
But the dental industry isn’t the only one that Nexa3D is interested in – the company is also collaborating with Techniplas, a global design and automotive manufacturing provider. Nexa3D joined its open innovation program as a partner a year ago in an effort to expand its presence in the automotive industry, and at this week’s CES show, Techniplas will be showcasing a concept vehicle that features 3D printed parts produced by Nexa3D, along with its growing generative design capabilities.
 At CES 2019, Nexa3D will be exhibiting a range of its 3D printers, including the new NXE400, at the Techniplas booth #9320 in the North Hall’s Vehicle Technology zone in the Las Vegas Convention Center (LVCC), and also at the Dynamism booth #32020 in the 3D Printing Marketplace in the LVCC’s South Hall.
Izhar Medalsy, the Chief Product Officer for Nexa3D, said “After more than two years of intensive research and development, our team is proud to exhibit the results of our painstaking work at CES 2019 with our significant partners Techniplas and Dynamism, two go-to-market collaborators that are helping us validate the marketplace impact and build access to new products.”
Nexa3D wants to invite all qualified resellers, strategic partners, and industry practitioners to check out its new NXE400 3D printer, priced at $49,950, at CES 2019 this week. If you’re unable to make it out to Las Vegas for the show, you can see the 3D printer in action in the video below:
Discuss this news and other 3D printing topics at 3DPrintBoard.com or share your thoughts in the Facebook comments below.
[Images provided by Nexa3D]
Long Term Home Review of Ultimaker’s New S5 Professional 3D Printer
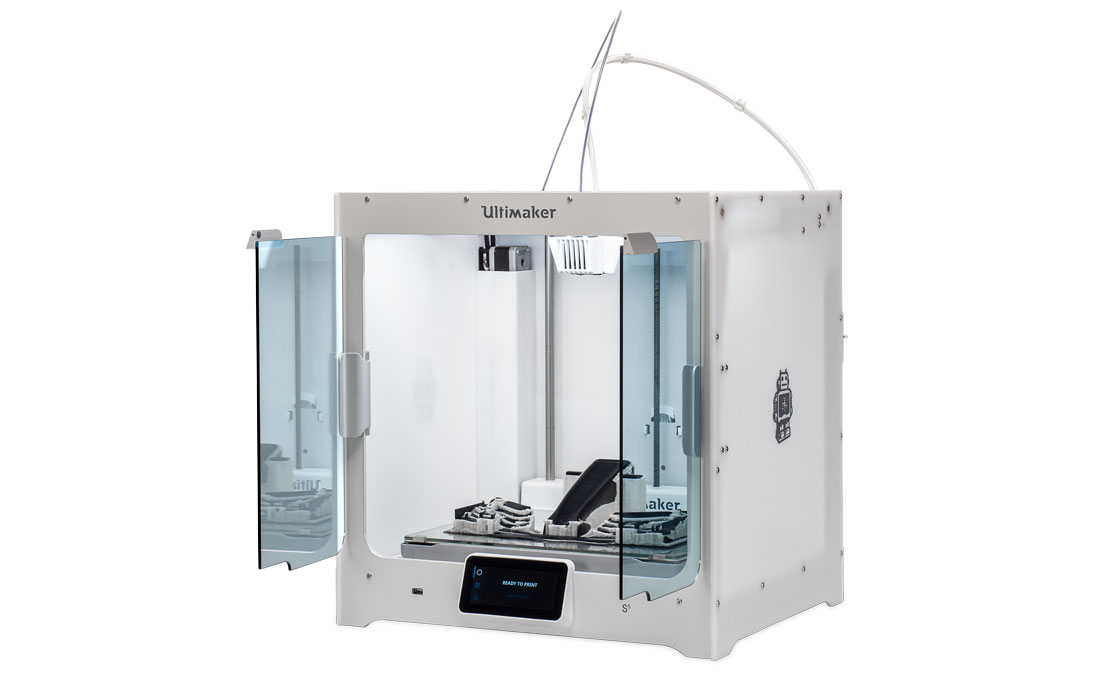
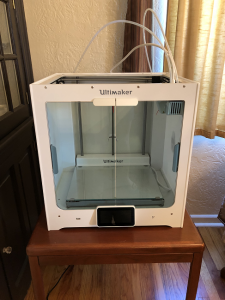
 At Hannover Messe this past April, desktop 3D printing leader Ultimaker introduced its first new 3D printer in two years – the S5, an expansion to its professional 3D printer portfolio. Ultimaker reseller Dynamism showcased the new S5 at RAPID + TCT that same month, as did Ultimaker itself. The desktop system, with a 330 x 240 x 300 mm build volume, has all kinds of great features, including dual extrusion, an intuitive touchscreen integrated into the front panel, and an enclosed front with tinted glass doors…so imagine my excitement when I learned that Dynamism would be shipping me a review unit!
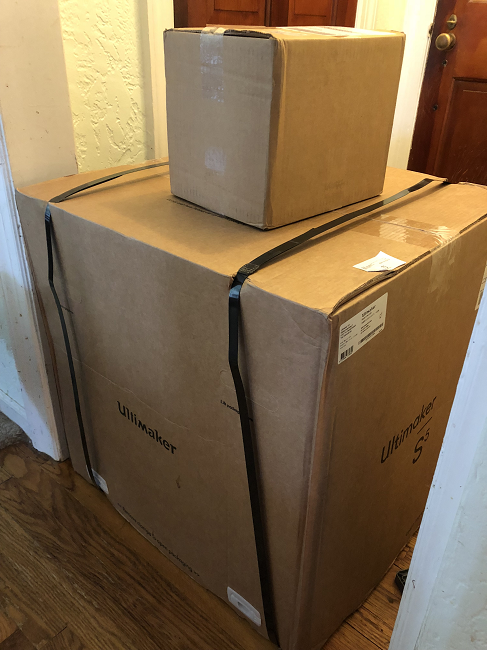
Full disclosure – while I’ve completed 3D prints before at Dayton’s 3D printing bar, this would be my first time setting up and operating a 3D printer all on my own. So when the gigantic box, and a smaller one of extra filament, arrived on my porch, I was a little…okay, a lot…intimidated. In fact, I was so concerned about not having anything pull focus from the unboxing and set-up process that the gigantic carton just sat in my dining room for a few days until the opportune moment. At 3DPrint.com we do not charge money for reviews. This is my own experience and my own opinion.
I’ll say this – the S5 was extremely well packaged. I was amazed at the sheer amount of used packing material I had at the end of the process, but also not surprised; I was dealing with precious cargo, after all. Another thing I will say, with complete honesty, is that while I write about technology all day every day, handling it is not my personal forte. So the fact that I was able to get this machine out of the box and set up with relatively few hiccups means that anyone can. The provided instructions were easy to follow, and if I needed more information, I just checked out the Ultimaker Resources.
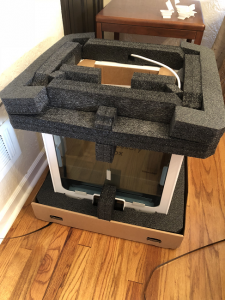
The S5 came with a test print and a box of hardware accessories and tools, including two print cores, several nozzle covers, the glass build plate, a 2 mm Hex screwdriver, a glue stick, spool holder with a material guide, XY calibration sheets, a power cable, and a USB drive. The 3D printer also came with Tough PLA and PVA support material, the latter of which I am in love with…but more on that later.
Keeping my cats and dogs away!
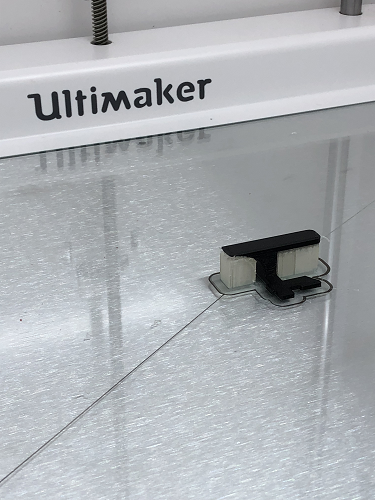
I found it fairly straightforward to set up most of the hardware, but I had a bit of trouble using the clips to secure the Bowden tubes; however, I think that was more user error than anything else. I had no issues installing the Cura software, or updating the firmware once the 3D printer was fully up and running, though it took me a couple of tries to get the 3D printer to connect to my WiFi. While there were no problems loading the materials, I had a harder time installing the BB 0.4 print core. I think this was mainly due to the fact that I was so insanely aware of just how expensive this machine was and was treating it with kid gloves, and a firmer hand is sometimes required when installing hardware. Luckily, the more I used the 3D printer, the more comfortable I became.
Speaking of actually using the 3D printer, when the time finally came to test it out, I got a little too excited and forgot about a very important step: calibration. I very quickly realized that there was a problem, as the print was stringing and not adhering to the build plate, even though I’d applied a thin layer of glue, and stopped the job about three minutes in. While I was sad that my first print was far from a resounding success, I resolved to make it right.
 I again waited a bit to try calibrating the S5, partly because I was busy but mainly because I was intimidated by it all over again. But once I took the time to sit down and figure it out, the calibration sheet that came with the 3D printer was a breeze to use, and I was on my way once again, ready to try 3D printing something that wasn’t just the calibration grid of straight lines.
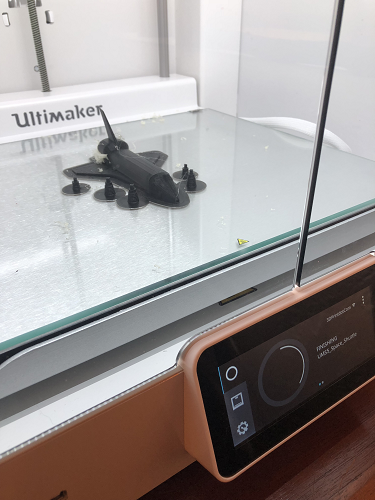
My first successful attempt was one of the two sample prints that came on the included USB drive, which printed very quickly. I love the intuitive touchscreen on the front of the S5 – it’s very user-friendly, and I quickly figured out how to pull up a rough image of what the print would look like once it was complete, so I’d know that it was printing correctly. Once I pried the tiny print off of the plate (a very easy task thanks to a layer of glue underneath), I put it in a small container of water and let it sit overnight, so I could see how long it took to dissolve the PVA support structures.
I loved the Ultimaker water soluble PVA. It was just so easy – pop the print in water and let the material work its magic. It’s possible to simply crunch and pull the supports off by hand as well, but the immediate effect wasn’t as clean. Obviously, the larger and more complicated the prints were, the longer I had to let them sit in water, and I learned that unless I felt like getting gummy residue stuck to my fingers, it was best to just wait until the supports had 100% completely dissolved. It was also a little tough cleaning the build plate, as the PVA sort of bonded with the glue and became hard to scrub off. But I followed the advice of the Dynamism team and got a soft, non-abrasive sponge to help with this task.
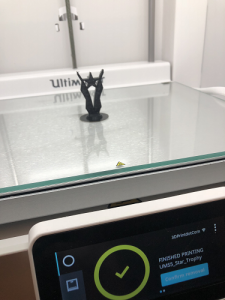
My next two prints were included Cura files: a star trophy and a rocket ship. Both of these were fairly straightforward prints, and gave me a chance to try out an extra form of bed adhesion with the addition of a brim; I can tell you now I much prefer a skirt, but I figured I would just give it a shot.
 The first print I completed that wasn’t already included in Cura or the USB drive was a Harry Potter Logo by Cults3D user 3DNaow, which turned out great. It’s definitely my favorite 3D print from this review, mostly because I love Harry Potter. Because I majorly scaled it down, the print took a lot less time to complete as well.
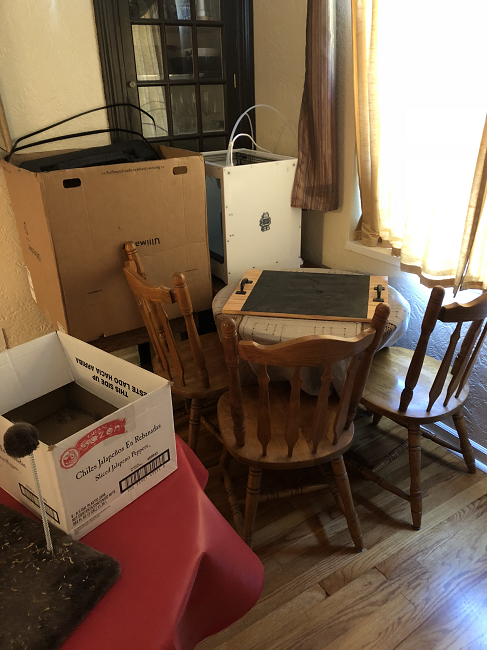
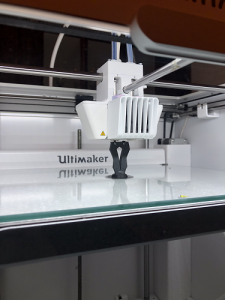
I’m going to take a moment here to rave about the remote monitoring. I didn’t download the app, but I did not have the S5 set up in my office. I live in an older Cape Cod house, and my office is in the half story upstairs, which doesn’t have great ventilation. So I decided it would be better to put the 3D printer on a table in my dining room, which is in a much more open part of the house. But this meant that I couldn’t keep my eye on it during the day. Having the option to monitor my print jobs from upstairs, thanks to Cura and the camera located above the auto-leveling bed, provided me with peace of mind.
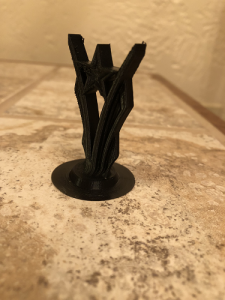
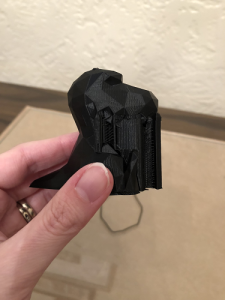
I would have called this adorable Low Poly T-rex by Thingiverse user slavikk my favorite, had I not screwed it up so badly. I had been messing around in the custom settings in Cura, just to try and put the system through its paces by changing up things like the infill and layer height, and I somehow managed to change the support material from Extruder 2 – the Natural PVA – to Extruder 1 – the Tough PLA. It took me about a quarter of the way into the print to realize my mistake, and by then it was too late. So this dino is still pretty cute, but I think he will be much better-looking when I take the time to get an X-Acto knife and cut away the black supports from the front.
![]()
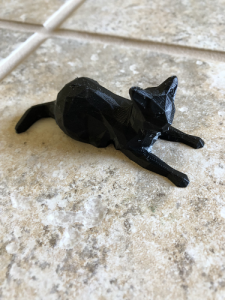
In completing my small collection of low poly animals from Thingiverse, I chose to 3D print a Low Poly Cat – another print by slavikk – and a Low Poly Stanford Bunny by johnny6. I put both the cat and the bunny on the build plate at the same time for a 7.5 hour print. This is where things started to get a little rocky.
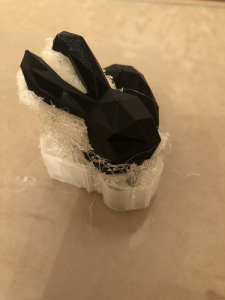
About four hours in, an error message popped up on the touchscreen: “One material appears to be empty. Please change it to a new material to continue printing.” I wasn’t home (this became the only time I left the house during a print job) and my husband texted me about it, but said that it didn’t appear that the filament was empty. Once I got home and took a look, it was definitely very obvious that neither filament was empty, so I just took a shot in the dark and pressed ‘Ok’ below the error message to confirm that I had changed to a new material, even though I hadn’t, just to see if it would start up again.
I got lucky and the prints resumed…for about 20 minutes. Then, the same thing happened again, I tried the same fix, and things continued on, though the support material was looking pretty stringy. About an hour later, the connection went out and I lost the monitor view upstairs, but the S5 just kept rolling along.
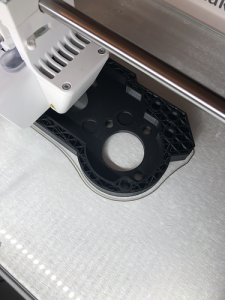
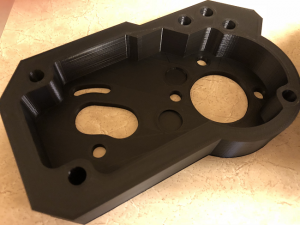
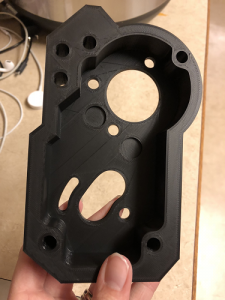
My next print was an STL file that the Dynamism team had sent me of a generic sample spare part, which took about 15 hours to print, with no supports, when scaled to 100%. It was a good illustration of just how important professional 3D printers, like the S5, can be for businesses in need of prototypes or models. The level of quality and accuracy of the prints produced on the S5 is just stellar, in my opinion. Maybe you should take my opinion with a grain of salt, because as I noted earlier, I’m not an expert on using 3D printers, but that’s up to you.
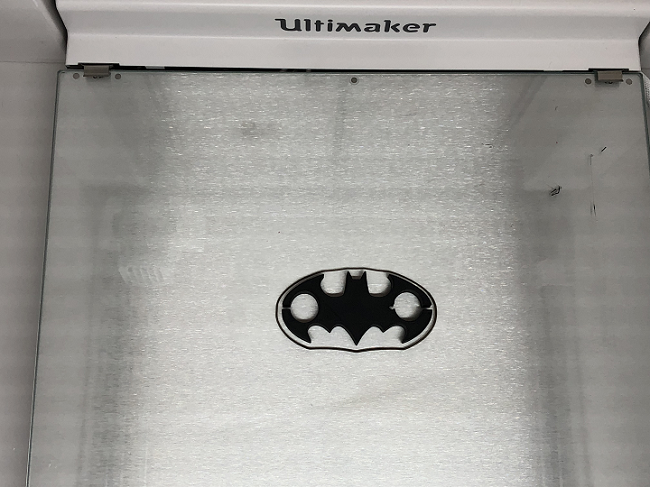 Realizing that not a single one of the items I’d 3D printed so far were at all useful, I went back to Thingiverse and found this batman earphones holder by itlaor, which quickly printed without any supports and is now being used by my husband, with great appreciation, to keep his earbuds from getting tangled up all the time.
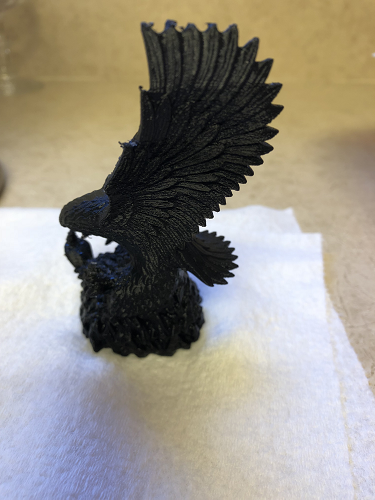
I also decided to 3D print this very detailed Eagle Sculpture by Thingiverse user 3DWP for my husband, who is an Eagle Scout and has a small collection of eagle figurines and sculptures. With this one, I couldn’t get my computer upstairs to connect to the 3D printer downstairs. I turned the WiFi off on both the computer and the printer and then immediately back on, and still nothing. So in the interest of saving time, I simply saved the STL file to the USB drive and printed it that way. About 10 hours in to the 16.5 hour print, I got the same error message I’d received with the low poly animals, and “fixed” it the same way. It seemed to only occur on prints with PVA supports for some reason.
I enjoyed trying out the Ultimaker S5 3D printer from Dynamism. I had it for far longer than I planned, but thoroughly enjoyed using it. What I knew already from writing about this technology daily, and have now had the chance to truly experience for myself, is that 3D printing takes time, which is something I don’t always have in the evenings – I do a decent amount of church and theatre volunteer work. So I kept searching for quick print jobs to try with the S5 because I just do not often have 15-24 hours where I am at my house the entire time. But as for the quality and ease of use – that was top notch.
The Ultimaker S5 is available for purchase on the Dynamism website starting at $5,995.
Discuss this and other 3D printing topics at 3DPrintBoard.com or share your thoughts below.
[Images taken by Sarah Saunders for 3DPrint.com]