![]() When it comes to industrial 3D printing for automotive applications, London-based Betatype is building up considerable expertise. The 3D printing company was founded in 2012, and works with its customers to deliver functional, 3D printed components. Betatype built a data processing platform called Engine to help manage and control multi-scale design; the platform maximizes the ability of 3D printing to provide control in one process over material, shape, and structure.
When it comes to industrial 3D printing for automotive applications, London-based Betatype is building up considerable expertise. The 3D printing company was founded in 2012, and works with its customers to deliver functional, 3D printed components. Betatype built a data processing platform called Engine to help manage and control multi-scale design; the platform maximizes the ability of 3D printing to provide control in one process over material, shape, and structure.
Some of the benefits provided by 3D printing include high cost-per-part, productivity, and volume, especially when it comes to using metals. Betatype recently completed a case study that demonstrates how the advantages of metal 3D printing can be properly leveraged for applications in automotive parts production. It focuses on Betatype’s use of laser powder bed fusion (LPBF, also called Powder Bed Fusion, DMLS and SLM) 3D printing and optimization technology to, as the case study puts it, challenge “the current status quo” by producing 384 qualified metal parts in one build, which helped lower both lead time and cost per part.
“When it comes to automotive and other consumer-facing industries focused on producing high volumes of parts at low costs, the current generation of Additive Manufacturing (AM) processes is generally considered incapable of meeting these needs,” Betatype explained in its study.
“The key to making AM productive enough for wider adoption across these high-volume industries, however, lies in process economics – choosing the most effective manufacturing process for each part. Combining these principles with Betatype’s knowledge of the limits of additive – as well as how and when to push them – together with the company’s powerful optimisation technology, supports customers with the design and production of parts that not only perform better, but that are economically viable against existing mass production technologies.”
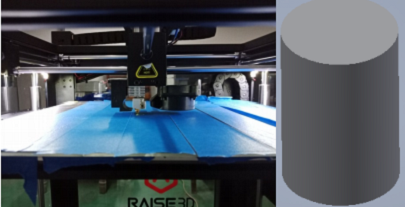
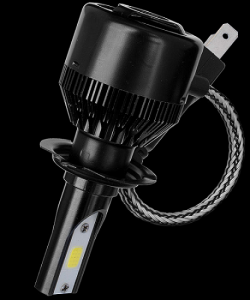
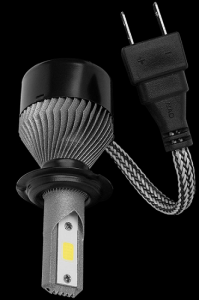
Production build of automotive LED heatsinks by Progressive Technology on an EOS M280.
You’ll often hear people in the 3D printing industry saying that one of the benefits of the technology is its ability to offer greater design freedom than what you’d find in more conventional manufacturing process. While this is true – 3D printing can be used to produce some pretty complex geometry – that doesn’t mean it’s without its own problems. It’s necessary to understand these constraints in order to find applications that can fit with the technology, and be used in high volume manufacturing as well.
Processes like die casting are capable of creating millions of components a year. 3D printing is valuable due to its capability of using the least amount of material to provide geometrically complex parts. Often 3D printing just doesn’t have the manufacturing volume or part cost to be an economical choice. But, this may not be the case for long.
According to the case study they looked at, “how it is possible to combine the innate geometric capabilities of AM with increased production volumes of cost-effective parts and improved performance” The team looked at “the Automotive industry’s switch to the use of LED headlights, which brings with it new challenges in thermal management.”
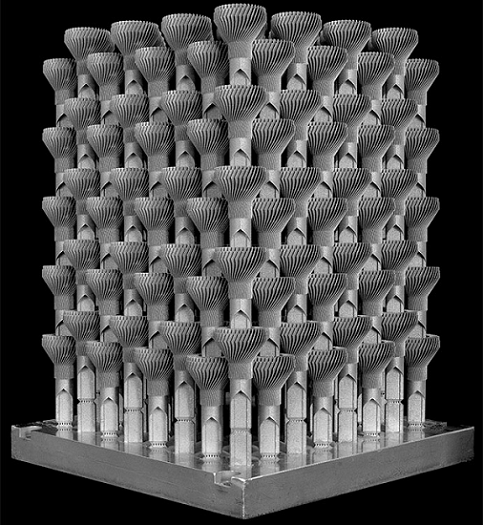
Most LED headlights need larger heatsinks, which are typically actively cooled. Betatype realized that the geometry of these metal parts would make them a good candidate for metal 3D printing, which is able to combine several manufacturing processes into just one production technique.
Betatype realized that LPBF would be ideal during the component’s initial design stage, and so was able to design the component with in-built support features. This made it possible to stack multiple headlight parts without requiring any additional supports; in addition, the company maintains that completed parts could be snapped apart by hand without any other post-processing required. This claim is something that we are highly skeptical about. No destressing or tumbling, shot peening, HIP or other processes usually result in parts that look different from the ones in the images given to us.

[Image: EOS]
Depending on part geometry it can be difficult to achieve full stacking with LPBF 3D printing. This is largely due to thermal stresses placed on parts and supports. Betatype designed the part in such a way as to decrease these stresses. This is what allowed Betatype to nest a series of heatsinks in order to maximize build volume and produce nearly 400 parts in one build envelope using an EOS M 280 3D printer owned by Progressive Technology.
“Through specific control parameters, the exposure of the part in each layer to a single toolpath where the laser effectively melted the part was reduced significantly, with minimal delays in between.”

13 x the productivity per system. Estimated Number of Parts per Machine per Year/Model built on build times provided by Progressive Technology for SLMF system (EOS M 280) and Renishaw AMPD for MLMF system (RenAM 500Q).
One of the large drivers in part cost is equipment amortization, and it’s important to lower build time in order to make parts more cost-effective. By using LPBF 3D printing and its own process IP and optimization algorithms, Betatype claims to have reduced cost-per-part from over $40 to less than $4, and lower the build time from one hour to less than five minutes per part – ten times faster than what a standard build processor is capable of performing. This would be a huge leap in capability for metal printing if these cost estimates stack up.
On single laser systems, like the EOS M 280 and Renishaw’s RenAM 500M, Betatype says that lowered the build time for all 384 parts from 444 hours to less than 30 hours; this number went down even further, to less than 19 hours, by using new multi-laser systems like the SLM Solutions 500 and the RenAM 500Q.
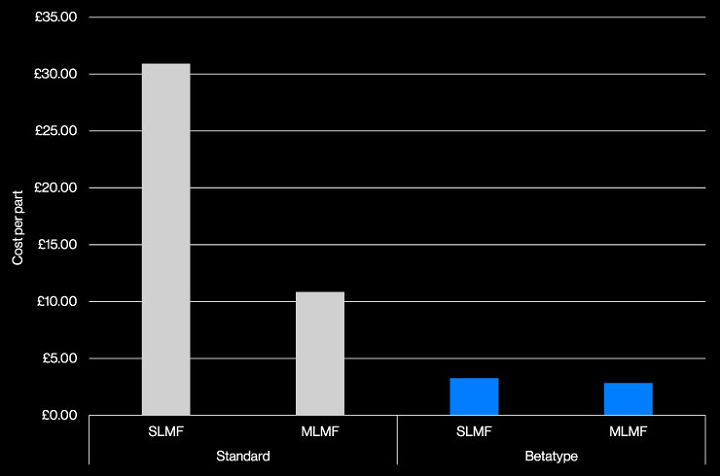
Up to 90% reduction in part cost. Estimated Cost per Part / Model built on build times provided by Progressive Technology for SLMF system (EOS M 280) and Renishaw AMPD for MLMF system (RenAM 500Q).
Betatype’s claims that their customer was able to achieve a productivity gain of 19 times the old figure per system in a year – going from 7,055 parts to a total of 135,168.
The case study concludes, “With an installation of 7 machines running this optimised process, volumes can approach 1 million parts per year — parts that are more functional and more cost-effective.”
It always good to show performance that is a step change ahead of what everyone thought possible. It is also significant that companies are making detailed case studies and verifiable claims as to output and yield. Betatype’s Case Study shows very promising numbers and we hope that productivity can indeed reach these heights with their technology.
Discuss this story and other 3D printing topics at 3DPrintBoard.com or share your thoughts in the Facebook comments below.
[Images provided by Betatype unless otherwise noted]