Coding for 3D Part 4: Rhino, Grasshopper and Weaverbird Setup

Rhino

After doing research on how we are going to attack this series with our toolbox of resources, we are setting up our environment for exploration. Setting up the build environment is simple enough, but it is vital. Even with our build environment, there are specific subtle things we need to do for our purposes of creation. We will go through some of these items in this article while highlighting some other integral parts.

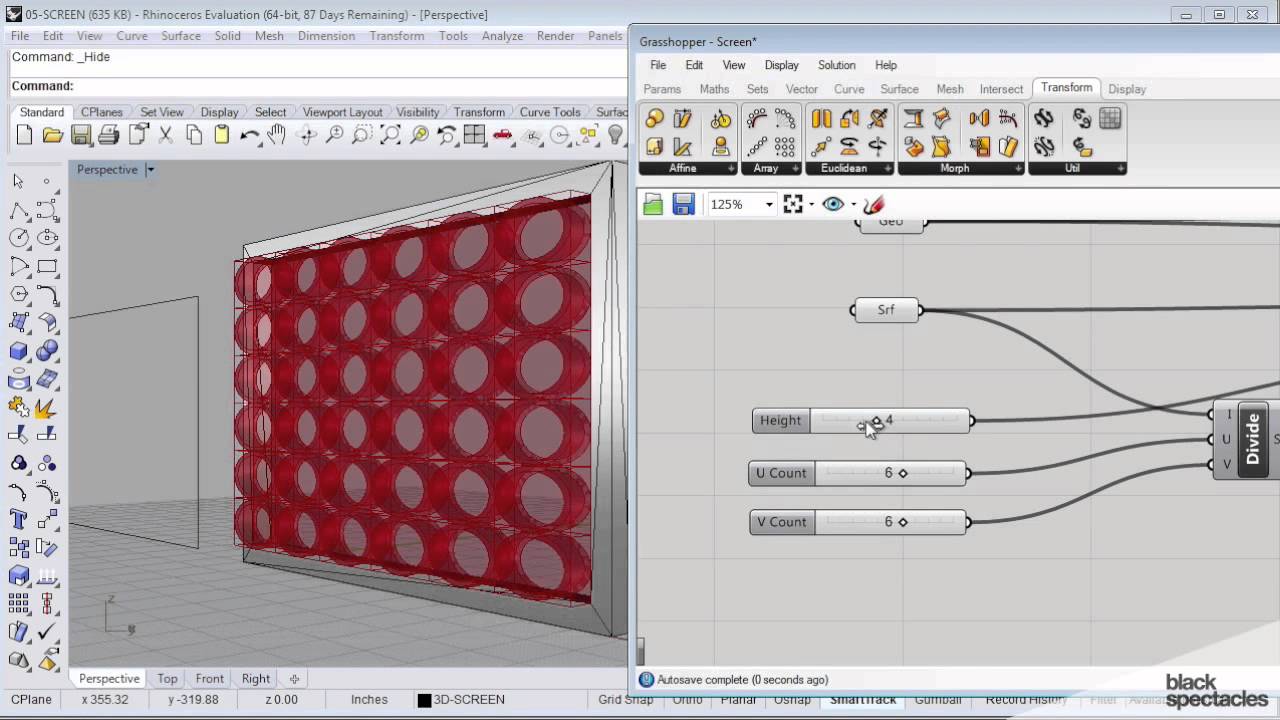
Firstly we need to download Rhino for our modeling purposes. To do so check out this link for a free 90 day trial version of Rhino. After going through the download instructions, we can now use Rhino. When I first opened Rhino, frankly I was intimidated. I have used various 3D modeling environments and software, but Rhino’s interface is a lot to handle. No disrespect to Rhino as a package as it is great, but it seems to have a steep learning curve. It has various plugins and tools ready for your disposal. Something important to remember is that having various tools is often not the best route when building anything. This is a methodology I take in terms of technical project building as well as physical product manufacturing. My goal with Rhino is to build parametric designs through coding, so I have a precise route to learning. This allows me to get to the meat of what I want to do quickly. I would not benefit from a large overview of Rhino at this point. A lot of what Rhino has tool wise does look intriguing, but we will stay focused when using it. Otherwise our curiosity may let us stray from our path to getting things done.

Download Window for Rhinoceros

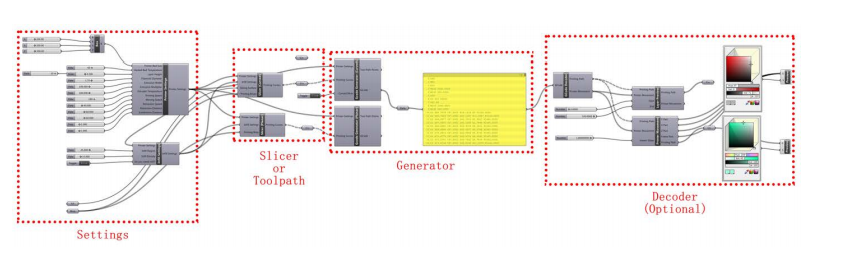
The biggest advantage of Rhino is the number of plugins available for it. These plugins are the essence of utility. We will focus on two plugins for Rhino in this series. The first plugin of interest to use is Grasshopper. Grasshopper is an algorithmic modeling plugin for Rhino. It uses a visual programming language vs. a typical text-based coding language. It also gives you the ability to reference geometrical objects from Rhino. The ability to create intriguing geometry quickly and with comparative ease is the main benefit of Grasshopper.

Grasshopper Build Environment

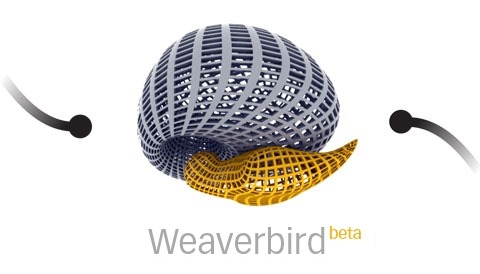
The second plugin of choice for us is Weaverbird. Weaverbird is a topology based modeler. It gives a designer the ability to make known subdivisions and transformation operators. This plugin allows us to automate subdivisions and reconstructing of shapes. It is a great plugin due to its ability to help in fabrication as well as rapid prototyping of ideas.

Weaverbird

Something I appreciate from Rhino is how extensive the program is from just looking at it briefly. Various software packages I have used are expansive, but Rhino seems to take things to a different level. The mind of an architect is very expansive, so their tool of choice needs to have various tools within its utility belt. I am excited to somewhat learn the mindset of an “architect” through operating in this program.

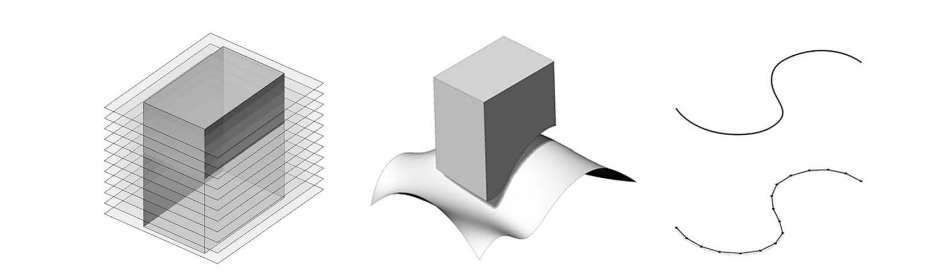
For the next installment of this series, we will try to make a simple 2D parametric design that can be extruded into 3D form. I realize the importance of 2D drawing and going to the 3D level as it makes product creation much easier. It flows better and it makes the ability to iterate more intuitive. So look out for that in our next article.

The post Coding for 3D Part 4: Rhino, Grasshopper and Weaverbird Setup appeared first on 3DPrint.com | The Voice of 3D Printing / Additive Manufacturing.

Caterpillar Is a Powerful Rhino Grasshopper Plug-in for Greater Customization in 3D Printing

Bio-inspired 3D printings by (Zheng and Schleicher 2018)

Whether you are a serious 3D printing user or not, you have probably heard of Grasshopper, a popular add on of 3D modeling software Rhino. Grasshopper lets you use scripts and algorithms to create 3D models and generative designs. It is one of the quickest ways through which designers can get started with generative designs and lets you in a visual build things such as parametric designs or designs based on datasets. You may not yet be familiar with other features, however, recently outlined by University of Pennsylvania’s Hao Zheng in ‘Caterpillar – A GCode Translator in Grasshopper.’ Here, we learn more about a new plug-in Caterpillar and its ability to unleash full use of the three degrees of freedom of Computer Numerically Controlled (CNC) machines and non-traditional 3D printing. Caterpillar lets you generate Gcode from within Grasshopper. Your dataset or generative algorithm or existing model can now be quickly turned into Gcode that you can then optimize for 3D printing. This will enable people to quickly implement very creative and new 3D printing methods and techniques as well as enable the making of more non-traditional 3D printing processes.

Zheng points out what many of have noticed over time, as 3D printing users are simply not satisfied to stop and enjoy what has been supplied to them in terms of what is now traditional 3D printing in the layer-by-layer, bottom-to-top approach. For better control, Zheng postulates that users must be able to use ‘the three degrees of freedom’ – meaning X, Y, and Z and also go beyond them. More degrees of freedom and different ways of printing mean more applications are possible. The developers have added to conventional methods previously with accompaniments such as robotic arms, 3D printers that print on curved surfaces, as well as those that extrude alternative materials like wire.

For Caterpillar to do the necessary work, you must first give it the necessary data required. This means printers settings, to include many different parameters:

“Printer bed size (MM) contains three numbers (x, y, z), indicating the maximum printing size of the printer. Heated bed temperature (°C), extruder temperature (°C), and filament diameter (MM) are based on the printing material, which normally will not be changed once settled. Layer height (MM) and subdivision distance (MM) control the precision of the printing, while printing speed (%), moving speed (%), retraction speed (%), and retraction distance (MM) control how fast the printer will act when printing, moving without printing, and retracting materials. Extruder width (%) and extruder multiplier (%) together decide the width of the printed toolpaths.”

Work flow of Caterpillar in Grasshopper

Most users can just go with their default settings to be safe, but there may be some cases where you want to customize without default restriction. Infill settings must be considered too if you are slicing the model to provide infill.

For slicer and toolpath generation, there are numerous options:

  • Planar slicer
  • Curved slicer
  • Curved toolpaths for special use
  • User-defined toolpaths

Planar Slicer (left), Curved Slicer (middle), User-defined Toolpath (right)

The workflow of the GCode generator then creates toolpaths based on points based on inputted curves, and optimization occurs:

“So before inputting the given curves to the dividing component, the program will detect and separate curved toolpaths and linear toolpaths, then divide the curved toolpaths as usual and extract the start and end points to represent the linear toolpaths.”

The GCode decoder then translates text files, assisting users in further design and control through keywords extraction and model rebuilding.

Commonly-Used Gcode.

“In the future, non-conventional customized 3D printing will be highly developed for both educational and industrial purposes,” concludes Zheng. “Low-cost 3-axis 3D printers with extra toolkits can handle a variety of tasks, providing an alternative for expensive robotic fabrication.”

In 3D printing, the central theme is customization. Users can create on an infinite scale, whenever they want, rapidly and affordability. Hardware choices continue to expand with the needs of 3D printing enthusiasts around the world, as do materials. Changes and evolution in software tend to be even more sweeping—and desired—as computer programs allow us to design objects and then control printing processes. While add-ons, plug-ins, and updates are continually available, software programs drive innovations—whether in allowing more advanced bioprinting and tissue engineering, scanning, or simulation of other processes. Caterpillar makes is much easier to implement, design and develop completely new 3D printing techniques and we can not wait to see the impact that this will have.

What do you think of this news? Let us know your thoughts! Join the discussion of this and other 3D printing topics at 3DPrintBoard.com.

Printing Simulation

[Source / Images: ‘Caterpillar – A GCode Translator in Grasshopper]

Researcher Presents Case Study on Partially 3D Printed Lace-Like Dress

Lace isn’t just for wedding dresses or your grandmother’s doilies anymore, especially not when 3D printing is involved. Researcher Lushan Sun recently presented her case study about a 3D printed garment, titled “Instilled: 3D Printing Elastic Lace,” at the International Textile and Apparel Association (ITAA) Annual Conference Proceedings.

“The purpose of this design study is to explore the elastic performance in the various 3D printed structures using flexible FDM filament (nylon) in ready to wear apparel,” Sun wrote in her paper. “The goal is also to explore visual illusion in surface design through digital textile printing. Research through design (RTD) methodology was applied in this case study, and data were collected through reflexive journal documentation, video recording of the virtual design process.”

[Image: Danit Peleg]

Many designers are experimenting with the use of 3D printing in customized apparel design, in order to solve aesthetic issues as well as creating a unique design that’s also functional. While some designers, like Continuum Fashion with its N12 bikini, use SLS technology to create articulating structures for clothing, others, such as Israeli fashion designer Danit Peleg, use FDM and more flexible materials to make pieces that are actually comfortable to wear.

This second was the route that Sun took for the study, which focused on the “inspiration of visual illusion.” Sun integrated organic forms, which fused together to look like lace, in the prototype garment, which featured a delicate torso and skirt portion, completed with a flared silk skirt with an uneven hemline. The torso part of the dress, which blends two digital design applications, was lined with silk habotai – one of the most basic plain weaves of silk fabric – and did not require an additional closure in the form of a zipper.

“The torso was developed in silk charmeuse and consists of a stylized neckline and waistline. The back consists of two layers, a stylized cowl neckline and a 3D printed portion (nylon in FDM). The silks are draped over the elastic 3D printed lace to juxtapose the loosely fitted and the form-fitted silhouettes,” Sun wrote.

“Overall, the organic engineered print and 3D printed lace patterns in the front and back help to provide a unique focal point from different angles of the garment.”

There were four important phases in the development of the dress. First, Sun explored and sampled the chosen engineered textile prints in order to work out the appearance and color schemes, using Adobe to generate graphics for rendering and manipulation. Draping techniques were then used to develop flat patterns for the flowing piece.

The third step consisted of using direct 3D modeling techniques in Rhino to fully reflect the style of the dress’s organic shapes.

Sun explained, “The units were repeated to form the various groupings that were sampled for different elastic performance.”

The shapes in the lace-like, 3D printed part of the garment, which is fitted to the waist, upper hip, and shoulder, were customized to the shape of the flat pattern, in addition to being engineered to different scales so they would fit both the elastic and aesthetic needs of the dress. Finally, Sun used commercial Rit dye to give the 3D printed part of the garment the same ombre transitioning color scheme that the textile portions had.

“The resulting garment prototype takes the advantage of engineered elastic performance of the 3D printed lace in form fitting,” Sun concluded.

“This case study also suggested some challenges exist in developing a resilient and flexible structure that is both comfortable and durable in wearing. Future research should consider alternative 3D printed structures through difference 3D modeling techniques. Additionally, alternative complexity can be considered in the structure with different FDM materials.”

I can honestly say, without a doubt, that this is one of my favorite 3D printed pieces of clothing. I would definitely wear this dress out and about, as it looks comfortable enough to spend a decent amount of time in…pair it with some 3D printed high heels and I’m out the door!

What do you think? Discuss this work and other 3D printing topics at 3DPrintBoard.com or share your thoughts in the Facebook comments below.