
Boylei of Boylei Hobbies just got an AnyCubic filament printer. To test it out, he built a cool paint bottle holder based on the business end of a Star Wars Blockade Runner.
Auto Added by WPeMatico
Boylei of Boylei Hobbies just got an AnyCubic filament printer. To test it out, he built a cool paint bottle holder based on the business end of a Star Wars Blockade Runner.
In this video, Zach Freedman shows off ten of his favorite 3D printable tools that are useful to hardware hackers and other flavors of makers. He covers things like an Altoids tin storage rack, a syringe for dispensing flux, a filament sppol holder, a smart phone camera rig, and more.
In this video, Adam Savage extols the virtues of a blow dryer as a useful shop tool. Whether you use a salon-type dryer or an industrial heat gun, having deliverable heat in the shop is a game-changer. Adam, whose tool-tastes run on the expensive side, recommends a dryer that’s $50, but you can get one that’s just as good for half that price.
But the real tip he’s sharing here is not just about the dryer, it’s using it (and a cardboard box) to create an oven for quickly drying primers, paints, etc. He’s also just discovered using Bondo Filler Primer for 3D prints. He applies this is many layers. Not wanting to wait for it to air-dry, or to hold the dryer, he simply puts the object inside of an overturned box, cuts a hole in the box, and shoves in the dryer. Fancy!

This versitile vice was shared by OffRoadCowboy on Thingiverse:
This is a great little vise for hobbyists.
I printed it all with 20% infill and 6 exterior walls.
Print the bolt in the vertical direction.
Make sure that you only use supports on the build surface and not in the threads.
Screw the bolt into the vise, slide the washer on and glue the round nut onto the end of the bolt. Align the top & bottom pieces of the movable jaw on the end of the bolt and glue them together. After that dries, glue the washer into place to hold it all together.
Then Enjoy!
Download the files and learn more

Every Thursday is #3dthursday here at Adafruit! The DIY 3D printing community has passion and dedication for making solid objects from digital models. Recently, we have noticed electronics projects integrated with 3D printed enclosures, brackets, and sculptures, so each Thursday we celebrate and highlight these bold pioneers!
Have you considered building a 3D project around an Arduino or other microcontroller? How about printing a bracket to mount your Raspberry Pi to the back of your HD monitor? And don’t forget the countless LED projects that are possible when you are modeling your projects in 3D!
This is kind of mesmerizing; oddly satisfying, watching Ivan Miranda build a giant 3D printer.

Shared by nosferatu74 on Thingiverse:
Useful handle for router base from https://www.thingiverse.com/thing:1904236
Base is for Bosch GKF600, Bosch Colt
Download the files and learn more
Every Thursday is #3dthursday here at Adafruit! The DIY 3D printing community has passion and dedication for making solid objects from digital models. Recently, we have noticed electronics projects integrated with 3D printed enclosures, brackets, and sculptures, so each Thursday we celebrate and highlight these bold pioneers!
Have you considered building a 3D project around an Arduino or other microcontroller? How about printing a bracket to mount your Raspberry Pi to the back of your HD monitor? And don’t forget the countless LED projects that are possible when you are modeling your projects in 3D!

Shared by stickyfox on Thingiverse:
Fits over the rest of Hakko soldering irons to store tips, so you don’t have to scrounge around in the junk drawer like I’ve been doing all this time.
Obviously, you should always use caution with hot things and easily-melted plastic. Please let me know if you have any heat-related problems with this part.
Download the files and learn more
Every Thursday is #3dthursday here at Adafruit! The DIY 3D printing community has passion and dedication for making solid objects from digital models. Recently, we have noticed electronics projects integrated with 3D printed enclosures, brackets, and sculptures, so each Thursday we celebrate and highlight these bold pioneers!
Have you considered building a 3D project around an Arduino or other microcontroller? How about printing a bracket to mount your Raspberry Pi to the back of your HD monitor? And don’t forget the countless LED projects that are possible when you are modeling your projects in 3D!
This YouTube video by Eric Strebel goes through the full design process of creating a handy utility knife.
This video is about Design a Small Utility Knife for shop use. The blade is replaceable and requires no tools to swap the blade.
See more! and thanks to Eric for sharing!
This is the final installation of the wax ring project I have been working on. It has been such a great learning experience, and it has invigorated the maker within me. I highly suggest everyone to start making projects for fun. There is such a cathartic feeling attached with having an idea and bringing it to completion. It really pushes oneself to get things done. The creativity and new skill sets associated with building projects is so rewarding. Before this project I had zero skills in jewelry making and prototyping. After this project, I will not be at the level of a professional jeweler, but I have a newfound confidence to experiment and make new jewelry projects in my spare time. I also see what areas I need to improve to be a better designer. I will definitely be working and crafting my 3D design skills if I want to make very intricate designs for the future.

Before Cleaning Up
The end of this project required a good amount of clean up of our rings. Buffing, cutting, as well as sanding was necessary to complete the project. The ring was still attached to our sprue structure that was discussed in our previous articles. In order to remove this, we first needed large bolt cutters to clip the base material of the structure. This requires one to place the structure on the floor and then use force to cut the base. I had to put on a mask for facial safety in case of debri flying from the ground towards my eyes. After this has been cut, the tree like structure can then be cut further with different tools. The main tools used for this include a jeweler’s blade as well as pliers. The pliers were used to remove the stems of sprues within the structure. It takes a bit of dexterity as well as patience to make sure that the structure is properly handled.
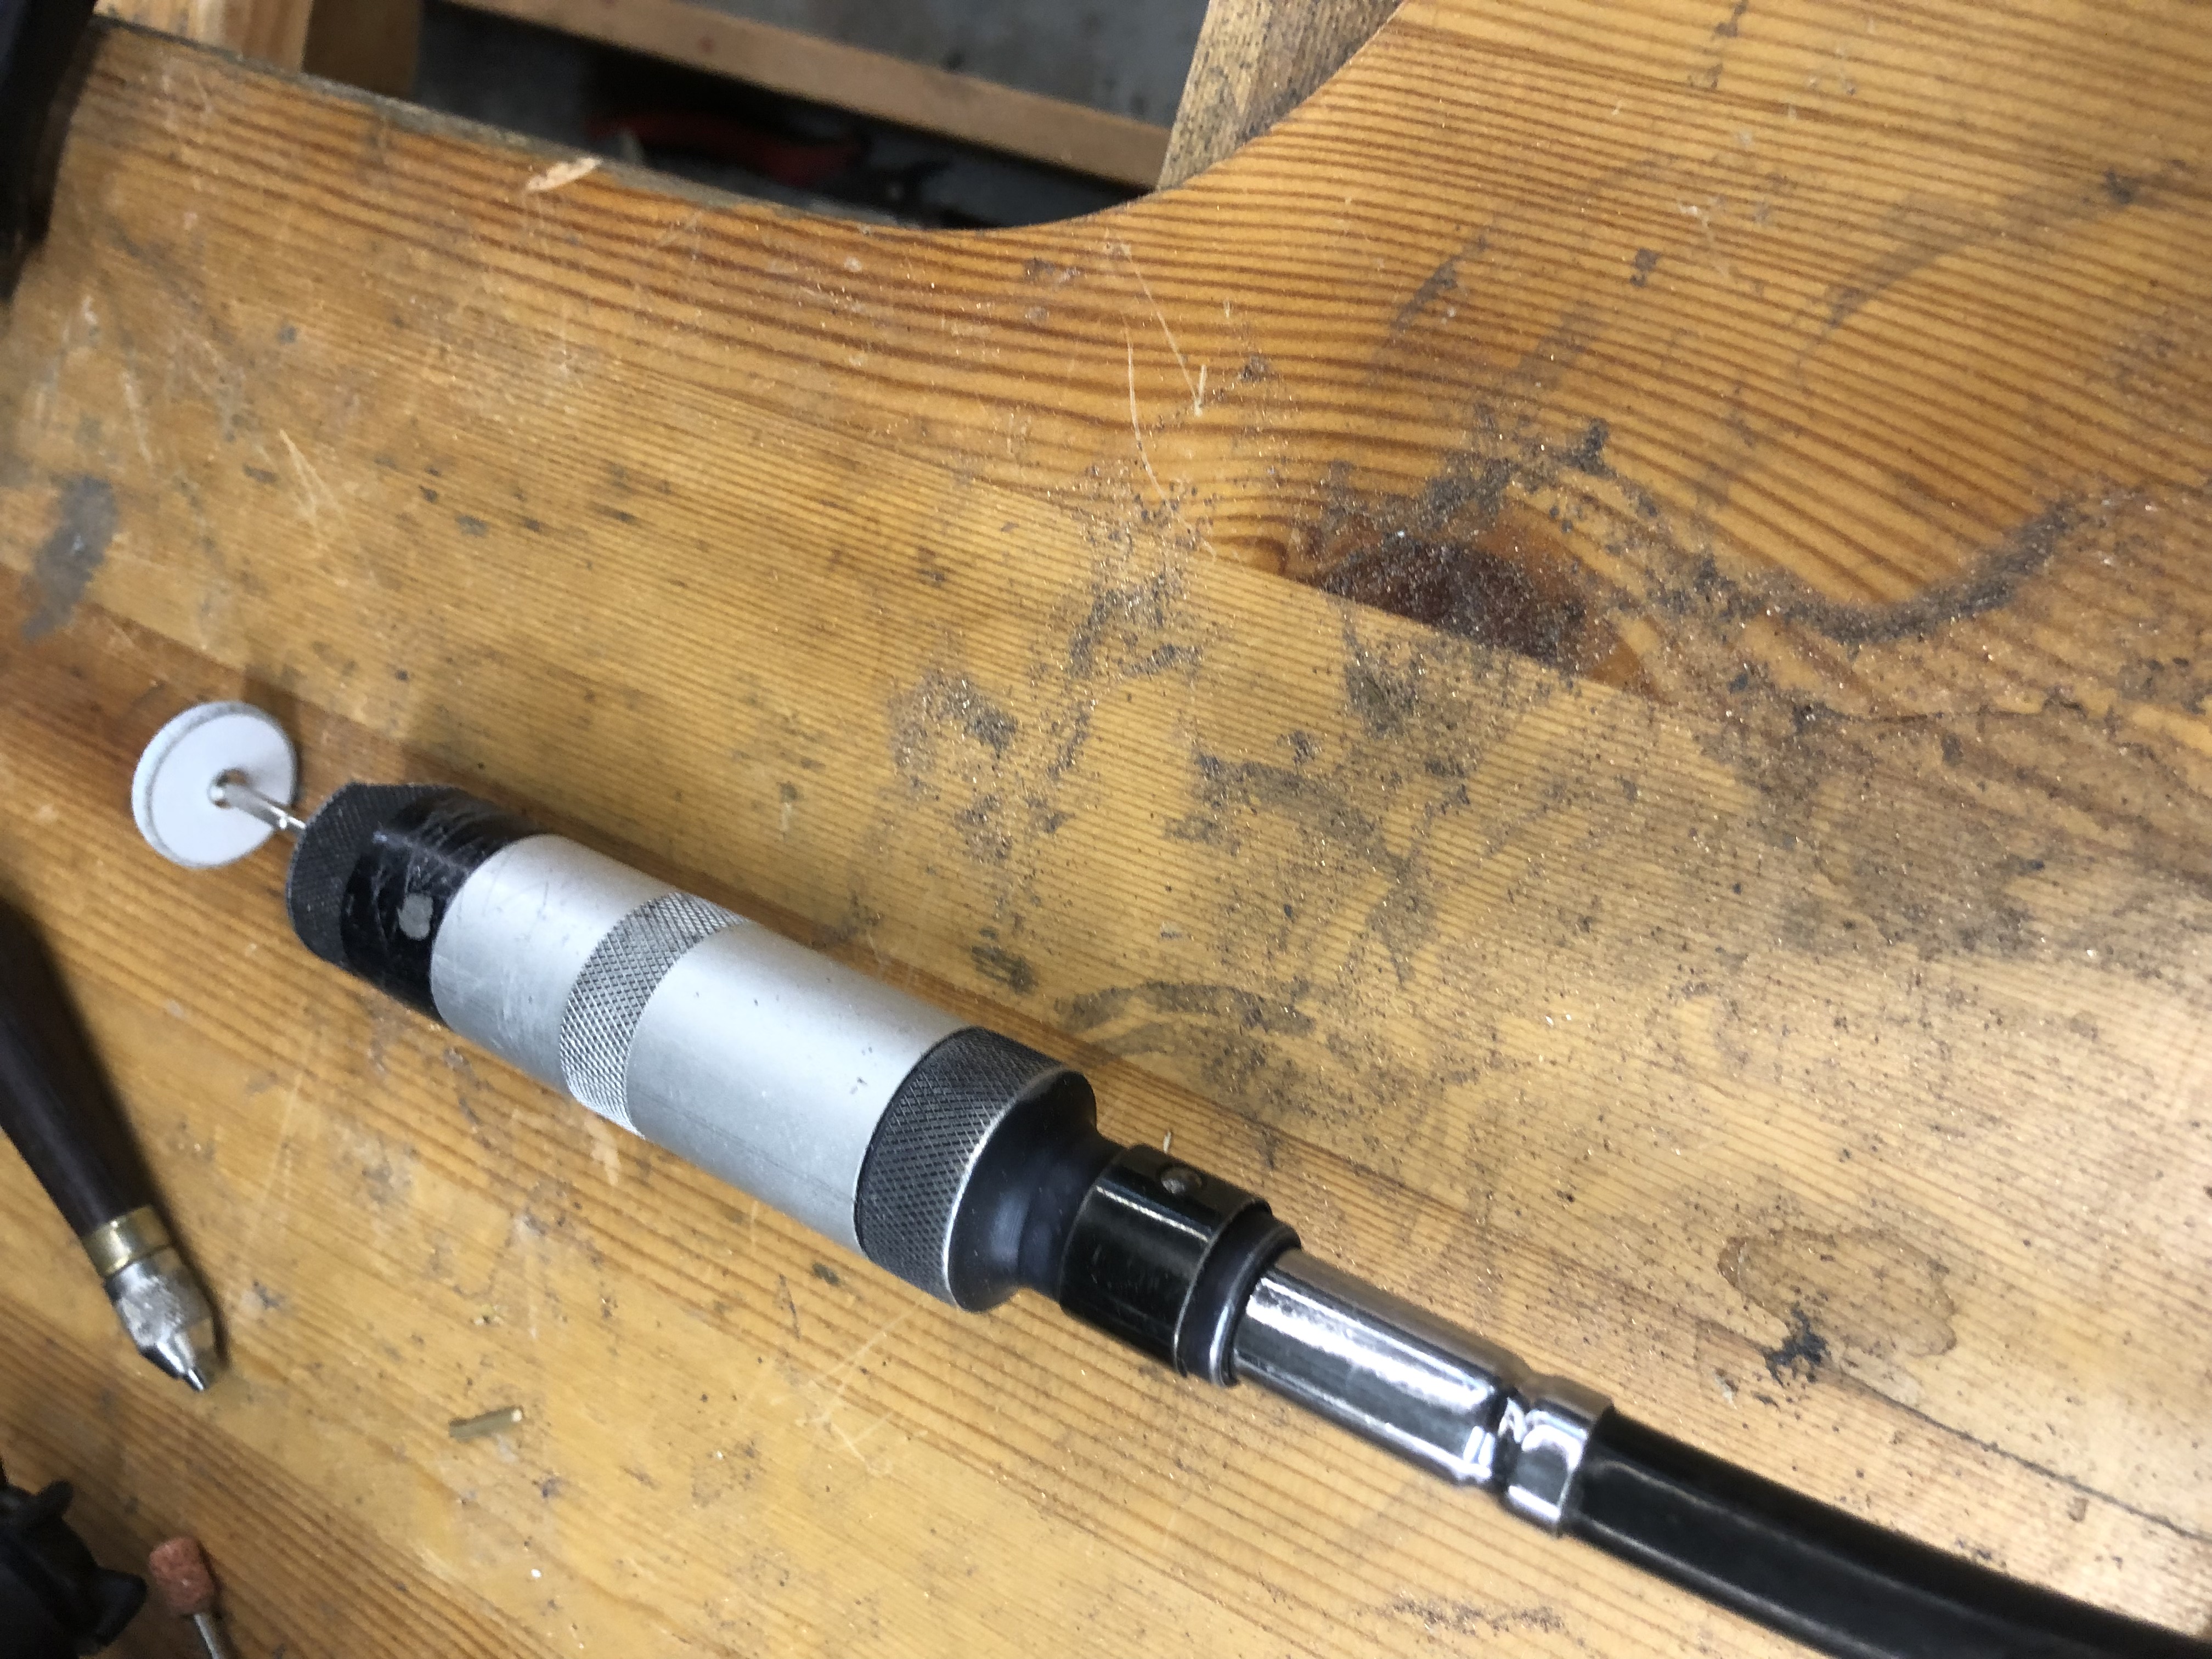
Rotary Dentist Tool
The biggest issue from this is making sure that the cuts and blade movement are precise. A jeweler’s blade is very thin. This can lead to the blade breaking easily during a cut if one is not precise in their movement. One does not want to have chunks of material still hanging off their piece also. This will make the next step of the process way more difficult than we would want. I learned this through firsthand experience. The next step in the process was focusing on grinding the extra chunks of material within the ring. The pliers did an okay job of removing the stems within our sprue structure, but nubs of the material were still present. I then used a handy set of dentist tools to grind the inside of my rings. Before this project, I had no idea how the dentistry industry and the jewelry industry used similar tools. With the rotary grinder tool available to me, I then smoothed out the inside of the ring as best as I could. Honestly, my precision and detail were only okay. It is definitely a great start in the journey of refinement and detail. I would say that I miss out on details at times, and I believe keeping up with this hobby of jewelry will really develop my attention to detail.
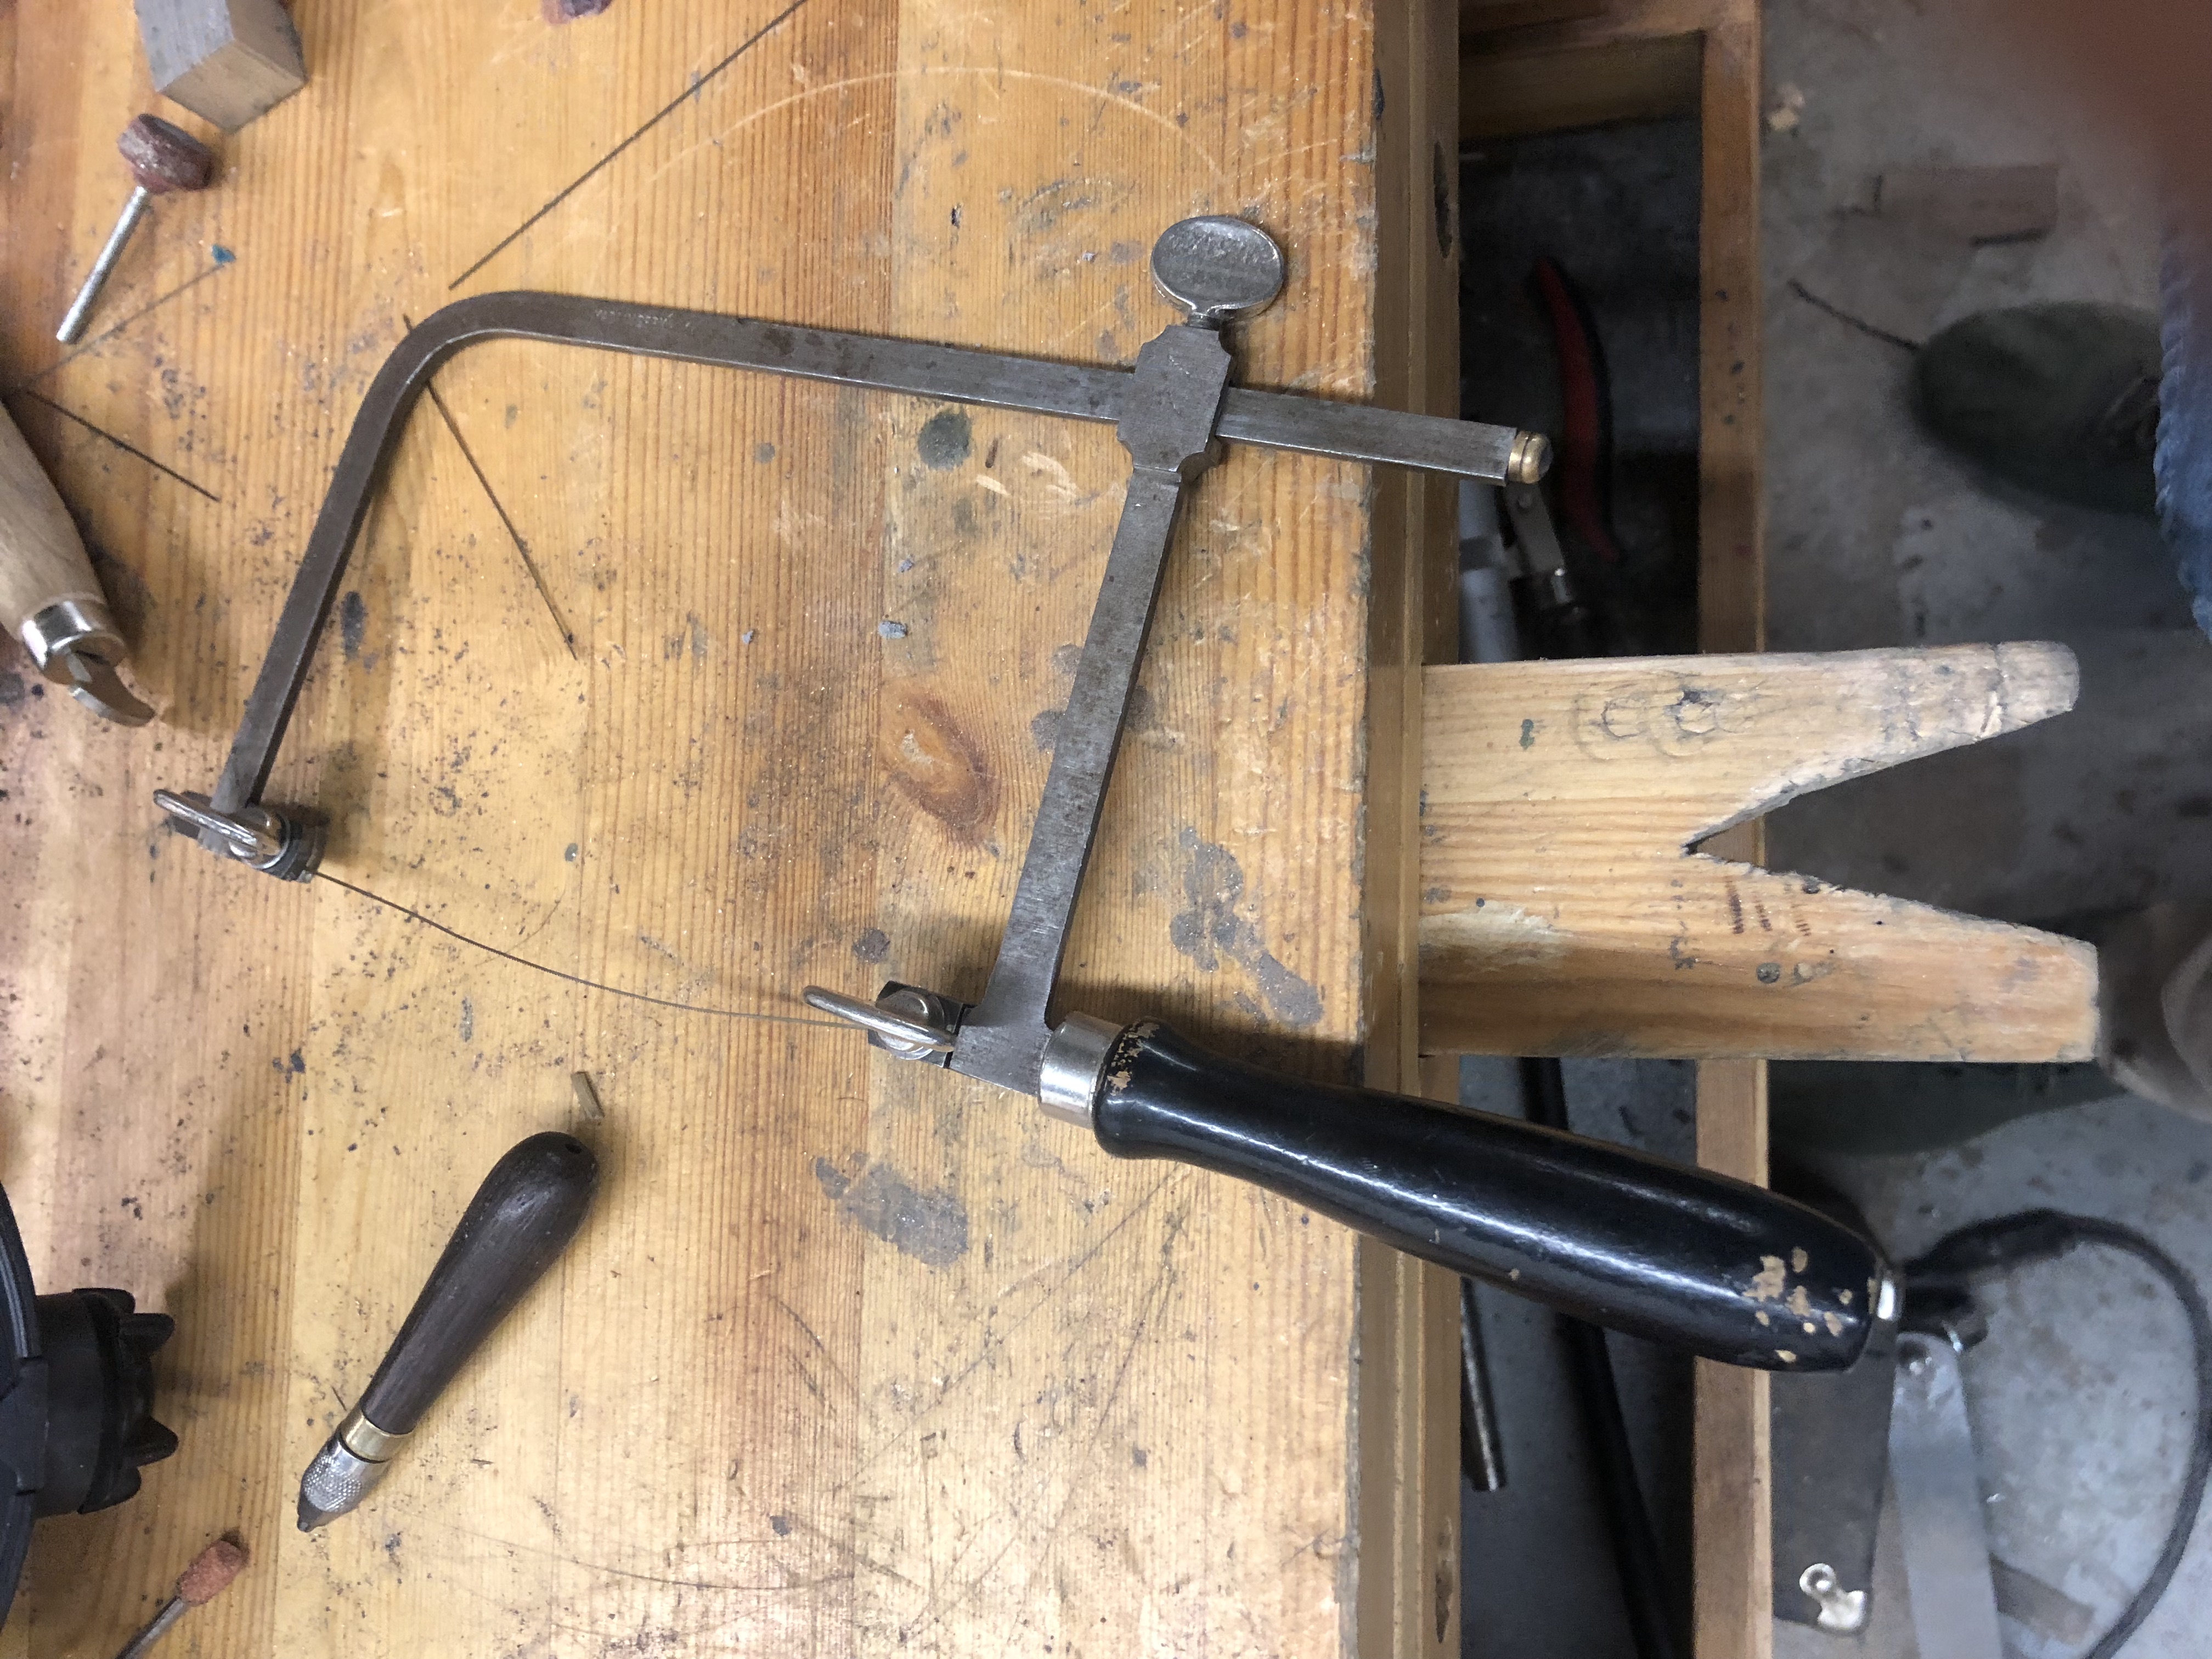
Jeweler’s Blade
Once these nubs of material were ground out with the dentistry tools, I focused on finishing the product in terms of refinement. This is where sanding precision came into play. I took an 80 grit piece of sandpaper and applied it to the perimeter of the rings. This helped to bring out the true shine of silver in the designs. This part of the process was simple, but the most difficult part was to come. I had to sand done the face of the lion without degrading the actual design of the ring. This requires using the rotary dentist tool again. It took some precision, but the lion head was buffed and the silver shine of the material came through all around the ring.

Finished Product
With this done, I finally had a cool lion ring made. The overall cost of the project itself in terms of silver was $200. With a bit more refinement, I will be able to sell this product at a high price point. Some follow ups of this project would include building a mold of the ring. This would then cut down the time associated with creating this product. Thank you all for watching this project evolved, but be prepared for new projects that I have ready for the future.
The post Make All the Things Part 2: Ring Creation and Casting a Wax Ring, Part 2 appeared first on 3DPrint.com | The Voice of 3D Printing / Additive Manufacturing.

Browse through all that’s new here!

Mini Oval Speaker with Short Wires – 8 Ohm 1 Watt: Hear the good news! This wee speaker is a great addition to any audio project where you need 8 ohm impedance and 1W or less of power. We particularly like this speaker as it is small and comes with nice skinny wires with a connector on the end. It has a handy “Molex PicoBlade” 1.25mm pitch 2-pin cable, which makes plugging into a board easy. Or you can cut off the connector and just solder/clamp onto the wires directly.

Lithium Ion Polymer Battery with Short Cable – 3.7V 350mAh: Lithium ion polymer (also known as ‘lipo’ or ‘lipoly’) batteries are thin, light and powerful. The output ranges from 4.2V when completely charged to 3.7V. This battery has a capacity of 350mAh for a total of about 1.3 Wh.

Lithium Ion Polymer Battery with Short Cable – 3.7V 420mAh: Lithium ion polymer (also known as ‘lipo’ or ‘lipoly’) batteries are thin, light and powerful. The output ranges from 4.2V when completely charged to 3.7V. This battery has a capacity of 420mAh for a total of about 1.55 Wh

Micro Servo Arm and Horn Set: If you bought a servo from us you probably got a bunch of plastic add-ons that you can snap onto the rotating part of the servo. These are called ‘servo horns’. For many robotics projects you’ll end up drilling or gluing to the horns to attach it to your armatures. But maybe you messed up, or you want to recycle the expensive motor part? This product comes with just the horns! No servo is included, so you can reuse the motors you’ve got.

Standard Servo Arm and Horn Set – 25 Spline: If you bought a servo from us you probably got a bunch of plastic add-ons that you can snap onto the rotating part of the servo. These are called ‘servo horns’. For many robotics projects you’ll end up drilling or gluing to the horns to attach it to your armatures. But maybe you messed up, or you want to recycle the expensive motor part? This product comes with just the horns! No servo is included, so you can reuse the motors you’ve got.
They mate with 25-tooth servo axles. We’ve found they’re compatible with our standard-size servo motors

Brass Heat-Set Inserts for Plastic – M3 x 4mm – 50 pack: Wanna improve the connection strength between your project’s 3D-printed parts, and also have nice clean surfaces? Instead of gluing bits together, or screwing plastic screws directly into your 3D prints, use strong and reusable machine screws and heat-set inserts. Heat set inserts are only a few cents a piece and have a grooved outside, with threads on the inside. Originally they were designed for injection molded parts but they work fabulously for 3D printed plastic as well.

Brass Heat-Set Inserts for Plastic – M3 x 3mm – 50 pack: You could use a plain soldering iron to try to heat-press these in – Heat up the iron and use it to press the insert in, wait for it to cool, then use like a hex nut that’s embedded inside the plastic. We strongly recommend our heat-set insert tool for soldering irons because it’s really hard to insert them straight otherwise and you risk damaging your print!

Plastic Micro Servo Adapter for LEGO Cross – 16mm long: Who doesn’t love LEGO and compatible bricks? Nobody! Except when we accidentally step on them. There are soooo many mechanical things one can make with those ubiquitous bricks, plates, gears, pulleys. Say a 13-meter high LEGO London Tower Bridge…
But what do you do when you want to add LEGO-compatible bricks and parts to your servo arms and horns? This is the adapter you need! Just push the axle housing end onto the shaft of your Micro Servo, and it’s ready to adapt to the standard LEGO-compatible cross axle parts, including gears and wheels. So easy, we think this will enable many creative endeavors.
Comes 1 x per order – fits our Micro Servo only! Not guaranteed to fit with any other kind of servo splines, and definitely doesn’t fit our standard servos.

2CDriver by Excamera Labs: I²CDriver is an easy-to-use, open source tool for controlling I²C devices and a great tool to help with quick driver development and debugging. It works with Windows, Mac, and Linux, and has a built-in color screen that shows a live “dashboard” of all the I²C activity. It uses a standard FTDI USB serial chip to talk to the PC, so no special drivers need to be installed. The board includes a separate 3.3 V supply with voltage and current monitoring. It’s kinda like a Bus Pirate with a display and great Python support.

SPIDriver by Excamera Labs: SPIDriver is an easy-to-use tool for controlling SPI devices and a great tool to help with quick driver development and debugging. It works with Windows, Mac, and Linux, and has a built-in color screen that shows a live logic-analyzer display of all SPI traffic. It uses a standard FTDI USB serial chip to talk to the PC, so no special drivers need to be installed. The board includes 3.3 and 5 V supplies with voltage and current monitoring. It’s kinda like a Bus Pirate with a display and great Python support.
New Products 6/5/19 Featuring SPIDriver by Excamera Labs! #adafruit
Stay in the loop at Adafruit.com/New!

Want to get this info beamed straight into your inbox?
New nEw NEWs From Adafruit is an email newsletter sent once a week to subscribers only.
It features new products, special offers, exciting original content, and more.
Sign-up for the Adafruit weekly Newsletter here: https://www.adafruit.com/newsletter