Check out the newest project tutorial from Erin St. Blaine: make an epoxy resin Minecraft-inspired torch lamp. This lamp has a strand of warm white fairy lights embedded right into the resin, making a lovely starry glow effect. Adding a Circuit Playground Express underneath powers up the lamp with 10 programmable NeoPixel LEDs. The included MakeCode downloadable code makes the lamp flicker like a torch for a really beautiful ambient lighting effect.
From the guide:
Make your own custom Minecraft-inspired Torch lamp from epoxy resin. Embed a strand of fairy lights inside, and set it on top of a Circuit Playground Express. The onboard NeoPixel lights provide a lovely, flickery torch effect. This gorgeous lamp glows from the inside out.
Add a piece of shiny copper tape to the base, and you can change light modes with a touch of your finger. Capacitive touch control is just like magic!
We’ve provided a simple 3d printable base model, or you can get creative and design your own display mount. We made ours look like Viking Dragon Ships to go with our Dragon Wall Sconce, and now we sail into sleep at night with fiery dragonish gargoyles watching over us.
The stories we’re sharing in today’s 3D Printing News Briefs run the gamut from materials to new printers. Altair has launched its new industrial design solution, and Remet opened a metal 3D printing lab in Poland. Innofil3D is sharing lots of material news, and Equispheres has released the test results for a unique 3D printing powder. Finally, Hackaday published a micro 3D printer project.
Altair Launches New Industrial Design and Rendering Solution
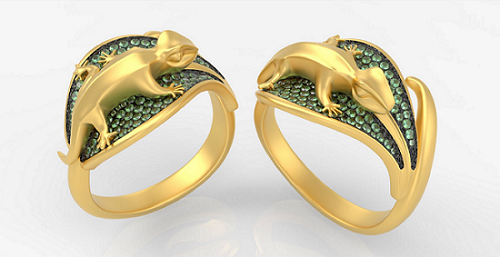
The “Geko Ring Collection,” jewelry by Luca Palmini, designed and rendered with Inspire Studio. Image courtesy of Luca Palmini.
Global technology company Altair has launched Inspire Studio, its new 3D design and rendering solution, to help architects, designers, and digital artists create, evaluate, and visualize designs. The solution builds on the functions of Altair Evolve, and includes 3D rendering and animation software Inspire Render, which helps users rapidly generate photorealistic product renderings and animations. Both Inspire Studio and Inspire Render run on MacOS and Windows, and help designers open up their creativity to go beyond traditional CAID tools. The solutions will be introduced next month during a one-day launch event in Italy, and you can also get a free ticket to formnext 2019, where you can learn more about Inspire Studio and Inspire Render at Altair’s booth E11, hall 11.1.
“We are very pleased with these two new solutions for the global industrial design community. Inspire Studio builds on our previous industrial design tool, Evolve, while going beyond Evolve’s capabilities. Inspire Studio will enhance designers’ creativity by letting them drive their designs. It offers an intuitive user interface and a powerful construction history, allowing them to quickly create and explore multiple iterations of their design. Relying on the same modern user experience with powerful interactive, full progressive and raytracing rendering engine, Inspire Render will help designers quickly run photorealistic renderings and walkthrough animations on GPUs and CPUs,” said James Dagg, CTO at Altair.
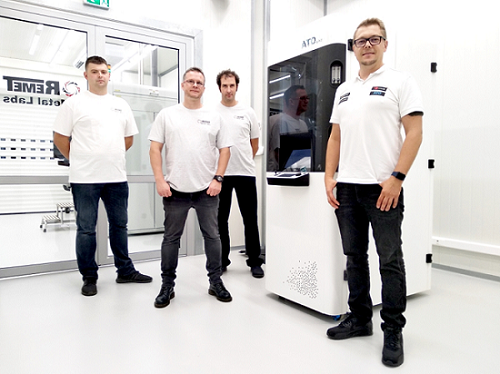
Polish steel structures manufacturer for the oil and gs mining industry, Remet, has launched a metal 3D printing laboratory equipped with a range of high quality machines and devices. The first of these is the DMP Flex 350 by 3D Systems, followed by 3D Systems’ Figure 4, the office-friendly metallic powder atomizer ATO Lab, and plenty of other specialized research equipment. Remet completed the project together with 3D Lab, a top Polish industrial 3D printer distributor and manufacturer of the ATO Lab.
The ATO Lab metal atomizer, which enables testing and fabrication of many powdered metal alloys, was the starting point for this unique laboratory. A new branch of the enterprise, called Remet Metal Labs, is where the company will work on comprehensive additive manufacturing and industrial applications projects. Its goal is to create highly flexible conditions for creating prototypes in the powder production field, and automotive, aviation, and space industry customers are invited to work with Remet to take advantage of the lab. 3D Lab and Remet will present their solutions together at formnext in Frankfurt next month.
Innofil3D Materials and Design Rules Video
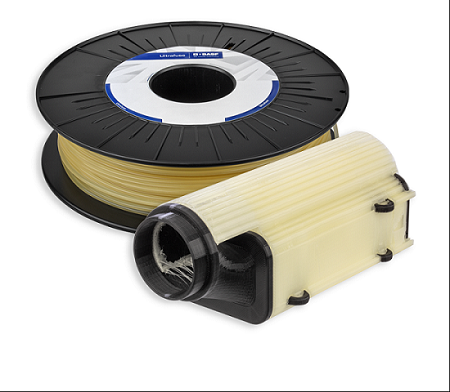
This week, Innofil3D, and its parent company BASF, have a lot of news to share. First up, Ultrafuse BVOH, its water-soluble support filament, is now available for purchase, along with its new Ultrafuse 316L metal filament. Designed for easy FFF 3D printing, this is the company’s first metal material – 80% stainless steel with a 20% polymer content.
For users interested in 3D printing their Innofil3D PRO1 filament on a Raise3D printer, you can now join the Raise3D Open Filament Program to take advantage of optimized settings and print profiles. This new program is a collaboration between Raise3D and filament manufacturers, like Innofil3D, to find the top-performing materials for its 3D printers. Finally, Innofil3D has released its second video tutorial for design rules and principles of FFF 3D printing. Check out the video below, and be sure to visit BASF at its large K-Fair exhibit in Hall 5, C21/D21.
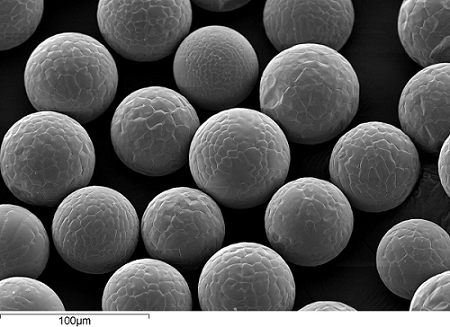
Equispheres Releases Test Results for Unique AM Powder
Materials science technology company Equispheres has released the results from its first powder testing phase, completed by a facility that certifies AM materials for applications in aerospace and defense. The results have confirmed that the powder has exceeded expectations, allowing for a 20-30% increase in mechanical performance and a 50% increase in production speeds. In light of this news, Equispheres is launching new equity financing in order to, as the company wrote in a press release, “grow and unlock the vast potential of Additive Manufacturing.”
“The unique properties of our powder, including the high sphericity, narrow particle size distribution and low surface area results in significantly increased packing density. This allows an increase of powder layer thickness by a factor of 2 which significantly increases build speed. Most importantly, this boost to build speed does not come with a mechanical performance penalty. Instead, the uniform nature of our powder ensures that parts are produced with reliable and consistent mechanical properties. The minimal variance in our performance results provides design engineers the statistical confidence to produce stronger, lighter parts,” said Equispheres’ CTO, Dr Martin Conlon.
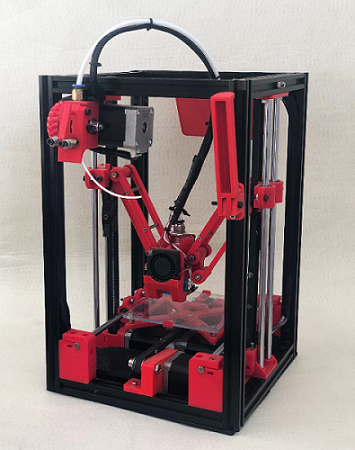
Hackaday Project: Micro Deltesian 3D Printer
A new Hackaday project by architect Ekaggrat Singh Kalsi was just published – a micro Deltesian 3D printer, which he says offers a quality that’s on par with any Cartesian 3D printer. The printer has a solid aluminum frame, with a standard slider Y axis and a Delta mechanism for the XZ axis. A 3.5″ LCD touchscreen, with a built-in SD card, is fast and easy enough for his young daughter to use, which was his ultimate goal. With an 80 x 100 x 85 mm build volume and a print bed held in place with magnets, the biggest challenge in making the minuscule 3D printer easy to use was the filament loading; Singh Kalsi used a lever-based latch mechanism for this.
“the micro deltesian was born out of the curiosity of building the convoluted deltesian mechanism,” he explained. “Later on it evolved into the idea of building a 3d printer simple enough to be used by my daughter. The deltesian mechanism seem very wierd when i first saw it but eventually i thought maybe i should give it a try and hence this printer was born.”
Watch the video below to see just how easily his daughter uses the micro Deltesian 3D printer:
Discuss these stories and other 3D printing topics at 3DPrintBoard.com or share your thoughts in the Facebook comments below.
Check out the latest tutorial from Erin St. Blaine: design and create 3d printed mesh “armor” and make it glow! From the guide:
Design and create glowing scales in your favorite shape and add NeoPixel strand lights inside for a stunning display of animated lights.
These are so easy to add to any costume or design. This guide shows you how to create your design in TinkerCad, a free online 3D design program. You can print your armor at home or use an online printing service. Hot-glue a strand of NeoPixels inside and control your project with a Gemma M0 or microcontroller of your choice.
The guide includes sample designs using a heart shape, as well as a mermaid scale shape, and instructions on how to create your own design in the shape of your choice. It also includes a 3d printable enclosure design for your Gemma M0 and battery.
In the previous article, I showed the awesome coding framework of Processing. It is fun and interactive for anyone new to code. It makes learning a simple breeze, and it lines up a lot with the topics we have covered within this series thus far. These topics include image processing, 3D image rendering, 3D scanning, pixelation, image restoration, and a slew of other applications. With this article, I will show you how to get started with this program.
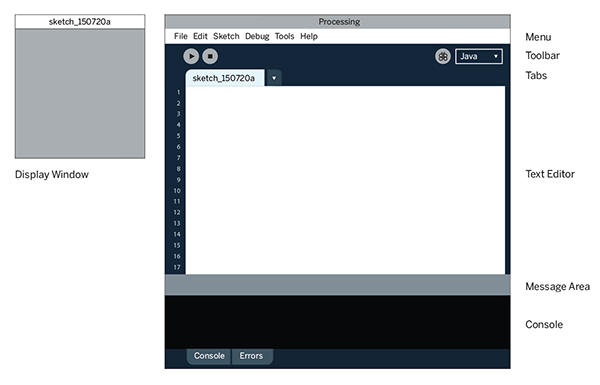
To get started, one should visit Processing and their website. From there, you can go to their downloads page and find the corresponding installation package that is right for your system. The package for Processing will be found in a zip file in your downloads section once it is unpacked from the website. Within this download package you will click through it to find an icon that says processing. Once you click this your computer will prompt you to extract the file into a different location. After this you may now use Processing.
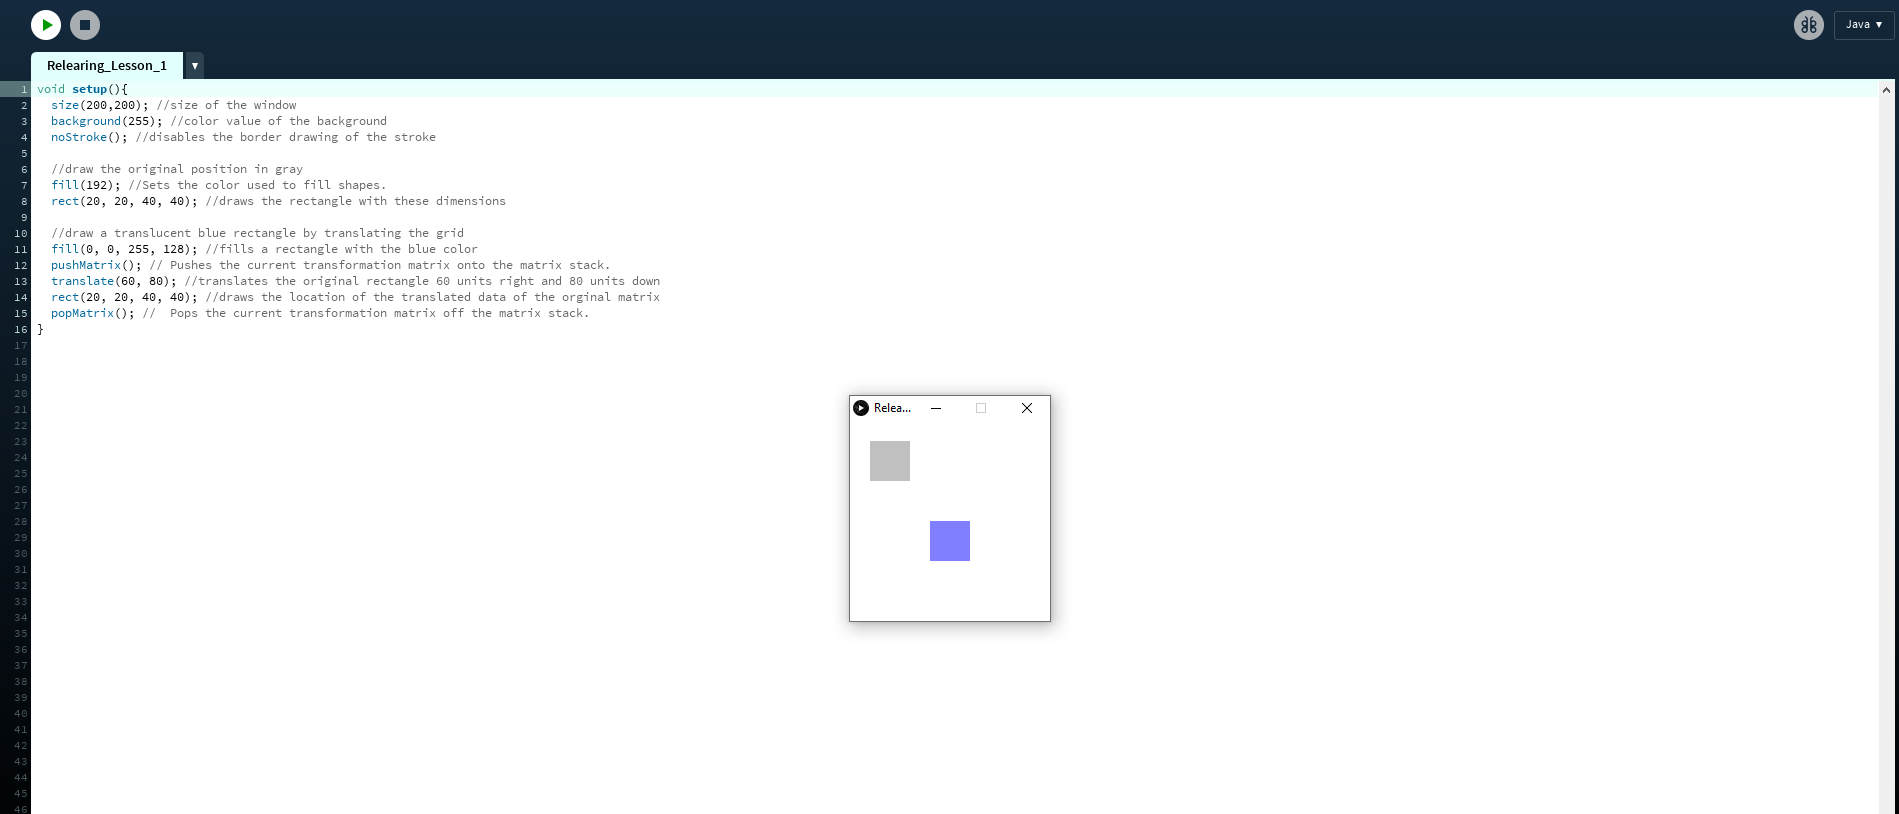
Once you open Processing you will notice the sketchbook and developing environment. That is where all of the code will be run and executed. In order to code within this environment, one needs to understand how to manipulate movement and vision within the 2D realm first before moving to 3D. I think having a solid foundation within 2D leads to better 3D thinking because geometry naturally flows this way. Processing is object oriented and it utilizes rotational and translational commands to make interesting visuals. The majority of commands used in 2D will be applicable to 3D. Processing fortunately has a 2D transformation tutorial online that is a great starting point for explaining the capabilities. Below is a snippet of code that is from the processing site and it has comments on what these lines mean.
void setup(){ size(200,200); //size of the window background(255); //color value of the background noStroke(); //disables the border drawing of the stroke //draw the original position in gray fill(192); //Sets the color used to fill shapes. rect(20, 20, 40, 40); //draws the rectangle with these dimensions //draw a translucent blue rectangle by translating the grid fill(0, 0, 255, 128); //fills a rectangle with the blue color pushMatrix(); // Pushes the current transformation matrix onto the matrix stack. translate(60, 80); //translates the original rectangle 60 units right and 80 units down rect(20, 20, 40, 40); //draws the location of the translated data of the original matrix popMatrix(); // Pops the current transformation matrix off the matrix stack.}
To initialize a build environment in Processing, one needs to setup the environment. Setup calls a function for a viewport to see the digital code. The window size is denoted as well as the background color. The noStroke() function disables Processing and its automatic border drawing for images.
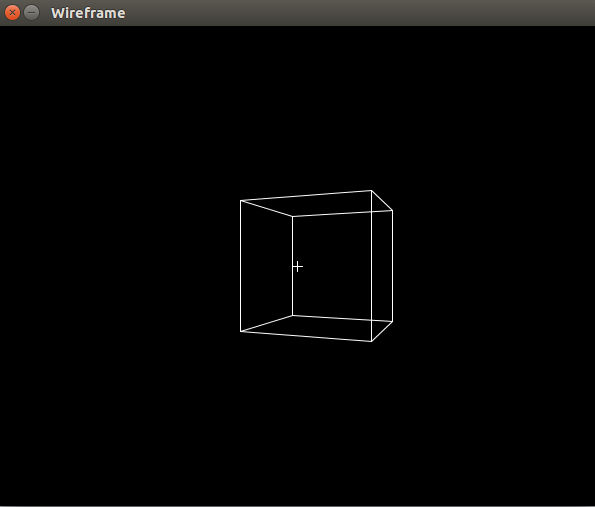
Executed Script in Processing
Then a fill function is used to color any shape after this definition to be this color. To set the dimensions of our box, we used the rect() function. Then we wanted to create a new blue rectangle so we applied the fill function again but with different values. After this we want to apply translations to the original matrix data we had for the rectangle in terms of location. The pushMatrix() command essentially opens up a loop of interaction within our code to allow us to independently control objects within our environment. Then we are able to apply the translate function to our original matrix data. In this case we translated the data to the right 60 units and down 80 units. Then we ended this cycle by applying the command popMatrix().
Whenever one wants to code, it is good practice to know what every command or function within your code means. Without knowledge of this, you are going to become a copy and paste coder who does not understand the nuances within their own code. It also will take you a bit more time to go through programming tutorials when you stop to learn exactly what everything means, but at a certain point you will gain a greater overall scope of the tools you have at your disposal. With this basic code example, we can expand our skills and apply this in 3D. In the next article, I will show how to do so.
New tutorial from Erin St. Blaine: create amazing cosplay glowing crystal gems! From the guide:
Crystal Gems will always save the day!
Create a stunning paper craft crystal from laminated cellophane wrap. Add NeoPixels and watch it sparkle!
We’ve included two different build sizes in this tutorial — one crystal large enough to house a Circuit Playground Express, and one with a single NeoPixel illuminating the crystal. This project can be run from a battery for cosplay applications (the crystal on Gandalf’s staff perhaps?) or plugged in to the wall via USB for a more permanent installation.
We’ve also included a Steven Universe Warp-Pad 3D printable base, so your Crystal Gems can be displayed in style. The possibilities are endless!
We love these gems. They’re easy to make with a few easily found tools. The main ingredient is cellophane gift wrap that’s been run through a laminating machine, which creates a perfect material for paper crafting — stiff enough to hold up but easy to cut with scissors or a utility knife. You can also get fancy and use a vinyl cutting machine to create perfect gems in multiple sizes. 3d print a base, or use the gem in a hanging lamp, or place it on top of your staff for a Gandalf-style cosplay. Such a cool project!
Your looks will turn them all to stone, and your snakes will writhe in delight and delicious decadence. The glow from your serpentine hair will only be eclipsed by the toothsome grin you wear as you fill your statue garden with wonders wrought from your deadly gaze.
The Crickit is so easy to use that it’s a great first foray into the world of animatronics and servos. Create your own animated costume just in time for Halloween.


 Your looks will turn them all to stone, and your snakes will writhe in delight and delicious decadence. The glow from your serpentine hair will only be eclipsed by the toothsome grin you wear as you fill your statue garden with wonders wrought from your deadly gaze.