
Researchers from the University of Lincoln, UK, have developed a prototype for a 3D printed, sensor-operated prosthetic arm designed for children under two-years-old. In an article published in IEEE Robotics and Automation Letters, a Soft-Grasp Infant Myoelectric Prosthetic Arm (SIMPA) was created using 3D scanning, additive manufacturing, and an armband-based Surface Electromyography (sEMG) system. “Many traditional […]
Mayo Clinic is Using 3D Printing to Teach the Next Generation of Spine Surgeons
 Resident life is hard. After years of living, studying, and breathing medicine, they are finally one step closer to officially being able to practice. Medical residencies can take three years for primary care physicians, but some surgical specialties require even more training time to develop new procedures without risking lives, sometimes up to seven years. And did we mention that training is not a breeze? Its hard work and some of it is not for the queasy.
Residents need cadavers for educational purposes, but these are difficult to come by. In the United States, only 20,000 bodies are donated to science every year, that’s barely enough to satisfy a population of more than 27,000 residents. Plus you need to add the costs of purchasing them, according to an article by The New York Times, delivery of an intact cadaver costs as little as $1,000, but different specialists seek out specific pieces of anatomy for their work, and individual parts can be expensive, such as a torso in good conditions which can go for $5,000, or a spine for $3,500. With residents needing more than one cadaver to practice on and clinics usually having only limited resources, there is a sensical need to find new ways to educate the next generation of doctors. For William Clifton, Neurosurgery Resident at the Mayo Clinic in Florida, it seemed there had to be another way to train surgeons, so he consulted with an engineer, who was also a friend, and realized that creating 3D printed models for medicine and simulators for resident training could be the solve-all solution.
Clifton had an idea which involved buying an Ultimaker S5 FDM desktop printer with a personal loan, and finding room at home to begin printing out models in his free time, not an entirely easy job considering the young doctor and his wife have four children. But Clifton, one of the first recipients of the Mayo Clinic John H. and Carolyn O. Sonnentag Neurosurgery Residency in Florida, was on a mission, one he became very passionate about, using 3D printing technology to build simulators that can be used to train residents for surgery. Along his path, he ran into Aaron Damon, a researcher and lab specialist at the Simulation Center at Mayo Clinic, and immediately discovered that they shared a desire to change the future of resident training.
His early designs helped him build the training models used today. Since last March, they have developed 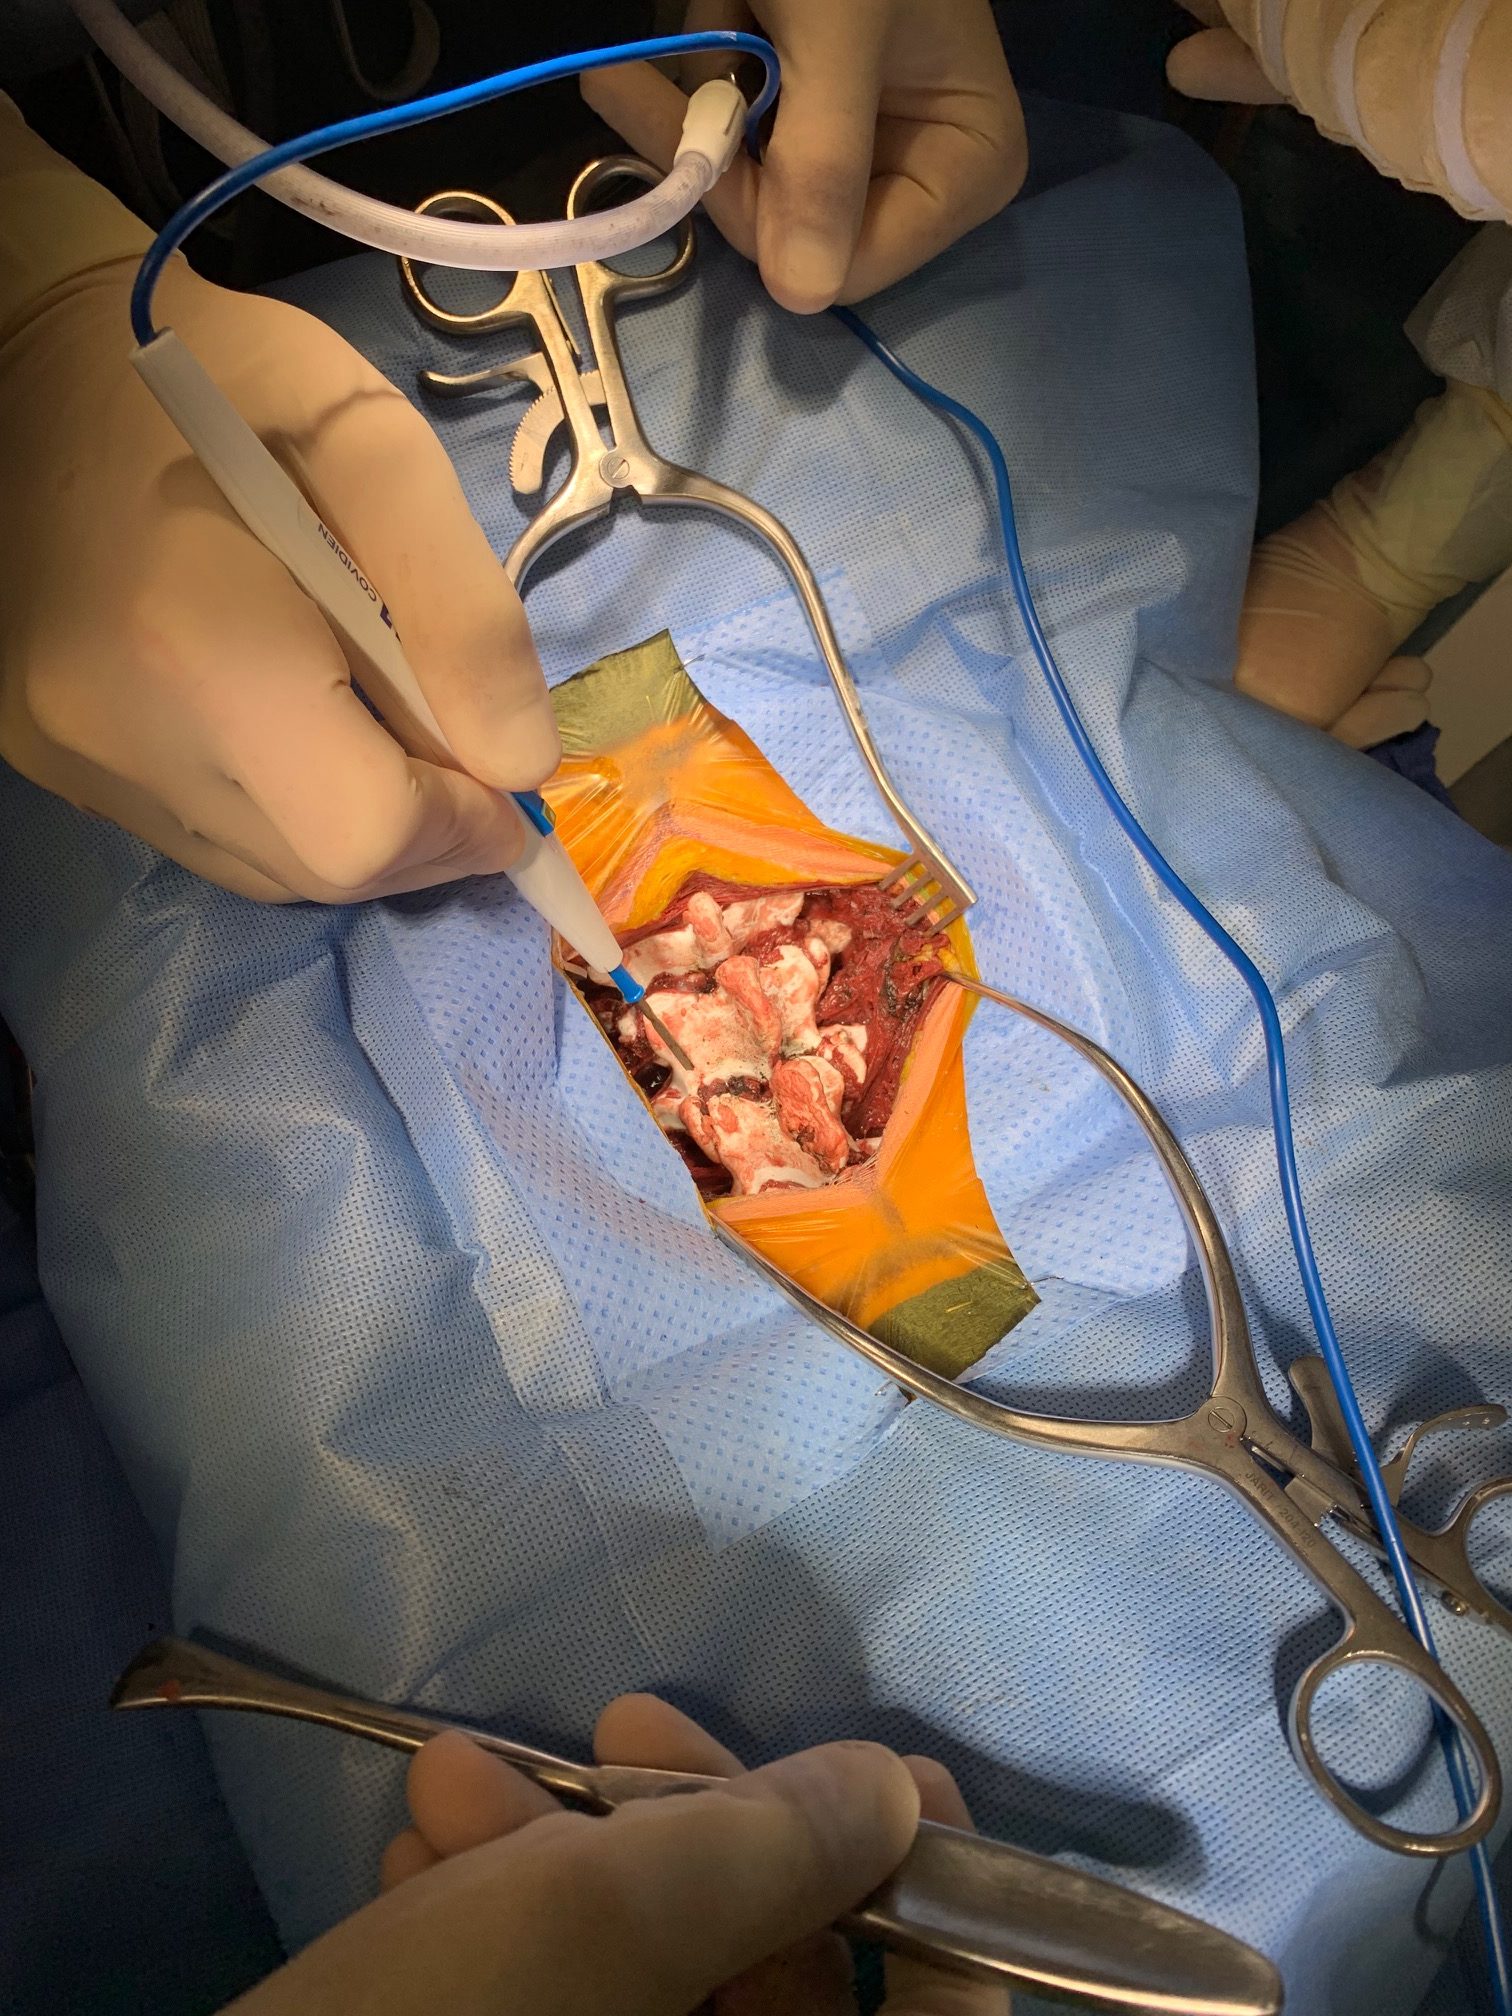 hundreds of their original Biomimetic Human Tissue Simulators, more than 30 peer-reviewed publications, as well as several patent submissions for neurosurgical devices. The Department of Neurologic Surgery also became heavily engaged in planning for dedicated neurosurgery 3D printing space and there is now a materials science laboratory based on the ideas and infrastructure Clifton helped create. Today their lab houses three FDM printers: two Ultimaker S5 and one Raise3D Pro for bigger volumes, such as when they need to print cases of scoliosis (a medical condition in which a person’s spine has a sideways curve) to help residents that need to deal with pediatric scoliosis.
“We are using 3D printed patient-specific models in a certain way to characterize the material properties of actual bone, soft tissue, muscle, ligaments, tendons, and more, exactly how it is in vivo,” said Clifton in an interview with 3DPrint.com. “The big innovation is that our models exhibit the same biomechanics as the human spine or the human skull so that the surgeon can see where the structures are in realtion to each other, bend and move them, as well as watch how the dynamic relations change.”
According to Mayo Clinic, the 3D printing process comprises stripping down information from a patient’s CT scan and converting the image to stereolithography. Based on spatial information, Mayo Clinic can program the printer to create patient-specific models, such as anatomically precise vertebrae. Physician-scientists use these surgical training models in tandem with resources provided by the J. Wayne and Delores Barr Weaver Simulation Center at Mayo Clinic’s campus in Florida. The Weaver Simulation Center partnered with Clifton to share his 3D training models with surgical learners.
The real innovation was simulating human tissue and creating a new polymer for FDM 3D printing of anatomical models that will be used for practicing pre-surgical operations using electrocautery, something that has never been done before. The innovative new polymer chemistry and the 3D printed film should be commercially available soon as Clifton and Damon are in talks with multiple companies through Mayo Clinic Ventures (the business office at Mayo that handles this type of negotiations and commercialization).
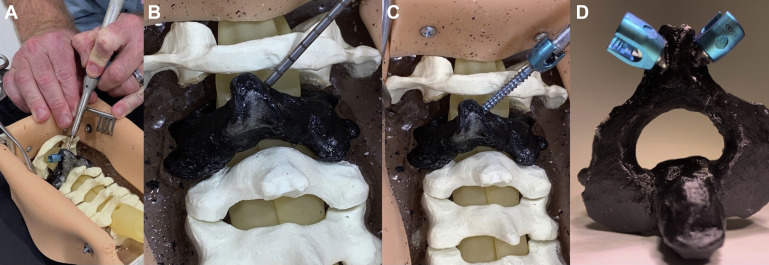
3D printed phantom for teaching neurosurgical trainees the freehand technique of C2 laminar screw placement
“The faculty is ecstatic about this project because the skill of the residents has gone up considerably. Traditionally interns learn on cadavers or during the residency in living people. For example, surgical residents have to learn to place screws into the C2 vertabrae and this is a complex procedure because they are learning to navigate between the vertebral artery and the spinal cord; but with our models they can practice puting in a couple of hundred C2 pedicle screws so that when they go to the Operating Room (OR) they know exactly what to do, because they have done it so many times on such reallistic models,” claimed Clifton, whose specialty as a neurosurgeon leads him to perform surgery on the brain, spinal cord, and peripheral nerves.
Mayo Clinic is all about research, education and patient care, which is why Damon and Clifton are printing their way into teaching future doctors how to take care of the next generation of patients. The duo gets along extremely well, understanding that cooperation and collaboration are one of the keys of their success, which will shortly be used in the other two Mayo Clinics, in Rochester and Arizona. In the short eight months since their adventure began, they have created 14 different models for spine pathologies alone, and now they will begin developing brain models. Damon indicated that they have a brain tumor resection model in the works, “that residents can use to practice the removal of a brain tumor, coagulation of vessels, measuring blood loss, brain manipulation, and even brain mapping, meaning that now we are going into the microsurgery skill set, and not just spinal surgeries.”
“We can print a lot of different pathologies, wereas you are kind of limited with a cadaver. With 3D prinitng you can model specific pathologies after a patient, as well as complex and rare pathologies that residents might not see that often in the OR,” explained Damon. “This is a very specific and universal development at the same time, because we hope that other clinics around the world that barely have any access to cadavers for resident training, can use them and eventually this will improve outcomes and lives all over the world.”
Each simulator costs approximately $50, whereas a cadaver normally purchased for this type of surgery training can run into the thousands, helping Mayo Clinic save thousands of dollars as well. The medical center, which ranks as the best clinic for neurosurgery worldwide, will still get cadavers of course; but Clifton recalled that he spent over $50,000 in just three months, on cadaveric tissue for research and education in 2018. That experience and the reality of the burden of costs behind his training is one of the reasons that sparked the interest in developing a more cost-effective way to practice.
“One of the distinct advantages of FDM 3D printing specifically is that it allows us to build models made from different material compositions and properties. We do this to simulate different disease processes for resident training, and to approach patient care and surgical planning in an individualized way,” said Clifton.
Clifton and Damon want to take this technology to the point where it is streamlined so that residents will have dedicated simulation training. The key is that even before they hit the OR, they have done the procedure at least 10 times, and not just the simplest parts of the procedure, but also all the complex elements. Their hope for the future is that this will become a standardized model in the US.
Damon suggested that a big part of their work has been refining and validating their models until they achieved a high fidelity that is comparable to cadavers. “With these simulators, residents are able to acquire the same skill level as surgeons who have been in the field for many years by high fidelity and cost-effective repeated practice. The support we get from Mayo Clinic also allows our creativity to grow and continue to push the boundaries of innovation in 3D printing.”
Damon suggested that “even in our lab at Mayo, there were up to five surgical residents sharing one cadaveric torso, but now each person can have their own model and countless amount of experience, which is invaluable.” The two experts claim that training on cadavers gives residents one chance of getting a procedure right, while models can be 3D printed hundreds of times.
Three of Clifton’s patients recently benefited from his applications in 3D printing. The unique models contributed to surgical planning sessions, helped to pinpoint precise diagnoses and guided postoperative management choices. The first patient had a congenital spinal deformity, the next had a large metastatic tumor near the lumbar spine, and the third had a rare cyst compressing her brainstem. All three patients have recovered from their successful surgeries because of the combined forces of innovation and surgical skills.
“We are really looking into the education component, trying to obtain a better, safer and cheaper solution for the future. My goal is to teach the next generation of residents to become great spine surgeons.”
[Image credit: Mayo Clinic]
The post Mayo Clinic is Using 3D Printing to Teach the Next Generation of Spine Surgeons appeared first on 3DPrint.com | The Voice of 3D Printing / Additive Manufacturing.
Ultimaker launches S3 3D printer and S5 Pro Bundle – technical specifications and pricing
Award winning desktop 3D printer provider Ultimaker has launched the Ultimaker S3. Part of the company’s S-Line of systems, which also includes the S5, the S3 was selected to debut at this week’s TCT Show in the UK. A new Ultimaker S5 Pro Bundle has been made available too, combining the S5 3D printer with […]
FDA clears Materialise Mimics Enlight for cardiovascular surgery
Belgian 3D printing software company Materialise has received FDA approval for Mimics Enlight, a 3D modeling software for planning cardiovascular surgery. Bryan Crutchfield, vice president and general manager of Materialise North America, said, “We believe in the power of our mission to create a better and healthier world […] We work very closely with teams at […]
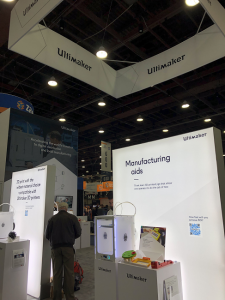
RAPID 2019: Talking 3D Printing and Partnerships with Ultimaker’s Jamie Howard
While attending the recent RAPID + TCT conference and trade show, I also visited the Ultimaker booth to meet with Jamie Howard, the new president of Ultimaker North America. On the first full day of RAPID, when the show floor had officially opened and there were just a few less lectures and workshops, the company announced that Heineken is using its on-demand 3D printing solutions to create functional machine parts and custom tools for the manufacturing line at its Seville brewery in Spain.
“We’re still in the first stages of 3D printing, but we’ve already seen a reduction of costs in the applications that we found by 70-90% and also a decrease of delivery time of these applications of 70-90%. Local manufacturing helps us a lot in increasing uptime, efficiency and output. We use 3D printing to optimize the manufacturing line, create maintenance and quality control tools, and create tools for our machines which help us increase safety for our people. I think there will be even more purposes in the future,” Isabelle Haenen, Global Supply Chain Procurement at Heineken, said in a press release.
Howard told me that he would describe Heineken as a “global customer,” and that Ultimaker was already looking at additional 3D printing applications in the brewery, aside from the ones it’s already working on, like safety and line optimizations and tooling.
The brewery produces multiple brands of beers owned by Heineken, which all adds up to 500 million liters of beer annually. Engineers at the Seville brewery started off using the Ultimaker 2+ about a year ago, but have since switched to a set of Ultimaker S5 machines.
Howard explained that the project partnership with Heineken included the Ultimaker applications engineering team going through the plant to help the brewery “discover and develop applications that could be 3D printed.”
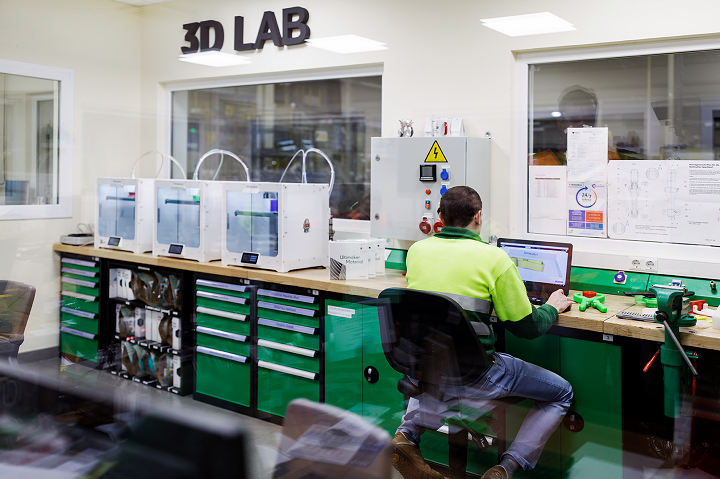
Heineken’s 3D LAB [Image: Ultimaker]
“We offer that to our Enterprise customers as a service to help them accelerate the adoption of 3D printing in the enterprise,” Howard said. “We also facilitated some advanced training in design for 3D printing so that they could actually print the parts and tools we discovered during what we call the ‘site scan’ process, and that enables the transfer of knowledge and the adoption of knowledge necessary to have them be able to do it more on their own.
“So teaching the competency to discover new applications – it expands the catalogue of parts and applications that they can actually 3D print, which increases the adoption and expands the footprint of the printers.”
 Since adopting Ultimaker’s solutions, the brewery has been able to increase its production uptime and save about 80% in production costs.
“The Heineken opportunity is really a good demonstration of the range of applications you can use the Ultimaker platform to do,” Howard said. “Our vision and mission is accelerating the world’s transition to local digital manufacturing, and in a distributed way, where you have the opportunity to leverage our software.
“The open materials platform gives us the flexibility to, at a local level, expand the range of applications with all the same accessibility to the material partners that we have through our Partner Alliance. The Heineken use case includes four categories of applications, from rapid prototyping to safety devices and also jigs, fixtures and tools on the manufacturing line, and also tooling for end-use parts – parts that fail during the production line process – to keep the uptime of the facility higher.”
I asked Howard what types of materials Heineken was using, and he showed me a device made out of Tough PLA material that is used to keep bottles from falling off the line.
“It’s light, and yet has the strength to be able to handle the weight from the bottle,” Howard explained.
“The tool that they were using before was a lot more rigid and rough, and it was sometimes causing the bottles to come off the line.”
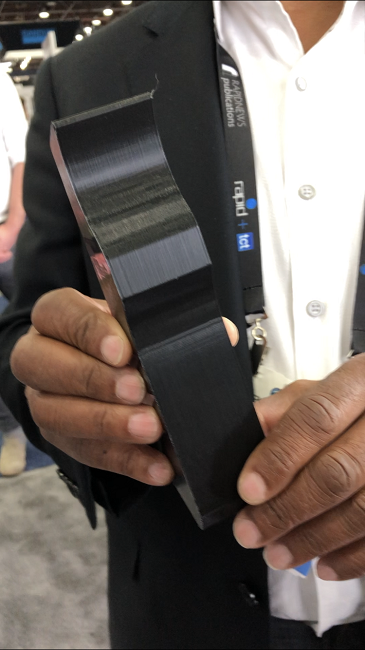
The 3D printed version of the tool causes less friction on the bottles, which means a higher yield for Heineken as less bottles are breaking. It also saves the brewery time and money, as they can fabricate the tool on-site rather than send the design away to a third party for manufacturing. Howard also told me about one of the 3D printed safety device that’s been implemented in the brewery.
“There was a piece of equipment that required maintenance, and there was a safety latch that they built to prevent the machine from accidentally coming on during the maintenance process, to protect the workers from any injury. So the part that was printed goes over the power [switch] so you can’t inadvertently turn that machine on during the maintenance process.”
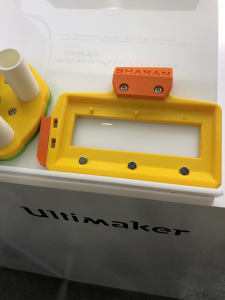
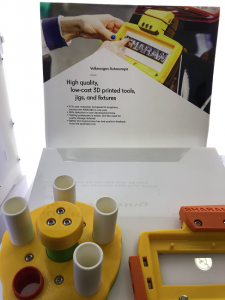
We then moved on to some parts 3D printed by other Ultimaker customers, including one for Volkswagen Autoeuropa. The tool, pictured above, was used on the manufacturing line to keep the wheel assembly from getting scratched. The tool has multiple drill guides to keep the wheel from falling off the lug nuts while it’s being screwed on, and Volkswagen was able to save a lot of time and money in upgrading to this 3D printed tool from the one they were previously using from a molding company, which would often break.
“We redesigned it…before, they were molding it in one piece. Our engineers helped them to discover that if they designed this differently, they could do it in a way that, if this part breaks, then you can just print that part, you don’t have to take the whole thing and throw it away,” Howard explained.
“All the principles of lean manufacturing are addressed in this particular piece.”
This new 3D printed version of the part reduces the amount of the time the tool was unavailable due to breakage, keeps productivity up, and also protects the wheel, so that the yield of the assembly at the end of the line is higher overall.
Take a look at more of my pictures from the Ultimaker booth at RAPID + TCT below:

Discuss this and other 3D printing topics at 3DPrintBoard.com or share your thoughts in the Facebook comments below.
[Images: Sarah Saunders, unless otherwise noted]
Heineken embraces Ultimaker 3D printing technology
Dutch brewing company Heineken is using Ultimaker 3D printing technology to produce functional end-use parts for its beer production line in Seville, Spain. With the aid of Ultimaker S5 printers, Heineken is now able to print its own parts on-demand, reducing the need for outsourcing. The company claims this increases production uptime and saves around 80% […]
2019 3D Printing Industry Awards: Personal 3D printer of the year (FFF) nominations update
As film nominees Bohemian Rhapsody, Black Panther and alike fight for Best Picture at this year’s Oscars, 3D Printing Industry continues to gather nominations for this year’s 3D Printing Industry Awards. Of the 20 categories covering the additive manufacturing sector, “Personal 3D printer (FFF) of the year” has welcomed a plethora of nominations. The following […]
Interview with Dynamism and Desktop Metal on the Ultimaker S5 and DM Studio System
Dynamism has been a retailer of 3D printing technology for over two decades, and the company always does well at keeping up with the latest, most talked-about 3D printers. Currently, one of its featured products is the Ultimaker S5, which was released last year and designed for industrial 3D printing. Another is the Desktop Metal Studio System, released in 2017 and designed for metal 3D printing in an office setting. Both systems exemplify two of the largest trends in 3D printing, more sophisticated desktop systems and binder jetting metals. Dynamism itself is at a crossroads as well. We’ve been talking to resellers around the world these past weeks to figure out what the 3D printing market is like for resellers today. What is a reseller to do? Do they move towards industrial or wait for the consumer market to grow? Dynamism gives us some interesting insight that points to them not only becoming more of business-focused firm but also looking at being more of an integrator.
Both the Desktop Metal and Ultimaker 3D printers have made a big impact on the 3D printing industry since their respective releases, and Dynamism is excited about their futures as well as its own. Recently both were showcased at CES, which wrapped up last week. We were able to talk with Dynamism CEO Douglas Krone about the Ultimaker S5 and its role in manufacturing.
Do you believe that the S5 will be used for manufacturing? What is holding it back from manufacturing now?
“On this point, I’d to point out that both the Ultimaker 3 and S5 are already widely used in manufacturing globally, for producing tools, jigs and fixtures.
To talk about end parts, are early use cases of customers printing end parts used in low volume products like machines or robots—grippers on robotics is a prime example. In these cases companies have looked at their BOMs (Bill of Materials) and found non-critical parts, often replacing metal with advanced 3D printed plastic. This provides short terms savings, but an even larger long-term advantage: far more efficient spare part production, though the life cycle of the product, and beyond. (Even after products are discontinued, companies must maintain a spare parts inventory—usually for years.)
I think that’s where Ultimaker’s Open Material strategy is a big win. These machine/robot producers require specific materials from leading chemical companies (certification, procurement risks) not from 3DP producers themselves (with the resulting lock in). Having said this, Ultimaker is focused prototyping, tools, low volume production and spare parts made on location.”
Do you foresee people using Ultiwalls (clusters of desktop printers) to manufacture parts? Will you need to automate more things on the printer or Ultiwall? Such as part removal?
“The current S5, and what we expect to see next from Ultimaker (the next-generation of ‘concrete floor’ machines), can be deployed in wall-formations. (And Cura’s CuraConnect supports that use.) But space, health, and safety requirements differ so much per factory and country, it would not make sense for Ultimaker to do a standard ‘Ultiwall’ product. You can expect 3D printing solutions providers like Dynamism to create these types of customized arrangements for larger customers.”
What are instances of Ultimaker adoption in the automotive industry?
“We see almost every automotive company, not just OEMs, but also in second, third and fourth tier now using Ultimaker. Uses are part development, tool design, and tool production. Ford and Volkswagen have especially impressive showcases.”
Are there any product announcements or other news from the show?
“The next news we expect from Ultimaker will be later this year. Look for innovative accessories that will work with all existing Ultimaker S5s, and make a great 3D printer even better. And of course Ultimaker is always iterating and improving Cura.”
To learn more about Desktop Metal’s Studio System, we spoke with Desktop Metal VP of Product Larry Lyons.
How well is the Desktop Metal Studio System doing?
“As our office-friendly systems are making their way to customers throughout the country, we recently announced the launch Studio System+ and Studio Fleet which together offer enhanced features for metal prototyping and low volume production. Engineers and designers who are looking to push the limits of metal 3D printing with small parts or parts with fine details can now achieve even higher-resolution, with a customizable system configuration for greater process efficiency and throughput right on the shop floor. The new Studio System+ retains all the key features of the original Studio System with advancements that allow customers to build to scale and offer high-resolution printing. Studio Fleet adds a custom-configurable, in-house metal 3D printing solution to support a variety of production scenarios and scales for a wide range of low- to mid-volume applications across industries. For the first time, on-demand metal 3D printing will be able to deliver accessible and scalable manufacturing that adapts to diverse business needs, part requirements, production volumes and cost constraints. We have received hundreds of reservations for our Studio System and are now shipping in volume to our customers in the USA. The Studio System is available in 45 countries, and we expect to begin international shipments in mid-2019.”
How well (and how) does the system compensate for shrink in all directions in different part sizes?
“Shrinkage is dependent on a number of factors, including alloy used, geometry of the part and size. As part of the Desktop Metal design, printing and sintering process, our software analyzes all of the factors that impact the approximate 18-20 percent shrinkage and automatically adjusts scaling factors in each dimension to yield the intended part size.”
How much can one Desktop Metal Studio System make?
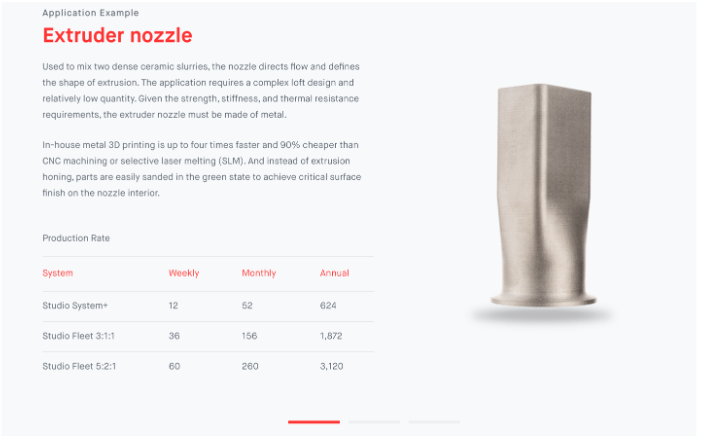
“With one Studio System printer, 12” x 8” x 8” is the maximum build volume, so any part that fits in that box can be printed. The Studio printer has a maximum print rate of 1 in 3/hr so the throughput of parts printed depends on the volume of the part you are printing. The debinder and furnace have the same build volume, but offer adjustable trays to batch process many parts at once, which is exemplified by our Studio Fleet offering.
For customers needing a higher throughput, Studio Fleet is a custom-configurable solution for in-house metal 3D printing—supporting a range of applications for low to mid-volume production. Built to scale, it leverages Studio System+ technology—including a software-controlled workflow and stackable shelving for batch processing—for the rapid production of high-quality, complex metal parts. For the first time, on-demand metal 3D printing will deliver accessible and scalable manufacturing that adapts to diverse business needs, part requirements, production volumes, and cost constraints. The Studio Fleet is available to be built in two configurations:
-
3:1:1 – With 3 printers + 1 debinder + 1 furnace, customers can realize a 300 percent improvement in throughput for only a 50 percent increase in system cost.
-
5:2:1 – With 5 printers + 2 debinders + 1 furnace, users will be able to realize 500 percent improvement in throughput for only a 100 percent increase in system cost.”
For automotive, what kinds of parts are your customers targeting?
“Our automotive customers are targeting parts across all stages of product life cycle. For Studio, most applications are in the product development, prototyping and tooling (jigs/fixtures/molds) areas where lower volumes and quick turnaround times match well with the Studio’s capabilities. For the Production System, which will be available to ship in 2019, early applications we are seeing are in the replacement / aftermarket parts, customization and serial production where volumes requirements range from mid-to-high throughput. Many customers are developing end-use parts that will appear in new cars that have yet to hit the market and will deliver higher performance at a lower cost than the traditional manufactured alternative in today’s cars.”
How much faster is it than MIM? How much cheaper is it than MIM?
“For the Studio System, the time it takes to produce the initial part is 2-3 days. This compares to several weeks or even months with MIM due to the mold that needs to be designed and manufactured before the MIM process can begin. This allows customers to dramatically accelerate the time it takes to get an initial prototype for testing and validation work compared to the traditional MIM process. It also allows customers to iterate on their design and test each iteration before ordering the mold to be manufactured, which can save thousands in costly mold changes if a change is needed.
Because of the expense associated with manufacturing the mold in MIM, most MIM companies will not bid on any job that is less than 10,000 units due to the mold cost making the parts too expensive. The Studio System provides a more cost-effective solution for low-to-mid volume applications in the MIM industry, especially when leveraging the throughput and cost advantages of a Studio Fleet installation.”
What kinds of part sizes can I reliably print with the Desktop Metal Studio?
“With the Studio System printer, 12″ x 8” x 8” is the maximum build volume, so any part that fits in that box can be printed. In addition, we recently introduced a new swappable high resolution printhead with supporting software profiles allows for smaller parts with finer features and animproved surface finish. This creates opportunities for new geometries and applications with the ability to print parts similar to those produced with metal injection molding (MIM)—parts featuring sintered voxels as tiny as 240um in XY by 45um in Z, which is smaller than a grain of table salt—making it ideal for a variety of applications such as parts for consumer electronics, medical devices and automotive.”
Discuss this and other 3D printing topics at 3DPrintBoard.com or share your thoughts below.
Long Term Home Review of Ultimaker’s New S5 Professional 3D Printer
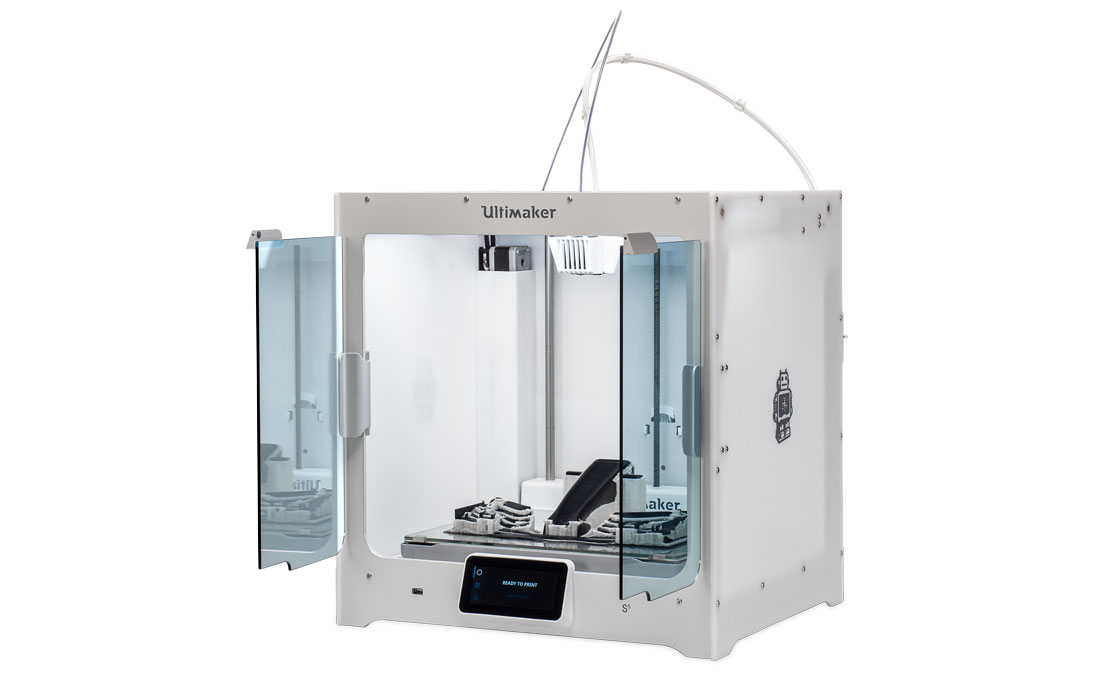
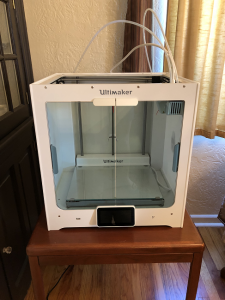
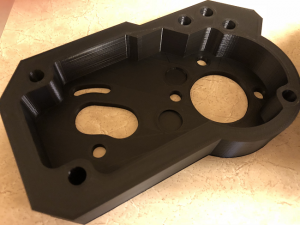
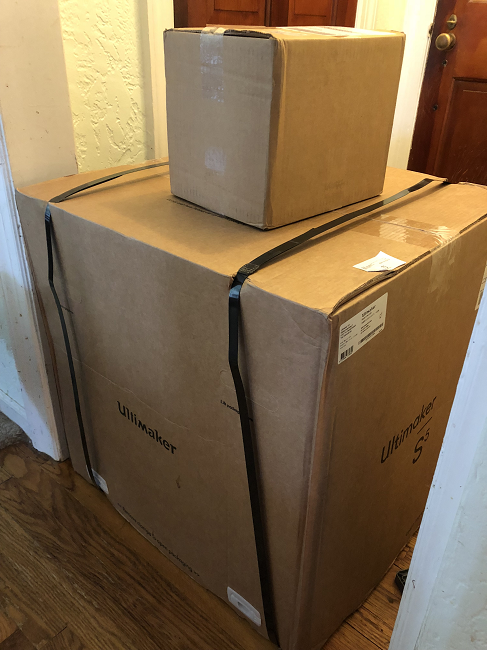 At Hannover Messe this past April, desktop 3D printing leader Ultimaker introduced its first new 3D printer in two years – the S5, an expansion to its professional 3D printer portfolio. Ultimaker reseller Dynamism showcased the new S5 at RAPID + TCT that same month, as did Ultimaker itself. The desktop system, with a 330 x 240 x 300 mm build volume, has all kinds of great features, including dual extrusion, an intuitive touchscreen integrated into the front panel, and an enclosed front with tinted glass doors…so imagine my excitement when I learned that Dynamism would be shipping me a review unit!
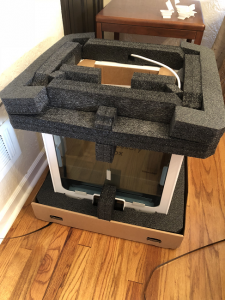
Full disclosure – while I’ve completed 3D prints before at Dayton’s 3D printing bar, this would be my first time setting up and operating a 3D printer all on my own. So when the gigantic box, and a smaller one of extra filament, arrived on my porch, I was a little…okay, a lot…intimidated. In fact, I was so concerned about not having anything pull focus from the unboxing and set-up process that the gigantic carton just sat in my dining room for a few days until the opportune moment. At 3DPrint.com we do not charge money for reviews. This is my own experience and my own opinion.
I’ll say this – the S5 was extremely well packaged. I was amazed at the sheer amount of used packing material I had at the end of the process, but also not surprised; I was dealing with precious cargo, after all. Another thing I will say, with complete honesty, is that while I write about technology all day every day, handling it is not my personal forte. So the fact that I was able to get this machine out of the box and set up with relatively few hiccups means that anyone can. The provided instructions were easy to follow, and if I needed more information, I just checked out the Ultimaker Resources.
The S5 came with a test print and a box of hardware accessories and tools, including two print cores, several nozzle covers, the glass build plate, a 2 mm Hex screwdriver, a glue stick, spool holder with a material guide, XY calibration sheets, a power cable, and a USB drive. The 3D printer also came with Tough PLA and PVA support material, the latter of which I am in love with…but more on that later.
Keeping my cats and dogs away!
I found it fairly straightforward to set up most of the hardware, but I had a bit of trouble using the clips to secure the Bowden tubes; however, I think that was more user error than anything else. I had no issues installing the Cura software, or updating the firmware once the 3D printer was fully up and running, though it took me a couple of tries to get the 3D printer to connect to my WiFi. While there were no problems loading the materials, I had a harder time installing the BB 0.4 print core. I think this was mainly due to the fact that I was so insanely aware of just how expensive this machine was and was treating it with kid gloves, and a firmer hand is sometimes required when installing hardware. Luckily, the more I used the 3D printer, the more comfortable I became.
Speaking of actually using the 3D printer, when the time finally came to test it out, I got a little too excited and forgot about a very important step: calibration. I very quickly realized that there was a problem, as the print was stringing and not adhering to the build plate, even though I’d applied a thin layer of glue, and stopped the job about three minutes in. While I was sad that my first print was far from a resounding success, I resolved to make it right.
 I again waited a bit to try calibrating the S5, partly because I was busy but mainly because I was intimidated by it all over again. But once I took the time to sit down and figure it out, the calibration sheet that came with the 3D printer was a breeze to use, and I was on my way once again, ready to try 3D printing something that wasn’t just the calibration grid of straight lines.
My first successful attempt was one of the two sample prints that came on the included USB drive, which printed very quickly. I love the intuitive touchscreen on the front of the S5 – it’s very user-friendly, and I quickly figured out how to pull up a rough image of what the print would look like once it was complete, so I’d know that it was printing correctly. Once I pried the tiny print off of the plate (a very easy task thanks to a layer of glue underneath), I put it in a small container of water and let it sit overnight, so I could see how long it took to dissolve the PVA support structures.
I loved the Ultimaker water soluble PVA. It was just so easy – pop the print in water and let the material work its magic. It’s possible to simply crunch and pull the supports off by hand as well, but the immediate effect wasn’t as clean. Obviously, the larger and more complicated the prints were, the longer I had to let them sit in water, and I learned that unless I felt like getting gummy residue stuck to my fingers, it was best to just wait until the supports had 100% completely dissolved. It was also a little tough cleaning the build plate, as the PVA sort of bonded with the glue and became hard to scrub off. But I followed the advice of the Dynamism team and got a soft, non-abrasive sponge to help with this task.
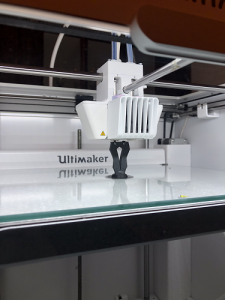
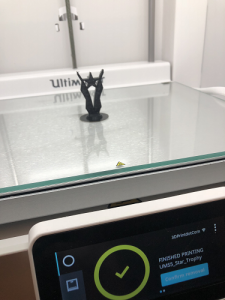
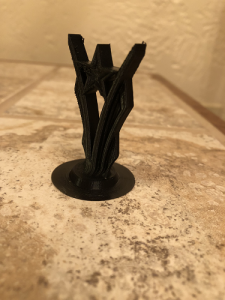
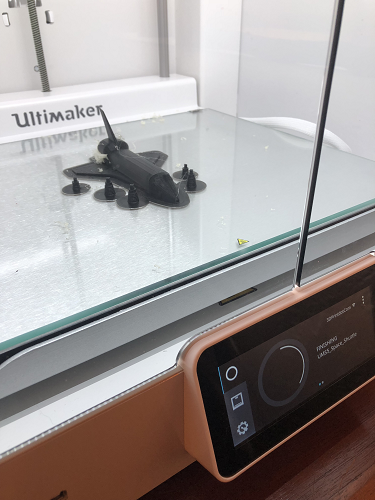
My next two prints were included Cura files: a star trophy and a rocket ship. Both of these were fairly straightforward prints, and gave me a chance to try out an extra form of bed adhesion with the addition of a brim; I can tell you now I much prefer a skirt, but I figured I would just give it a shot.
 The first print I completed that wasn’t already included in Cura or the USB drive was a Harry Potter Logo by Cults3D user 3DNaow, which turned out great. It’s definitely my favorite 3D print from this review, mostly because I love Harry Potter. Because I majorly scaled it down, the print took a lot less time to complete as well.
I’m going to take a moment here to rave about the remote monitoring. I didn’t download the app, but I did not have the S5 set up in my office. I live in an older Cape Cod house, and my office is in the half story upstairs, which doesn’t have great ventilation. So I decided it would be better to put the 3D printer on a table in my dining room, which is in a much more open part of the house. But this meant that I couldn’t keep my eye on it during the day. Having the option to monitor my print jobs from upstairs, thanks to Cura and the camera located above the auto-leveling bed, provided me with peace of mind.
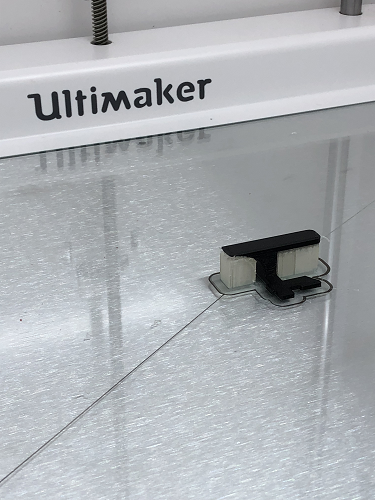
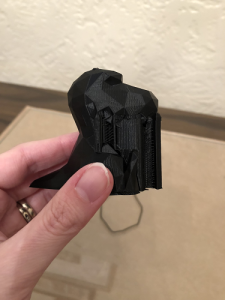
I would have called this adorable Low Poly T-rex by Thingiverse user slavikk my favorite, had I not screwed it up so badly. I had been messing around in the custom settings in Cura, just to try and put the system through its paces by changing up things like the infill and layer height, and I somehow managed to change the support material from Extruder 2 – the Natural PVA – to Extruder 1 – the Tough PLA. It took me about a quarter of the way into the print to realize my mistake, and by then it was too late. So this dino is still pretty cute, but I think he will be much better-looking when I take the time to get an X-Acto knife and cut away the black supports from the front.
![]()
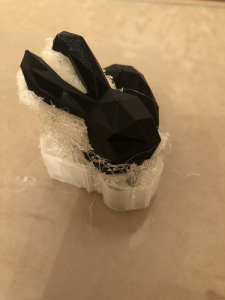
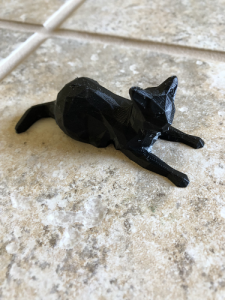
In completing my small collection of low poly animals from Thingiverse, I chose to 3D print a Low Poly Cat – another print by slavikk – and a Low Poly Stanford Bunny by johnny6. I put both the cat and the bunny on the build plate at the same time for a 7.5 hour print. This is where things started to get a little rocky.
About four hours in, an error message popped up on the touchscreen: “One material appears to be empty. Please change it to a new material to continue printing.” I wasn’t home (this became the only time I left the house during a print job) and my husband texted me about it, but said that it didn’t appear that the filament was empty. Once I got home and took a look, it was definitely very obvious that neither filament was empty, so I just took a shot in the dark and pressed ‘Ok’ below the error message to confirm that I had changed to a new material, even though I hadn’t, just to see if it would start up again.
I got lucky and the prints resumed…for about 20 minutes. Then, the same thing happened again, I tried the same fix, and things continued on, though the support material was looking pretty stringy. About an hour later, the connection went out and I lost the monitor view upstairs, but the S5 just kept rolling along.
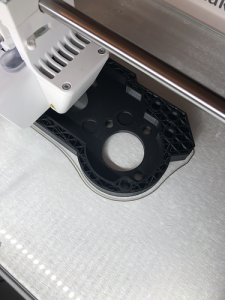
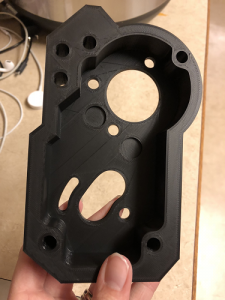
My next print was an STL file that the Dynamism team had sent me of a generic sample spare part, which took about 15 hours to print, with no supports, when scaled to 100%. It was a good illustration of just how important professional 3D printers, like the S5, can be for businesses in need of prototypes or models. The level of quality and accuracy of the prints produced on the S5 is just stellar, in my opinion. Maybe you should take my opinion with a grain of salt, because as I noted earlier, I’m not an expert on using 3D printers, but that’s up to you.
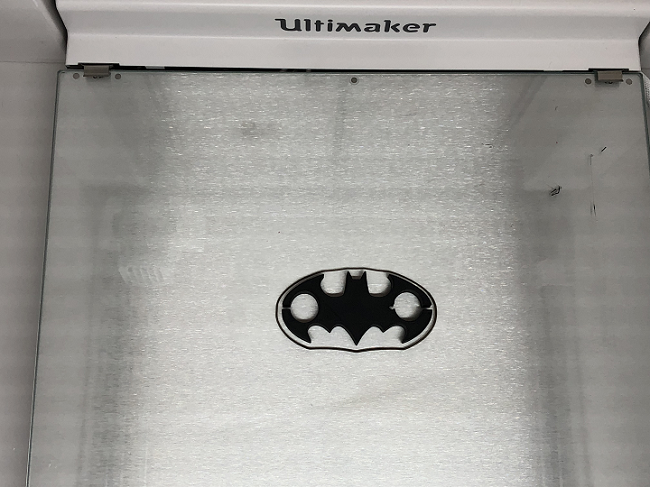 Realizing that not a single one of the items I’d 3D printed so far were at all useful, I went back to Thingiverse and found this batman earphones holder by itlaor, which quickly printed without any supports and is now being used by my husband, with great appreciation, to keep his earbuds from getting tangled up all the time.
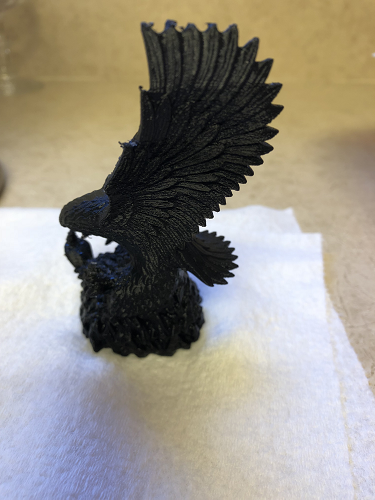
I also decided to 3D print this very detailed Eagle Sculpture by Thingiverse user 3DWP for my husband, who is an Eagle Scout and has a small collection of eagle figurines and sculptures. With this one, I couldn’t get my computer upstairs to connect to the 3D printer downstairs. I turned the WiFi off on both the computer and the printer and then immediately back on, and still nothing. So in the interest of saving time, I simply saved the STL file to the USB drive and printed it that way. About 10 hours in to the 16.5 hour print, I got the same error message I’d received with the low poly animals, and “fixed” it the same way. It seemed to only occur on prints with PVA supports for some reason.
I enjoyed trying out the Ultimaker S5 3D printer from Dynamism. I had it for far longer than I planned, but thoroughly enjoyed using it. What I knew already from writing about this technology daily, and have now had the chance to truly experience for myself, is that 3D printing takes time, which is something I don’t always have in the evenings – I do a decent amount of church and theatre volunteer work. So I kept searching for quick print jobs to try with the S5 because I just do not often have 15-24 hours where I am at my house the entire time. But as for the quality and ease of use – that was top notch.
The Ultimaker S5 is available for purchase on the Dynamism website starting at $5,995.
Discuss this and other 3D printing topics at 3DPrintBoard.com or share your thoughts below.
[Images taken by Sarah Saunders for 3DPrint.com]
New 3D Printing Safety Enclosure and Filtration System Designed for Ultimaker 3D Printers and XSTRAND
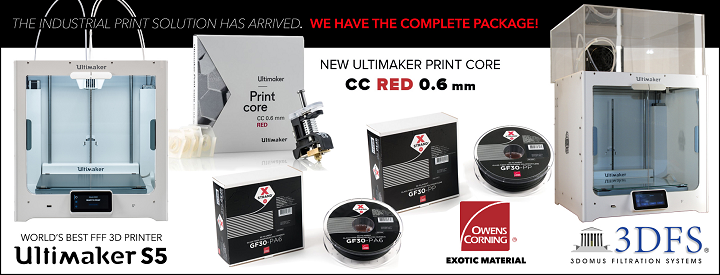
The Ultimate 3D Printing Store (U3DPS), based in Florida, was one of the first resellers in the US to carry engineering-grade XSTRAND 3D printing filament by Owens Corning. This exclusive material is part of the Ultimaker ecosystem, as it can now be used with the Ultimaker S5 thanks to the CC Red 0.6 print core, which Ultimaker just released on Tuesday. But more good news has just been announced for these three, in the form of a single, powerful solution for industrial 3D printing.
“We are thrilled to announce that our exclusive 3Domus Filtration System (3DFS), which we designed specifically for the Ultimaker S5, will be available the same day,” said Roy Kirchner, Founder and President of the Ultimate 3D Printing Store.
 The combination of the Ultimaker S5, XSTRAND filament, and the 3DFS safety enclosure is sure to have many industrial users reaching for their wallets. 3DFS is actually the first safety enclosure designed specifically for use with XSTRAND filaments and Ultimaker 3D printers.
“Ultimaker is rightly regarded as making the world’s best FFF 3D printers. And Owens Corning has created a filament that will revolutionize 3D additive manufacturing. Now, our company is debuting the first, and only, safety enclosure for the Ultimaker S5, which we believe not only completes this luxury machine but allows XSTRAND to print to its fullest capacity,” said Kirchner.
The enclosure, with U3DPS says is the first of its kind, was designed so Ultimaker S5 users could 3D print with more exotic filaments, such as XSTRAND, without contaminating their work space or damaging the machine.
The 3DFS safety enclosure, which Kirchner says is also compatible with the Ultimaker 3, Ultimaker 3 Extended, Ultimaker 2+, and Ultimaker 2 Extended 3D printers, comes pre-assembled, so you can take it out of the box and put it right to work. The enclosure comes with an optional activated carbon and HEPA filtration system, and offers “maximum protection” with no screws necessary to attach it to the 3D printer.

Safety and protection during 3D printing is a big deal. When 3D printers are used in places where a lot of people are around, like business and schools, there’s always a danger of inhaling small particles and potentially dangerous fumes. Last month, 3DPrint.com spoke with the National Institute for Occupational Safety and Health (NIOSH), which is the part of the US government that researches the safety of workers in many different professions.
“If a risk cannot be eliminated, engineering controls such as a fume hood or local exhaust ventilation (a system that specifically ventilates the printer rather than the air in a room) with HEPA/carbon filtration would be the next preferred method to reduce emission levels. Some 3-D printers are now being sold with built-in filtration units,” the group of NIOSH researchers told us last month when asked how people should best protect themselves from potential 3D printing risks.
“In one workplace, NIOSH researchers showed that an appropriately designed and operated local exhaust ventilation with HEPA/carbon filtration reduced the amounts of particles and chemicals in air.”
![]() According to Kirchner, U3DPS was inspired to develop a safety-conscious and attractive add-on unit because none of the 3D printers by Ultimaker currently come with their own factory-built enclosures.
According to Kirchner, U3DPS was inspired to develop a safety-conscious and attractive add-on unit because none of the 3D printers by Ultimaker currently come with their own factory-built enclosures.
Kirchner explained, “Anyone who works with one of these high-end printers, especially in an enclosed environment, should have this enclosure, not only to protect their machine from outside contaminants and to maintain internal thermal management, but also to keep their work environment free of fumes during the printing process.
“Our clear enclosure fits over your Ultimaker printer like a glove, forming a seal, while still allowing full view of the printing process.”
The company’s new Ultimaker safety enclosure can be purchased with or without the activated carbon and HEPA filtration system. Each 33DFS unit comes pre-drilled, so it can easily attached to an Ultimaker 3D printer. But in addition to offering us a safer way to use our 3D printers, the best news is that the safety enclosure is relatively affordable…maybe not for someone like me, who hates spending large amounts of money on fancy equipment (thus, why I do not own a 3D printer), but for those who spend a lot of time 3D printing, it’s worth the cost.

The enclosure can be purchased without the filtration system for a price between $179 and $379, while including the 3DFS with the enclosure will cost, depending on the 3D printer, anywhere from $299 (Ultimaker 2+) to $499 (Ultimaker S5). Additionally, you can also purchase the activated carbon and HEPA filtration system separately for just $129; replacement filters are only $29 each. But if you’re interested, you’d better act fast – the company expects that the limited quantity of enclosures currently available for purchase in its initial production run will sell out fast. Visit the Ultimate 3D Printing Store website to purchase yours today.
Discuss this and other 3D printing topics at 3DPrintBoard.com or share your thoughts in the comments below.
[Images provided by The Ultimate 3D Printing Store]