Dutch Railways Embraces 3D Printing with Help From DiManEx

Earlier this year, the Dutch Army signed a contract with Dutch company DiManEx to produce 3D printed spare parts. Now DiManEx is extending its services to Dutch Railways. The railway system has been experimenting with 3D printing for a while now and is looking to optimize its supply chain by 3D printing spare parts as needed, rather than keeping them in stock.

The partnership has actually been in place for several months. It initially allowed Dutch Railways to learn about and experiment with the possibilities of 3D printing and the quality of the parts that it could produce. The railway system selected and re-engineered a few parts, which were then 3D printed by DiManEx to the specifications provided by Dutch Railways. Mandatory quality control tests were then performed, and the approved part was then used in trains.

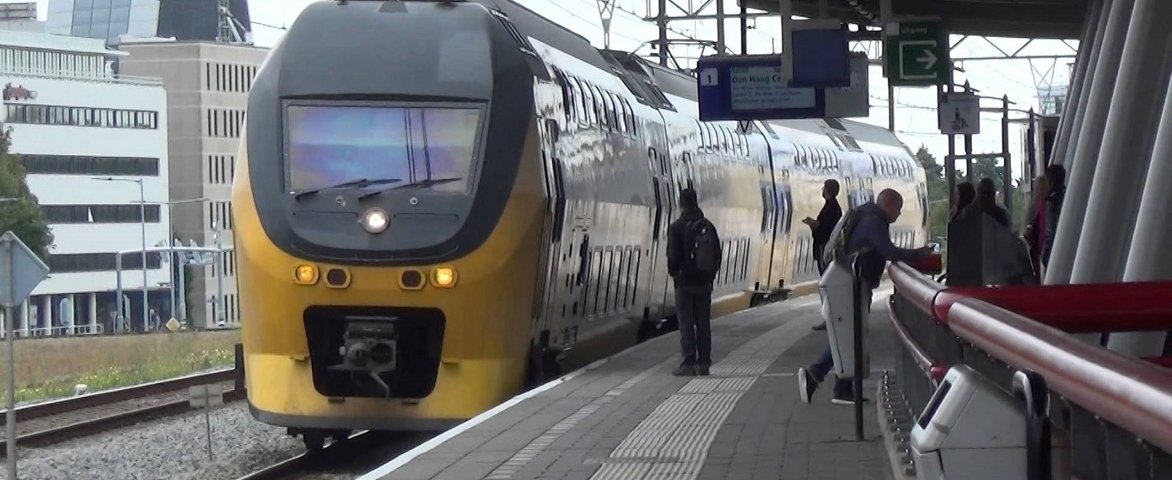
[Image: Dutch Railways]

After the first phase of the partnership, the automated digital supply chain workflow provided by DiManEx was implemented, and Dutch Railways has expanded the number of spare parts to be 3D printed. There are a number of benefits to the system: Dutch Railways will now be able to avoid long lead times by 3D printing parts on demand, and will have to spend less money and space on keeping spare parts in stock. It will also be able to keep legacy parts in digital form, ready to be 3D printed if needed.

“Today, our main risk in the spare parts supply chain is obsolescence,” said Joris van de Sande, Dutch Railways’ Supply Chain Operations Strategic Buyer. “With DiManEx, we are able to digitize our supply chain, mitigate risks and combat obsolescence. They are an ideal partner to help us build the supply chain of the future.”

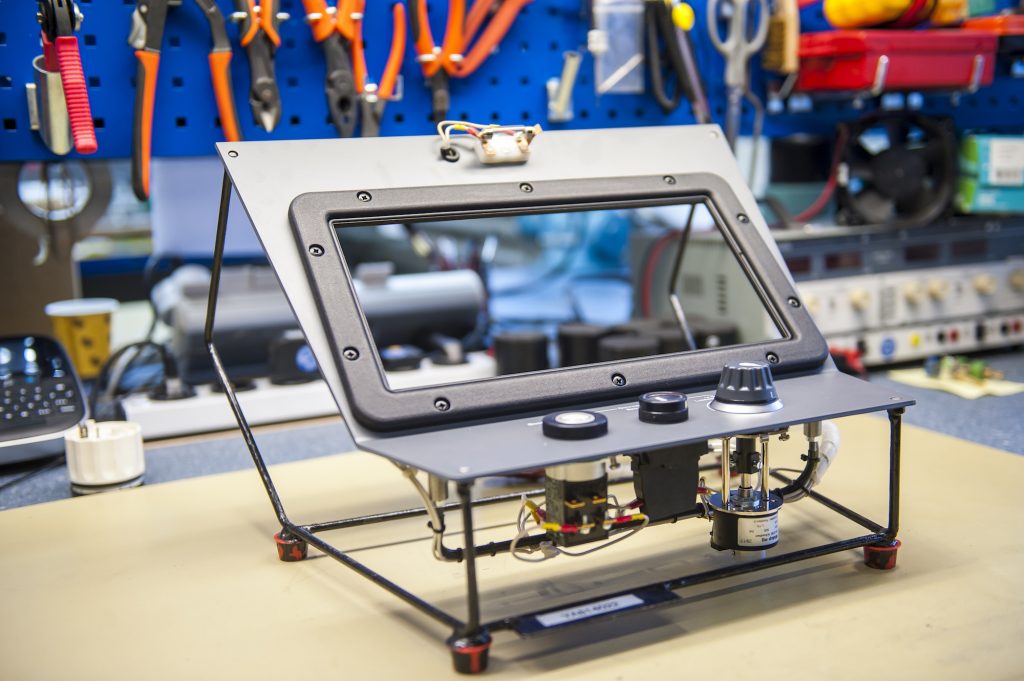
A spare part 3D printed for Dutch Railways by DiManEx [Image: DiManEx]

Based in Utrecht, DiManEx was formed for the purpose of helping organizations optimize their supply chains through 3D printing. It provides what it describes as “a global enterprise platform for distributed 3D manufacturing,” which takes the form of a cloud-based service. Its software allows customers to identify the right parts for 3D printing, and once the parts are selected, the company 3D models and prints them. DiManEx then sends a sample part to the customer for approval. Once the part is approved for on-demand manufacturing, authorized users can then easily place, track and report on orders.

“We are excited about the cooperation with Dutch Railways, and proud of the fact that we deliver 3D printing knowledge not as a goal, but as a means to create an agile supply chain that manages any unpredictable demand,” said Alexander Bours, DiManEx Co-founder.

Railways around the world have been using 3D printing to create parts for trains; while the railway industry hasn’t been as talked-about as, say, the aerospace or automotive industries in terms of its use of the technology, it has still been impacted plenty by it. The 3D printing of spare parts is an excellent way for the industry to take advantage of everything that 3D printing has to offer, especially with the risk of older parts becoming obsolete. The partnership between DiManEx and Dutch Railways will help the railway system to modernize its operations, as well as to save time and money.

Discuss this and other 3D printing topics at 3DPrintBoard.com or share your thoughts below. 


TU Delft Researchers Develop Heat Accumulation Detection Procedure for SLM 3D Printing

Selective Laser Melting (SLM), a powder-based 3D printing technique also known as Laser Beam Melting or Laser Powder Bed Fusion, has been used to process metal in a variety of sectors, such as automotive, medical, and aerospace. Because this AM method offers excellent freedom of form, it’s a perfect enabling technology for designs that are topology optimized; this means they have a complex layout, but still offer a superior performance. But, SLM 3D printers don’t always realize the dimensional accuracies that are necessary for very precise components.

Because of laser-induced heat, SLM 3D printed layers go through stages of rapid heating-cooling, which can cause inaccuracies, such as unwanted mechanical properties and poor surface finish. If certain design features, like thin sections and overhangs, that can cause local heat accumulation could be detected earlier in the design stage, this issue could be avoided more easily. To do this, next generation topology optimization (TO) methods need to be developed.

A group of researchers from TU Delft recently published a paper, titled “Towards Design for Precision Additive Manufacturing: A Simplified Approach for Detecting Heat Accumulation,” focused on a simper heat accumulation detection procedure – very important for creating a TO scheme that can account for thermal 3D printing aspects.

“In order to address thermal aspects of AM into a TO framework, an appropriate AM process model is required. This becomes problematic because a high fidelity AM process model is computationally very expensive and integrating it within a gradient-based TO framework becomes even more cumbersome,” the researchers explained in the paper. “Therefore, in this research, a physics based yet highly simplified approach is proposed in order to identify zones of heat accumulation in a given design. The computational gain offered by the simplification, makes it feasible to integrate the heat accumulation detection scheme within a TO framework.”

Definition of overlapping cells for heat accumulation detection.

In addition to being used in a TO process, the team’s new procedure can also be used to independently analyze 3D printing designs, manual design improvements, and even determine the best build orientation.

Equivalence of a 3D body (A) to a simplified body (B) with equal thermal capacitance
and conductance.

Two simplifications made in this research can be used to help lower the computational cost that’s associated with the thermal analysis of 3D printable designs. The first, “motivated by the fact that the local geometry of only few previously molten layers” can significantly effect the new layer’s initial cooling rate, is to perform thermal analysis in the vicinity of the 3D printed layer being deposited.

The second is to use a steady, rather than transient, state thermal response to predict heat accumulation.

“For this purpose, a physics based conceptual understanding is developed which enables estimation of spatially averaged transient thermal behavior of a local geometry just from its steady state response,” the researchers wrote.

A structure’s topology can influence its internal heat flow; as such, different geometrical features in an AM design can obstruct or facilitate heat flow during the 3D printing process differently.

The researchers explained, “In this work we explore the possibility to approximately quantify, and hence compare, different geometries from the viewpoint of heat accumulation. For this purpose, first the concepts of thermal conductance and time constants are studied.”

Time constant maps obtained by the heat accumulation scheme using the concept of
overlapping cells.

Thermal conductance, equivalent to the reciprocal of thermal resistance, is a structure’s measure to conduct heat, while the time constant of the transient thermal response is studied to quantify the heating/cooling rate. The team also divided the design in their experiment into overlapping cells, so as to increase the possibility of detecting the heat accumulation zones.

High time constants were recorded close to overhang surfaces, and so the researchers discovered that heat accumulation for design features depends a lot on the nearby local geometry, and that “purely geometric design guidelines of prescribing a limiting overhang value might become insufficient for preventing problems associated with local heat accumulation.”

“The computational advantage offered by the proposed method enables development of a physics based topology optimization method which would be beneficial for designing precision AM components,” the researchers concluded. “Next step for this research is to combine the developed method with density based topology optimization by penalizing design features which are prone to heat accumulation during each iteration.”

Co-authors of the paper are Rajit Ranjan, Can Ayas, Matthijs Langelaar, and Fred van Keulen. The team will publish an additional paper on their heat accumulation detection method’s integration within a TO framework.

Discuss this research and other 3D printing topics at 3DPrintBoard.com or share your thoughts in the comments below.

Tripod Pour Over Stand #3DPrinting #3DThursday

6f8ce385aae5388b483acb39e298231f preview featured

souzoumaker shared this project on Thingiverse!

This was my final project for my industrial design class. The goal was to design a small portable pour over coffee stand. As you can see above, I store the stand funnel side down with the legs closed. It looks nice on my dorm desk and is easy to transport during semesters.

See more!


649-1
Every Thursday is #3dthursday here at Adafruit! The DIY 3D printing community has passion and dedication for making solid objects from digital models. Recently, we have noticed electronics projects integrated with 3D printed enclosures, brackets, and sculptures, so each Thursday we celebrate and highlight these bold pioneers!

Have you considered building a 3D project around an Arduino or other microcontroller? How about printing a bracket to mount your Raspberry Pi to the back of your HD monitor? And don’t forget the countless LED projects that are possible when you are modeling your projects in 3D!

Keyboard Cherry MX Arcade Stick #3DThursday #3DPrinting

D17e0b0a6e08fa34af4d8bc464ac7c8d preview featured

Shared by jsjar on Thingiverse:

Arcade stick that uses cherry-MX style keyboard switches

you will need

4x Mechanical Keyboard Switch
(pack of 10 cheap on ebay https://www.ebay.co.uk/itm/10pcs-Mechanical-Keyboard-Switch-Red-for-Cherry-MX-Keyboard-Tester-Parts-n-EY/273206756125?ssPageName=STRK%3AMEBIDX%3AIT&_trksid=p2057872.m2749.l2649)

1x m8 100mm bolt with nut

a spring
(i used a Seimitsu Joystick LS-55 Spring https://www.arcadeworlduk.com/products/Seimitsu-Joystick-Spring.html)

4x m4 bolts or screws to mount

(Note)
The switches may be a little lose in the housing they shouldn’t fall out but I decided to add a dab of hot glue to each one just to be sure.

Download the files and learn more


649-1
Every Thursday is #3dthursday here at Adafruit! The DIY 3D printing community has passion and dedication for making solid objects from digital models. Recently, we have noticed electronics projects integrated with 3D printed enclosures, brackets, and sculptures, so each Thursday we celebrate and highlight these bold pioneers!

Have you considered building a 3D project around an Arduino or other microcontroller? How about printing a bracket to mount your Raspberry Pi to the back of your HD monitor? And don’t forget the countless LED projects that are possible when you are modeling your projects in 3D!

The Adafruit Learning System has dozens of great tools to get you well on your way to creating incredible works of engineering, interactive art, and design with your 3D printer! If you’ve made a cool project that combines 3D printing and electronics, be sure to let us know, and we’ll feature it here!

Arcade Fight Stick Joystick #3DThursday #3DPrinting

72bba0c0a69733648e4fcf88fb2228ce preview featured

Shared by Bobonium on Thingiverse:

I originally designed this because I wanted to use the longer arcade buttons (i.e. https://www.banggood.com/5V-Arcade-Push-Button-Durable-Long-Switch-Multicolor-p-957099.html ) which are not compatible with the design by elkayem.

It is designed in a way that you are able to flip the top part, so you can decide whether you want the joystick left or right.

The USB controller I used is called ‘zero delay arcade usb encoder’.

I printed one with white PLA and one with wood, both using the same resolution and infill.
One thing to note is that I had to sand down the wood one before I was able to put the bottom and top part together whereas the white PLA one instantly worked

The joystick is hold in place by 4x M4 nuts & screws.

Printed on an Anycubic I3 Mega, I had to adjust the printer settings to be able to slice it with cura (X: 215, Y: 215, Z: 205)

Although there are holes present to screw the top and the bottom part together I did not do this, because mine are already very tightly connected and will not come loose

Download the files and learn more


649-1
Every Thursday is #3dthursday here at Adafruit! The DIY 3D printing community has passion and dedication for making solid objects from digital models. Recently, we have noticed electronics projects integrated with 3D printed enclosures, brackets, and sculptures, so each Thursday we celebrate and highlight these bold pioneers!

Have you considered building a 3D project around an Arduino or other microcontroller? How about printing a bracket to mount your Raspberry Pi to the back of your HD monitor? And don’t forget the countless LED projects that are possible when you are modeling your projects in 3D!

The Adafruit Learning System has dozens of great tools to get you well on your way to creating incredible works of engineering, interactive art, and design with your 3D printer! If you’ve made a cool project that combines 3D printing and electronics, be sure to let us know, and we’ll feature it here!

Sitting cat low poly #3DPrinting #3DThursday

1de9e5fff46d35d408c20f28e0373254 preview featured

Vincent6m shared this project on Thingiverse!

Low poly sitting cat.

See more!


649-1
Every Thursday is #3dthursday here at Adafruit! The DIY 3D printing community has passion and dedication for making solid objects from digital models. Recently, we have noticed electronics projects integrated with 3D printed enclosures, brackets, and sculptures, so each Thursday we celebrate and highlight these bold pioneers!

Have you considered building a 3D project around an Arduino or other microcontroller? How about printing a bracket to mount your Raspberry Pi to the back of your HD monitor? And don’t forget the countless LED projects that are possible when you are modeling your projects in 3D!

GKN Aerospace cuts production time and costs with Stratasys 3D printer

Stratasys has announced that GKN Aerospace, a UK-based global engineering firm has improved production times for tooling applications since integrating its F900 3D printer into production. This printer was implemented at GKN’s Filton, South Gloucestershire manufacturing site, allowing the company to create complex parts, that would be difficult to make with traditional methods. “Since integrating the F900, we have […]

Dog LED lamp #3DPrinting

0348ac452b9e067ba75d529b7b8bb975 preview featured

ChrischanKA shared this project on Thingiverse!

Summary

Neck 100% Infill

Body 10% Infill

1 x LED withe

4 x magnet 2 mm

1 x battery holder

1 x switch

See more!


649-1
Every Thursday is #3dthursday here at Adafruit! The DIY 3D printing community has passion and dedication for making solid objects from digital models. Recently, we have noticed electronics projects integrated with 3D printed enclosures, brackets, and sculptures, so each Thursday we celebrate and highlight these bold pioneers!

Have you considered building a 3D project around an Arduino or other microcontroller? How about printing a bracket to mount your Raspberry Pi to the back of your HD monitor? And don’t forget the countless LED projects that are possible when you are modeling your projects in 3D!