Paul Ellis of Polymate3D is 3D Printing Speaker Drivers in Kit Form

I received my very first CD player as a birthday gift when I was in middle school; as it was the 90s, the system was a large, clunky boombox. As part of the gift, I received three new CDs as well, and I thought I was so cool listening to music on that stereo back in my bedroom. Over the years, there have been a wide variety of systems available on which people can listen to music, from tiny iPods and cassette, CD, and record players all the way up to giant stereos with huge subwoofer speakers. With the devices changing often, its the speakers that have been the least touched by technology so far.

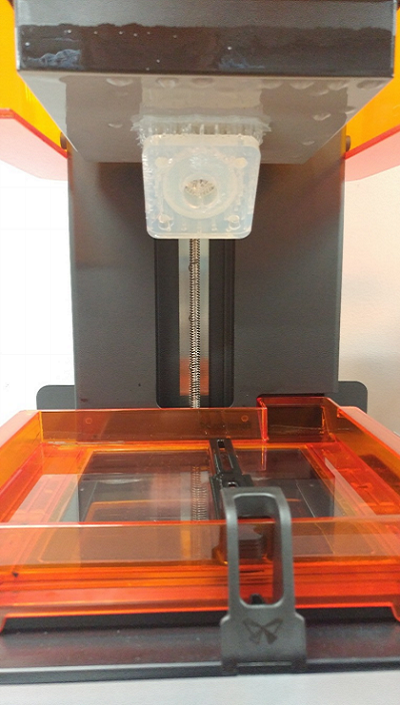
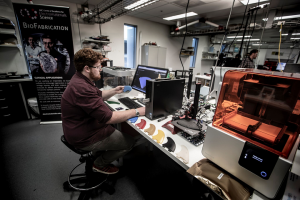
No surprise here – 3D printing has been used numerous times to fabricate audio equipment, such as speakers, earbuds, and microphones. Paul Ellis is a London-based maker and founder of sole trader company Polymate3D, which is working to fabricate, according to its Facebook page, the “first 3D Printed full range speaker driver in kit form that you can make at home.” Ellis also says that the kit can be upgraded and customized by users.

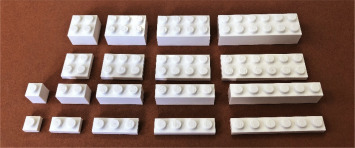
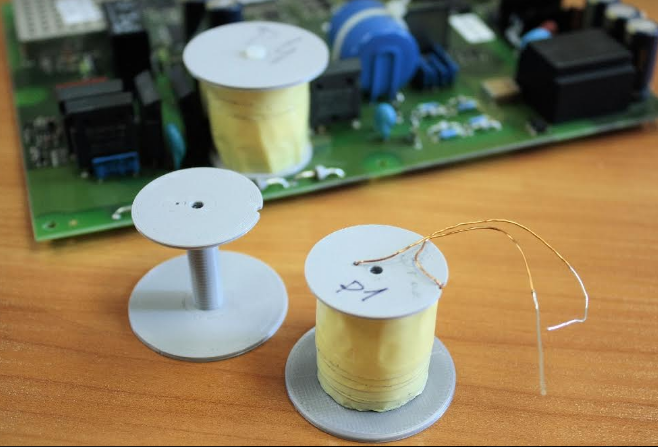
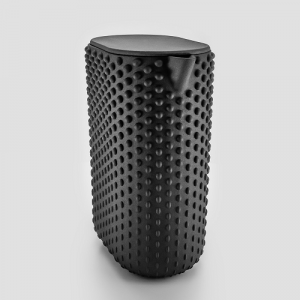
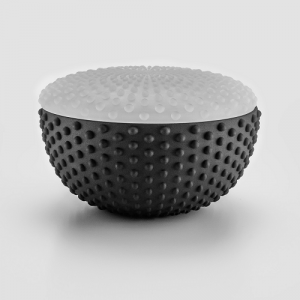
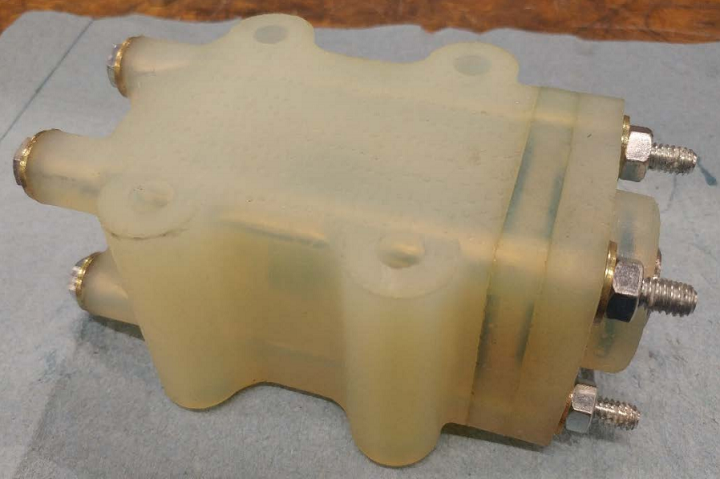
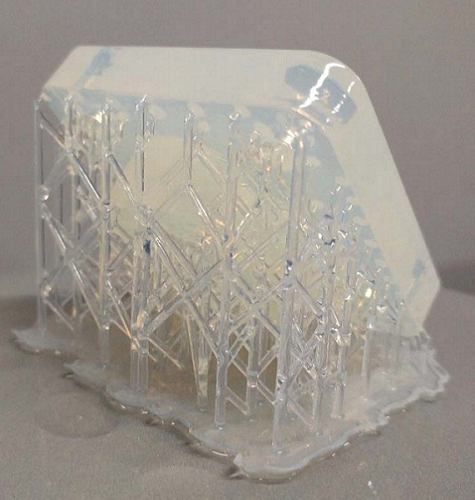
“I have spent the last 2.5 years working on and developing a 60mm speaker driver with printed cone, former, basket, surround & Spider. This has led to 28 prototypes so far and does use other components. These include screws, glue, copper wire, magnets, and a steel tube,” Ellis told 3DPrint.com. “The result is the last prototype, P28 achieving 80dB @ 1W/1M which matches it with the performance for some industry drivers of the same size. Examples include the Aura NS3 and Tang Band W3-1876S. I believe this is the only example of 3D printing being utlised to create product capable competing in the audio field. Everything before it has shown a proof of concept, but nothing more.”

According to the website for Polymate3D, which was founded earlier this year, it took Ellis thousands of hours of hard work – and nearly 20 prototypes – to create the FD61 driver, which is the first model Polymate3D is releasing to the public.

The website states, “Polymate3D may be in it’s infancy, but it is just the start on a long and vast product range aimed to distrupt the current industry, and put more power in the hands of you, the consumer!”

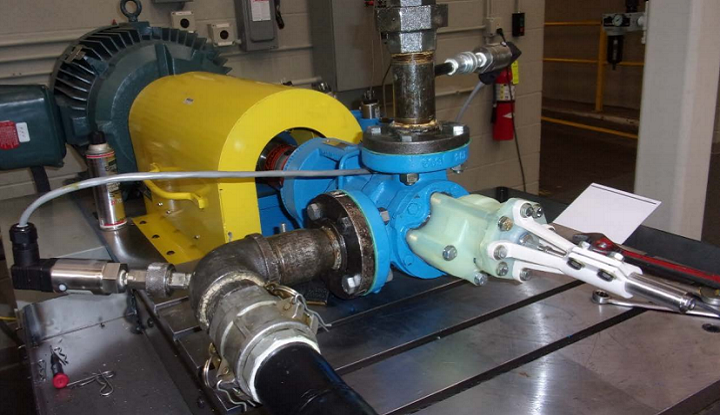
Ellis began working on his first speaker builds when he was just 19, and eventually obtained an analyzer and calibrated flat response microphone in order to compare his work to what was currently available on the commercial market. What he learned was very valuable – the material used to make the speaker makes “a distinct difference.”

“So I have designed my own speakers and 3D printers. I have produced speakers and desired there to be something that doesn’t exist. Designing is what I enjoy, and so I have spent the last 2 years on this project, and developing a plan to make my passion my career,” Ellis wrote on the Polymate3D website.

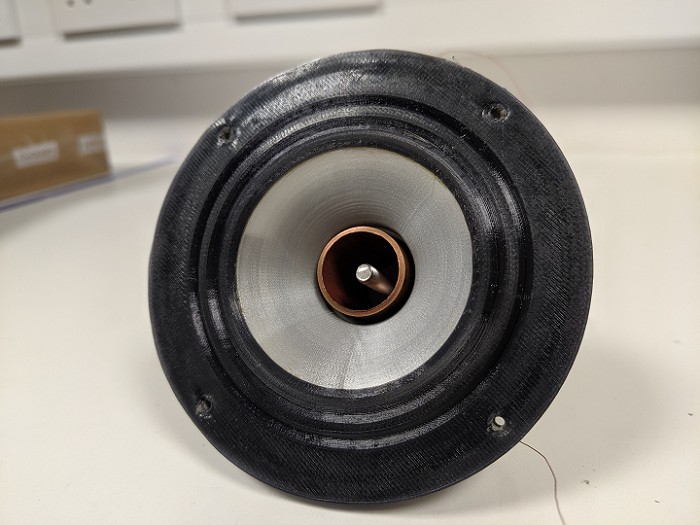
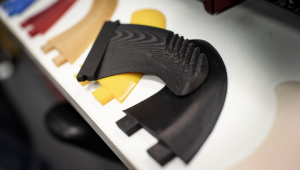
The FD61 full range speaker relied a lot on 3D printing, and also features an interchangeable drivetrain. Ellis has tested out over 90 different cone designs for the speaker, and used a variety of 3D printing materials. Speaking of which, he used filaments from Fillamentum and 3DXTECH to create a demo speaker design, which will be displayed by 3D FilaPrint at the Advanced Engineering UK show next month in Birmingham.

“On top of this, I have analysed and done frequency response results for some of my attempts, showing a frequency response of 100<8,000Hz so far, and continuing to improve this,” Ellis told us.

Polymate3D will soon start a Kickstarter campaign for the 3D printed speaker driver. In the meantime, you can follow the project’s progress, and even offer advice if you have any, on the Polymate3D FD61 diyAudio page.

What do you think of this project? Discuss this story and other 3D printing topics at 3DPrintBoard.com or share your thoughts in the Facebook comments below.

[Images: Polymate3D]

The post Paul Ellis of Polymate3D is 3D Printing Speaker Drivers in Kit Form appeared first on 3DPrint.com | The Voice of 3D Printing / Additive Manufacturing.

The Perfect Match? Using 3D Printing and LEGO for Better Prototyping

A diagram showing common physical prototyping techniques occupying a spectrum of fidelity, reconfigurability and skill level.  See more on the clay modeling image here.

While 3D printing has become a force in on-demand product manufacturing and a catalyst for creating many different functional objects, the technology was created to allow engineers to create rapid prototypes—with some being more perfect than others. In ‘Accelerating product prototyping through hybrid methods: Coupling 3D printing and LEGO,’ authors David Mathias, Chris Snider, Ben Hicks, and Charlie Ranscomb take on a modular approach to fabrication and prototyping.

For this project, the authors designed six different 3D shapes with a ‘continuum of hypothetical brick sizes.’ And while it’s hard not to think of LEGOS without getting inspired just due to the creative fun factor associated with the colorful building blocks, the researchers here were serious about studying the benefits of such material and technological collaboration—yielding a staggering reduction in fabrication time of up to 45 percent, with ‘reconfigurability of 57 percent at the optimum.’ Trailing behind also, are all the classic benefits of 3D printing: speed in production, affordability, savings in cost of materials, and rapid development.

“Prototyping is an essential part of the product development process and it is widely accepted that increased prototyping – both physical and virtual – leads to improved products,” state the authors in their study.

They outline the benefits of prototyping as follows:

  • Comprehensive exploration of a design space
  • Opportunity to solve design problems
  • Supplementation of designers’ mental models
  • Discovery of unexpected phenomena
  • Offering boundary objects for communication

The ‘trade off’ between time and quality of work in prototyping is discussed at length, but the authors also remind us of another benefit in this type of production as designers can engage with their designs more physically, ‘designing by hand.’

Aside from 3D printed structures, other materials often used in prototyping are foam, cardboard, and clay—which can be a high-fidelity endeavor. The authors remind us that no matter what form the prototype takes, if it is the materials are easy to use and the technique promotes expediency, more iterations can be made in striving to create a final product.

Benefits of adding LEGO blocks to the 3D printing quotient include:

  • Straightforward modeling
  • No health or safety precautions required
  • Aside from the obvious materials, no other tools are required

“Coupling low cost 3D printing and LEGO® introduces a level of fidelity unachievable by LEGO® alone while maintaining the flexibility and reconfigurability of a construction kit. It affords rapid ideation and modification with a physical prototype to avoid breaking user studies or creative episodes,” stated the authors.

Computer simulation was used to assess the viability of the project, and then it was put into action 3D printing a video controller for a case study meant to further demonstrate the advantages of such a coupling for the building of prototypes. Typical primitive shapes were chosen for the samples, in the form of:

These primitives consisted of:

  • Cube
  • Cylinder
  • Cone
  • Sphere
  • Tetrahedron
  • Triangular Prism

The primitive shapes used in the simulations. From L to R: Cube, Cylinder, Triangular Prism, Tetrahedron, Cone, and Sphere

“The volume of the objects was varied over a range of 1 × 103–8 × 103 mm3. These volumes were used as they are within the bounds of feasibility for most commercially available desktop low cost 3D printers–such as the Ultimaker 3 (9.42 × 103 mm3 (Ultimaker, 2018)) and Makerbot Replicator + (9.45 × 103 mm3 (MakerBot Industries, 2018)).”

“The simulations were stepped 50 times over this volume range. This was then repeated for each of the object shapes, and each of the sizes of brick.”

Sizes of bricks were described as follows:

“The initial brick size was LEGO with dimensions of 8 × 8 × 3.2 mm. For these simulations, a pool of standard bricks could be used to reduce the overall brick count (see Section 3.3.2). Smaller and larger bricks were considered either side of LEGO, these include NANO (4 × 4 × 3.2 mm) and DUPLO (16 × 16 × 19.2 mm). The use of different sizes of brick affords different levels of fidelity, with the expectation that the smaller bricks will allow a better approximation of more complex geometry.”

Comparison of the three sizes of construction kit brick

The researchers noted substantial time differences in 3D printing time for the three sets of bricks—with NANO bricks offering slower time, LEGOs offering the ‘greatest improvement in fabrication time’ and DUPLO bricks turning in a worse performance than the LEGO bricks. Reusability (the amount of materials that can be transferred to another prototyping design experience) was best for NANO bricks; worst for DUPLO—leaving the authors to state the use of smaller bricks would be best for users with reusability in mind.

Overall, however, the modular dynamic means greater ease for users as there is substantial latitude in being able to physically make changes to the designs. Whether they are inserting or removing LEGOS or refining the 3D printed components, prototyping can be improved on numerous levels—offering more expansive opportunity for design by connecting the concept process to that of actual, true physical, fabrication.

“This approach to creating looks-like prototypes of user-driven products is form dependent. Consequently, there could be better approaches using different prototyping methods to reduce the fabrication time and costs for particular designs,” concluded the researchers.

“Further work is required to realize the physical practicalities of producing prototypes using this hybrid approach, including optimizing brick layout for part strength and ease of construction, and to generate 3D printable surface pieces that attach to the LEGO bricks. As the resultant prototype is modular it would need to be constructed in such a way that it could be strong enough to withstand designer/user interaction without falling apart yet be easy enough to dismantle or reconfigure.”

A plot showing the total fabrication time against the object volume for the three brick sizes, a reference line for solely printing the object is included

3D printing and LEGOS are a natural match for users creating projects around the world, not only due to the plastics involved but because they are both centered around building and creating objects that may often also incorporate electronics and innovative controllers, from a motorized Go-Kart to kits requiring 3D printing of almost 400 parts—or 3D printers actually built with LEGOS.

The library of standard LEGO® bricks

[Source / Image: ‘Accelerating product prototyping through hybrid methods: Coupling 3D printing and LEGO’]

Poland’s Emtel Uses 3DGence 3D Printers for Defibrillator Parts

The advantages of using 3D printing industrially are apparent around the globe. In the medical field, doctors are exploring ways to create necessary items like dentures, 3D printed implants, surgical models, and countless innovative devices that are not only enhancing the quality of life for many patients today, but in some cases, saving their lives too.

Defibrillators, used for shocking the heart back to life in the presence of arrhythmias, are medical devices definitely placed in the ‘saving lives’ category, and now Poland’s Emtel relies on 3DGence 3D printers for the fabrication of both prototypes and final parts for these machines that are vital to so many patients. Their most recent work has been demonstrated in a case study regarding low-volume production of 3D printed patient monitor prototypes and parts for defibrillators. The benefits abound in using such technology for manufacturing of small batches, allowing companies like Emtel to move forward in a fiercely competitive medical device market.

Prototypes are a necessary step in the manufacturing process, and ease in creation of such models is what led 3D printing technology to fame initially. For Emtel, this is critical in manufacturing cardiac monitor cases today; for example, in comparison to sending out prototype or part creation requirements to third parties, they can instead create them in-house and save substantially, while also reducing turnaround time from thirty days to a mere five.

“We print using a 3DGence printer a number of various mechanical details that could, without deterioration in strength and quality, replace some of the traditional aluminum and plastic parts used in our products so far,” says Wojciech Przybycień from Emtel. “The use of 3D printing technology allows us to more flexibly adapt to current production needs, reduce costs, as well as some kind of freedom when designing new devices.”

In using 3D printed parts for prototypes and devices, the Emtel team states that they perform extensive risk analysis and evaluation, along with comprehensive testing. In the end, they say their savings on the bottom line, thanks to 3D printing, can be up to three to five times less than it would be in using conventional processes.

“Production companies are sometimes confronted with problems related to the end of production of components or subassemblies supplied by external subcontractors. In such cases, the most common solution is to look for another sub-supplier, but it is worse in the case of unit or low-volume production,” says Wojciech Przybycień from Emtel. “In our case 3D printing turned out to be a solution. Owning a 3D printer and a good knowledge of its capabilities basically immediately suggested a solution to the problem, i.e. own design and production of casings for the defibrillator.”

Patient monitor prototype

In their recent case study using the 3DGence ONE 3D printer, Emtel was able to create a 3D printed patient monitor model prototype at 1:1 scale. In this case, costs were reduced by a staggering 90 percent, with one 3D Printed part priced at 50 EUR. Savings in time was up to 25 days less than usual, with models being made in around five days. Precision was excellent in this case, and ‘final details’ of the prototypes required no corrections. Significant improvements via 3D printing included:

  • Faster production of prototypes
  • More precise verification of ‘project assumptions’
  • Better ergonomy, installation, and validation of dimensions

“Additive manufacturing technology allows you to shorten the time needed by constructors and engineers to create and test products. Currently, 3D printing has ceased to be seen only as a tool used only for prototyping, evolving towards the printing of final products. Compared to traditional methods, it can positively affect the time and cost of production. This is due to the improvement of the quality, reliability and range of available materials in the cheapest FDM / FFF printing technology,” concluded Mateusz Sidorowicz from 3DGence company, regarding the recent case study with Emtel.

EMTEL Śliwa is a manufacturer of electronic medical equipment designed to monitor the biological parameters of the patient and for resuscitation. Their products are successfully used in Poland, other European countries, and Asia, South America, and Australia.  
 
The 3DGence portfolio includes TÜV-certified 3D printers such as 3DGence INDUSTRY F340, a machine dedicated to industrial applications and 3DGence DOUBLE P255, a professional dual extruder 3D printer.  Clients include GM, Fraunhofer Institute, Alstom, OSRAM and many more.

What do you think of this news? Let us know your thoughts! Join the discussion of this and other 3D printing topics at 3DPrintBoard.com.


Reducing the cost of 3D printed prototypes with 3ERP

3D printing has given businesses the ability to create prototypes quickly and at a low price. Using a 3D printer, it is now simpler than ever to turn a digital 3D design into a physical object: desktop 3D printers are affordable and relatively easy to operate, while online 3D printing services allow non-experts to have their prototypes printed by those with a more in-depth knowledge of the process.

But while 3D printing is often cheaper than traditional manufacturing processes, it can still represent a significant investment. For young businesses in particular — those looking to develop their first products — forking out on a 3D printed prototype can eat up a large chunk of budget.

Fortunately, help is at hand. By observing a few simple rules regarding materials, design features and different 3D printing processes, the cost of 3D printed prototypes can be reduced without sacrificing quality. Prototyping specialist 3ERP knows how to deliver professional-quality 3D printed prototypes on a budget, and is here to offer advice for prototyping on a budget.

Why 3D printing can be cheaper than the alternatives

While there are particular ways to reduce the cost of a 3D printed prototype, it is important to know why 3D printing or additive manufacturing is, in general, an affordable means of creating prototypes.

One of the fundamental advantages of 3D printing is its economy with material. Where other processes like CNC machining and injection molding require excess material — CNC machines turn part of the workpiece into waste metal chips; injection molding requires the creation of a mold — 3D printing uses only the amount of material needed for the object itself. A small amount of material may be sanded or cut away during post-processing, but 3D printing generally uses the bare minimum of raw material.

3D printing can also help to save money over the entire product development process. Since no tooling is required, businesses can modify their digital design to create radically new iterations of a prototype at no extra cost. By contrast, amending an injection molded prototype would require the creation of a new mold — at a much greater cost than a single 3D printed prototype.

Ways to reduce the cost of 3D printed prototypes

Material selection

The simplest way to reduce the cost of a 3D printed prototype is to select a low-cost material for the project. This needn’t have an adverse effect on the outcome: if the prototype will only be used for display purposes, affordable materials like PLA or ABS are perfectly capable of producing a quality-looking prototype that can later be developed into something more robust.

Of course, material selection is directly linked to the type of 3D printing process that will be used. The most common 3D printing process, Fused Deposition Modeling (FDM), allows for the cheapest materials, such as PLA. More expensive processes like Stereolithography (SLA) are not compatible with materials like PLA, but have their own range of low-end materials. Prototyping with a standard SLA resin, for example, will be cheaper than prototyping with a durable or rubber-like resin.

Remember that prototypes do not necessarily need to be made from the same material as the finished part. For example, a carbon-reinforced nylon automotive part could be prototyped using a standard nylon for display purposes; the carbon version would only need to be made at the testing or pre-production stage.

Design considerations

Hollowing out

A huge advantage of 3D printing is its ability to create objects with hollow or partially hollow interiors. Since a 3D printed part is built up layer by layer and not simply flooded with a liquid material, businesses can use the technology to create hollow or near-hollow 3D printed prototypes.

Creating a hollow 3D printed part can entail designing the prototype in such a way using CAD software. Alternatively, most FDM 3D printer software has an Infill setting, allowing the user to modify the density (and effective material usage) of a 3D printed part. Using less material by hollowing out the inside of a part naturally reduces material costs.

Supports

Complex 3D printed parts — those with features that jut out, for example — often require support structures: sections of material that are printed solely to act as scaffolding, used to prevent the main structure of the part from collapsing during the printing process. These support structures are often necessary, but careful consideration of the design makes it possible to reduce their number.

While compromising on a design is not ideal, it can be beneficial to think of the 3D design in terms of how it will be printed. If overhanging features are not entirely necessary, or if their angles can be adjusted to reduce the size or number of supports, the material usage and eventual cost of the print job can be reduced.

Scaling down

A seemingly obvious (but often forgotten) way to reduce the cost of a 3D printed prototype is to simply scale it down. Non-functional prototypes can often be created in scaled-down form if the smaller version is still able to demonstrate the appearance and function of the product.

By scaling down a 3D printed prototype, money can be saved by reducing the total material usage and cutting down the operation time of the printer.

Finishing

3D printed parts can be post-processed in various ways, from a rough sanding of the printed part to more complex processes such as coloring, epoxy coating and metal plating. In general, simpler finishing options will be cheaper to accomplish, resulting in a lower total cost.

Working with a budget-conscious prototyping service

For companies looking to create a 3D printed prototype via a third-party service, it is beneficial to select a partner with expertise in additive manufacturing and one that knows how to keep costs to a minimum.

Prototyping specialist 3ERP is one such company. Not only does the prototyping service provider offer a range of services including 3D printing, CNC machining, injection molding and vacuum casting, it also has experience working with a wide variety of clients, from internationally recognized companies like BMW, Lamborghini and Thyssenkrupp to young startups creating their very first prototype.

Because of this experience at both ends of the spectrum, 3ERP knows how to deal with companies working on a budget. Its staff are happy to work with a client to decide on material, design and process options, finding a solution that is both practical and cost-effective.

Contact 3ERP to discuss the possibilities of 3D printed prototypes.


Designer Creates Unique 3D Printed Homeware Collection for Cooper Hewitt Showcase

From cookie cutters, vases, and gardening collections to clothing hangers, lamps, and kitchenware, it seems that 3D printed homeware is all the rage these days. New York designer Joe Doucet, referred to as “the Living Blueprint for the 21st Century Designer” by Forbes, recently used the technology to create a new collection of 3D printed homeware for a brand new exhibition at the city’s Cooper Hewitt Smithsonian Design Museum.

Doucet designed the 3D printed set of knobby, greyscale cookware, cutlery, serving, and storage capsules specifically for the museum’s Tablescapes: Designs for Dining Showcase. The understated yet attractive collection, according to a statement from Doucet, was “designed with limited resources in mind” in order “to represent dining in the 21st century.

In addition to co-founding the OTHR design brand in 2016 and being named the only ever AvantGuardian for Design by Surface Magazine, Doucet also received an honor in his field last year: he was named the 2017 winner of the Smithsonian Cooper-Hewitt National Design Award as Product Designer.

“We are an award-winning multidisciplinary practice who believe that design is a tool to create opportunities,” Doucet’s website reads. “We believe that creative vision can transform an object into an obsession, a product into a paragon and a business into a brand. We believe that by partnering with the world’s most exciting brands, we can create innovative ways for product design, packaging, architecture, retail design, furniture and technology to shape tomorrow.”

The Cooper Hewitt, located on the Upper East Side of Manhattan, is a big fan of Doucet’s work, and commissioned the 3D printed prototypes in the collection for the Tablescapes showcase, which will be available to view at the museum until April 14, 2019.


The 3D printed vessels can actually be used to perform several different functions for food service and preparation; for instance, the lids are used as normal to seal the bowls in order to keep their contents fresh inside, but they can also be used as trivets and plates as well.

Doucet explained, “By creating hybrid vessels, which act as cooking, serving and storage for food, we eliminate the need to use separate items for each step and avoid wasting potable water to clean each item between uses.”

The full 3D printed collection was made out of two different polymers by New York-based Shapeways. Shapeways also lent the museum its 3D printing equipment in order to demonstrate the process during the exhibit.

Doucet told Dezeen about the 3D printed prototype vessels, “They are envisioned to be in 3D-printed steel and 3D-printed glass in the near future, but the prototypes were made with current commercial technology.”

Doucet created some of his own pieces for the 3D printed product range, such as way-finding running gloves, and asked others, such as Yonoh, Phillippe Malouin, and Claesson Koivisto Rune to help add to the homeware collection as week.

The knobbly bumps that cover the entirety of the 3D printed vessels help provide grip, and are also meant to evenly spread heat during cooking, and then dissipate the warmth quickly during serving.

The 3D printed homeware collection also promotes cross-cultural dining, as it also includes a set of chopsticks in addition to the more typical Western utensils.

This is not Doucet’s first experience with 3D printing. The designer has used the technology in the past, such as when he created a capsule collection of 3D knitted ties with Thursday Finest. 3D printing makes it possible for items, such as utensils and dishes, to be customized specifically for the user, in terms of both scale and the hand they use to eat.

Discuss this story and other 3D printing topics at 3DPrintBoard.com or share your thoughts in the Facebook comments below. 

[Images: Donatello Arm]

Thesis Provides Proof of Concept for Using 3D Printing to Improve Design of Internal Pressure Relief Valve

Test pumps installed on 75 HP dynamometer: Test Setup Discharge Port at 90°

Over the years, 3D printing has proven to be a pretty handy technology to have in one’s toolbox when it comes to making replacement and mechanical parts, like hand water pumps, transmissions, gears, and valves. For his Master’s of Science thesis this year, titled “3D printed relief valve analysis and validation,” John Anthony Dutcher, III, a student at the University of Northern Iowa‘s Department of Technology, used SLA 3D printing to fabricate prototypes of the internal pressure relief valve of a positive displacement pump.

The abstract states, “Additive Manufacturing allows for faster, lower cost product development including customization, print at point of use, and low cost per volume produced. This research uses Stereolithography produced prototypes to develop an improvement to an existing product, the internal pressure relief valve of a positive displacement pump. Four 3D printed prototype assemblies were developed and tested in this research. The relief valve assemblies consisted of additive manufacturing produced pressure vessel components, post processed, and installed on the positive displacement pump with no additional machining. Prototype designs were analyzed with Computational Fluid Dynamic simulation to increase flow through the valve. The simulation was validated with performance testing to reduce the cracking to full bypass pressure range of the valve. By reducing this operational range of the valve, the power requirement of the pump drive system could be reduced allowing for increased energy efficiency in pump drive systems. Performance testing of the 3D printed relief valves measured pump flow, poppet movement within the valve, and discharge pressure at operational conditions similar to existing applications. The Stereolithography prototype assemblies performed very well, demonstrating a 56% reduction in the pressure differential of the cracking to full bypass stage of the valve. This research has demonstrated the short term ability of additive manufactured produced components to replace existing metal components in pressure vessel applications.”

The gear found inside positive displacement pumps, developed over a century ago, was able to overcome existing performance limitations, but it was by no means perfect. These pumps need an internal relief valve, which provide protection against too much pressure; if there’s a reduction in discharge flow, the over-pressure system could fail.

“The primary focus of this research is to investigate the performance of an internal relief valve for a positive displacement pump, propose an improvement to flow conditions in the cracking to full bypass pressure range of the valve based on flow simulation and validate the performance improvement with 3D printed prototypes,” Dutcher wrote.

SLA Part Production

Over the years, the design of the internal relief valve in these positive displacements pumps has not changed much. But by using computer simulation, the design can be revised and optimized to make the part more efficient. As he wrote in his paper, Dutcher’s research validates the 3D printed prototypes, using Computational Fluid Dynamics simulation and perfrmance testing, “in the design development of an improvement to an existing product,” and also shows that costs and time can both be reduced by using 3D printing to manufacture the valve.

“Additive manufacturing has the benefit of customization, allowing for design changes,” Dutcher wrote.

“Developing customizable end use components that can manufactured at the point of use, allows for application specific products to be produced for pressure vessel applications.”

The valve prototypes, 3D printed using SLA technology, were shown to reduce the amount of cracking in order to fully bypass the stage differential pressure that’s necessary to operate the internal relief valve. FDM 3D printing was used to make mounting brackets to attach an LVDT sensor to the valve prototypes; this sensor measures the movement of the poppet (internal device in the relief valve that seals its surface) during testing.

Assembled Reference Valve Extended

In his thesis, Dutcher wanted to determine if 3D printing could successfully be used to produce components of a test valve for the positive displacement pump, if the valve’s geometry was able to be optimized to reduce cracking based on flow conditions, and if the 3D printed prototype valves would perform at the same level as existing ones made with conventional methods of manufacturing. Ultimately, while he did answer these questions and demonstrated that 3D printing does indeed have applications in developing new products, his research provided a viable proof of concept for improving the existing design of a product.

“The 3D printed prototypes were developed to reduce cost and delivery lead time for prototype testing,” Dutcher wrote.

“The flexibility in design permutations that additive manufacturing allows with customization provides the opportunity to validate multiple product designs in parallel.”

SLA Support Structures

By using 3D printing to create the prototypes, Dutcher was able to develop several different design concepts at the same time, without getting caught up by the normal barriers that come with traditional manufacturing methods. SLA 3D printing also makes it possible to produce parts with “the dimensional tolerances of machined components,” which helps speed up the development of prototypes.

“This research has demonstrated the SLA 3D printing’s ability to reproduce existing machined metal components,” Dutcher concluded. “While extended performance testing was not the intent of this research, the 3D printed pressure vessel valve components performed very well in performance testing. The development of the design variations in timely manor would not have been possible without Additive Manufacturing. Testing has shown an improvement in the valve performance by reducing the cracking to full bypass pressure from 52.0 psi to 22.8 psi. The successful performance test to improve an existing product demonstrated the validity of the SLA 3D printed prototype assemblies.”

Discuss this research and other 3D printing topics at 3DPrintBoard.com or share your thoughts in the Facebook comments below.

3D Printed Fins Help Surfers Catch the Perfect Wave…and May Signal a Sports Industry Revolution

If you like 3D printing just as much as you enjoy riding those gnarly waves, you may remember when a research team from the University of Wollongong (UOW) in Australia started 3D printing surfboard fins specifically tailored to the needs of the individual surfer two years ago. This research has continued, and a multidisciplinary team of UOW students and academics from the university’s Australian National Fabrication Facility (ANFF), along with several surfers, recently took a trip to hang ten at the remote Mentawai Islands in Indonesia, and test out new shapes of surfboard fins, which were designed and 3D printed at UOW.

The project is part of UOW’s Global Challenges Program, with an initial goal of testing out several of these new 3D printed fin shapes and comparing them against conventional fins. But the researchers also hope to determine the possibility of developing a new niche manufacturing industry out of 3D printed surfboard fins.

“There is a lot to a simple surfboard fin, you have to consider the fin base, depth, rake (or sweep), foil, cant, toe and flex,” said Professor Marc in het Panhuis from the university’s School of Chemistry, who worked on the last 3D printed surfboard fin project. “Not to forget, the number of fins and their positioning on a surfboard.

“There is no such thing as a simple surfboard fin. The team has looked at things different materials that can make the fin stronger, lighter and its ability to flex.”

According to Professor in het Panhuis, ocean swell and a good surfboard, fitted with the proper fins, are both equally important to surfers. While these 3D printed fins may look like commercially available ones, Professor in het Panhuis said that “the proof is in the ride.”

Dr. Stephen Beirne with the university’s ANFF said that this is the perfect project to conduct trials on 3D printing and rapid prototyping.

“3D printing enables us to print virtually anything we can imagine and that includes surfboard fins. Our team started out creating CAD-generated fin designs on a computer, then we took those designs and used computational fluid dynamics to see how the fin was likely to perform in the water,” explained Dr. Beirne. “The last part of the process was to select the most appropriate materials to print the prototype.”

3D printing is often used today to fabricate equipment for real-life use in the sports and leisure industry, from protective gear – like soccer shin guards, helmets, and mouthguards – to apparel ranging from specialized footwear, eyewear, and racing gloves, and equipment such as improved snowboards, luge sleds, and even surfboards. By using this technology to create usable parts, the whole sports industry could see a 3D printed revolution in terms of customized products.

The UOW researchers took their time coming up with designs for the 3D printed fins, and after a long search to find the most consistent ocean waves in which to test the fins in real-world conditions, they chose the island chain off the western coast of Sumatra, as it provides both dependable waves and a variety of surf breaks, including the left-hand-breaking Macaronis wave the team used.

“Macaronis is a unique surfing spot because the waves always break on a reef in the same spot,” explained Professor in het Panhuis. “The waves also roll over a long distance and surfers can get a maximum of turns, which is perfect for collecting surfboard fin data.”


The surfers were tasked with catching a variety of waves, and performing as many turns as they could manage on each, with multiple different surfboard fins. Surfboard shaper Dylan Perese of DP Surfboards, who participated in the testing and data collection, also produced standardized surfboards for the project, so everyone had the same base.

Professor in het Panhuis then added embedded sensors and GPS tracking devices to the surfboards to gather performance data on the fins. He explained:

“The devices tracked everything from wave count, speed, number of turns to the amount of rail engaged during turning (to name but a few of the parameters). The surfers also filled out a fin performance rating scale immediately after they completed riding each set of fins. The information is then used to compare the different sets of fins.”

Professor Julie Steele, the Director of UOW’s Biomechanics Research Laboratory, has nearly four decades of experience running human trials, and collected the data during the trials, while also taking pains to ensure that the surfers were not biased toward any particular fin designs.

The surfers were tracked on over 450 waves, performing more than 1,700 turns, in multiple weather conditions, on three different 3D printed fin designs. The results, which should be published soon, were then compared against fins sold by two mainstream fin producers, and there was a clear winner.

“Preliminary analysis of the fin performance rating data has revealed that the surfers, on average, have rated one of the 3D printed fins as feeling the best to surf on. We were surprised that there was such a strong preference for this one fin, given the six surfers all had very different surfing styles,” said Professor Steele.

The 3D printed ‘Crinkle Cut’ fin has a series of grooves on one side, in order to increase the lift to drag ratio and propel surfers along the waves.

“The reason this fin shape works so well is because the contours improve the way the water flows past it,” Professor in het Panhuis explained. “These contours ultimately give the surfer more speed. The fins also seemed to offer plenty of drive and projection out of turns.”


So whether you’re hoping to catch the perfect wave, hit the track, or try for an Olympic medal, 3D printing could help you get to the finish line.

Discuss of this story and other 3D printing topics at 3DPrintBoard.com, or share your thoughts below.

[Images provided by UOW]