How to Modify and Customize Your Bicycle with 3D Printing

3D printing makes it possible to customize all sorts of products now, from prosthetics and tools to jewelry and eyeglasses. The technology can also be used to create customized components and modifications for our various means of daily transportation, be it a car, a motorcycle, a skateboard, or even a bicycle.

I personally know a few people who participate in long bike rides with large groups of people, sometimes even traveling through multiple states on their beloved two-wheel contraptions. Personally, I don’t see the appeal of being on two wheels for that long, outside in the elements with little protection. But that’s clearly just me – according to Statista, the number of bike riders in the United States increased significantly between 2012 and 2017, from around 51 million cyclists to over 66 million.

[Image: Singletrack]

In addition, the infrastructure in the US is also continuing to positively support the sport of cycling. It seems I can hardly drive two blocks without seeing ongoing construction to add in brand new bike lanes and bicycling initiatives, at least in my little corner of the world.

We often see 3D printing put to use in order to make components, accessories, and parts for bicycles…and sometimes even the bike itself. There are the 3D printed titanium lugs created by Australia-based Flying Machine, the 3D printed Garmin cycle mount for the rider who needs easy, hands-free access to directions, and other kinds of 3D printed cycle mounts as well, in addition to 3D printed bicycle tires, helmets, and frames.

There are bikes made out of aluminum that can fold up, mountain bikes for the more outdoorsy, adventurous types, plastic bikes and metal bikes, bikes made out of blue jeans (I’m not kidding), bikes that can be composted, racing bikes and also electric bikes. This last is what interests maker Terence Chan, who goes by user name RCConcepts on Thingiverse.

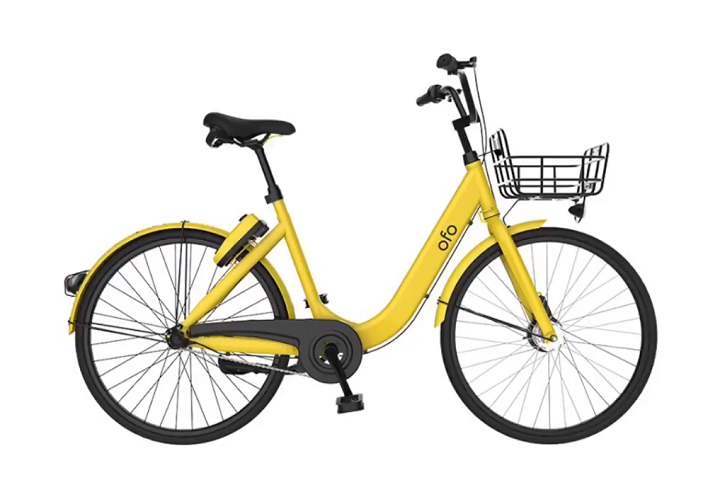
“In this video, I’m going to show you how to electrify an ofo bike,” Chan said in his latest YouTube video.

Founded four years ago, ofo is a Beijing-based bicycle sharing company that, as of last year, operates over 10 million yellow bicycles in 250 cities and 20 countries. It’s the first bike sharing company in the world that has a “non-docking” platform for users, and uses an app to locate and unlock nearby bicycles for use.

The first step in electrifying the ofo bike was taking away its rotating can; then, to make the motor, Chan had to hammer the shaft attached to the can, so it would “go through to the other side.” The hex screw holding the main shaft needs to be removed in order for this to take place, and if the glue is really hard, do what Chan did and use a heat gun to weaken it. Once the shaft is hammered through, a c-clip needs to be attached to the end of it.

In order to modify the bike to an electric one, Chan had to 3D print a few specific parts – namely the friction drive mount, the throttle controller by Thingiverse user RotaryDesign, the mounting brackets for a GoPro by Thingiverse user chrismalyon (which will be used to mount the controller), and the ESC tray, which, as Chan says in his video, is “not only to hold the ESC in place but also to protect all the weight from squashing against the electronics.”

If you want to learn how to electrify an ofo bike on your own, watch the rest of Chan’s video below:

Discuss 3D printed bicycle modifications, and other 3D printing topics, at 3DPrintBoard.com or share your thoughts in the Facebook comments below. 


Desktop 3D Printing and Functional Replacement Parts

3D printing is seeing increasing use in the manufacture of components for bikes, and sometimes even the bikes themselves. Bikes with 3D printed parts don’t just look cool, either – they perform just as well as, and sometimes even better than, regular bikes.

Open source advocate and 3D printing educator at Michigan Tech Dr. Joshua Pearce recently published an Ultimaker blog post about how to use your desktop 3D printer to create functional, inexpensive replacement parts for complex machines that require mechanical integrity – like bicycles.

Dr. Pearce’s team partnered up with the research group of John Gershenson. Dr. Pearce, Gershenson, Nagendra Tanikella, and Ben Savonen completed a study on the use of open source 3D printers for making components for the popular Black Mamba bicycle.

Dr. Pearce wrote, “Specifically, we chose to start tests with pedals that fail often and have clear standards namely the CEN (European Committee for Standardization) standards for racing bicycles for 1) static strength, 2) impact, and 3) dynamic durability.”

First, the teams used parametric open source FreeCAD to design a custom CAD model of a replacement pedal; the model and STL files are available for download from Youmagine. The pedal was made using the most common 3D printing material – biodegradable, inexpensive PLA.

Static strength test

The pedal was first subjected to a 1,500 N vertical downward force under the CEN static strength test, which found no fractures. Then, the pedal was tested to a 3,000 N compression load applied pedal uniformly – this is actually twice the required amount, which meant that the pedal well exceeded the standard, and, as Dr. Pearce put it, was able to “clear the first hurdle!”

A mass of 15 kg was dropped onto the pedal from 400 mm up, 60 mm from the mounting face, for the CEN bicycle pedal impact resistance test. While the test resulted in a minor dent, there weren’t any fractures – another test passed.

In order to simulate a real-world bicycle, with a person on the pedals, the CEN developed its dynamic durability test for bike pedals. For this test, the research groups had to spin the spindle at 100 rev/min for 100,000 revolutions; at the same time, the pedal also had a mass of 65 kg suspended only by a string. Just like with the static strength test, the pedal’s dynamic durability was designed to exceed the CEN standard under normal conditions.

Impact resistance

Rather than using a rig, the team attached the 3D printed pedal to a bicycle for direct testing, and went 200,000 revolutions with a person’s 75 kg weight being carried solely by the pedals. Again, this was twice the CEN standard, and passed again – I’m sensing a theme here.

Dr. Pearce wrote, “Our humble 3D printed pedal is now good enough for European [racing] bikes…but wait it is actually better!”

The 3D printed pedals are nearly a third of the moss of the Black Mamba stock pedals, which is performance-enhancing as well as cost-effective…if raw PLA pellets or recycled materials, like ABS, nylon, or PET, are used, that is.

Dr. Pearce also provided some easy, DIY guidelines to achieve lab-worthy results for the 3D printed pedals, so you won’t have to redo any bike part experiments.

First, look into expertise already available through a study that researched the parts you were interested in, such as this one regarding the viability of distributed manufacturing of 3D printed PLA bike pedals. Then, determine the material’s mechanical requirements – check out this study for a handy open access list of most of the commonly available tensile strengths of the more common 3D printing materials.

Sub-optimal layers

Print the component in the right material, and with required infills, to achieve your application’s desired mechanical properties. Then, make sure to check out the print’s exterior for any sub-optimal layers from under-extrusion – if the part is under-extruded, fix your 3D printer and try it again.

Finally, weigh the part to make sure there isn’t any under-extrusion inside that you’re not able to see; Dr. Pearce explained that a digital food scale has “acceptable precision and accuracy” for most prints done on extrusion-based 3D printers.

“This mass is compared to the theoretical value using the densities from this table for the material and the volume of the object,” Dr. Pearce said.

The previously mentioned study with the list of tensile strengths was able to find a linear relationship between a 3D printed part’s ideal mass and the maximum stress able to be undertaken by samples. You can just check the study to see how far off from the ideal your part is, and then determine if it needs to be reprinted before figuring out the high probability of your needed properties.

According to mechanical studies completed on many extrusion 3D printers, open source machines produce stronger prints than proprietary systems, mostly thanks to the setting limitations of the latter.

“But be aware that there is a range and the properties of your parts will depend a lot on your machine and the settings you use,” Dr. Pearce warns. “In general printing at the high end of the extruder temperature range for your material will result in a higher strength.”

Just use that weighing technique, and compare your part’s mass to the ideal, to find out where it will most likely lie on the strength range.

You can read Dr. Pearce’s full rundown at Ultimaker.

Discuss this and other 3D printing topics at 3DPrintBoard.com or share your thoughts in the Facebook comments below.