3Doodler Introduces Mobile App, 3D Printing Pen Activity Kits, and Wider Distribution for EDU Learning Packs

Earlier this week, 3Doodler attended the 2019 Toy Fair New York, and brought along the latest additions to its EDU, Start and Create product lines to the event in Manhattan. Last year at the Toy Fair, the company debuted its new STEM Series of products designed around its Start 3D printing pen, and this year 3Doodler is not only debuting its newest lines, but also a special surprise – its first Mobile App, which is now available for download in both the App Store and on Google Play.

“Over the last few years, we’ve emphasized the ability to make a phone case using a 3Doodler pen. But with the app, the 3Doodler’s capability to work with your device makes it easier than ever to create. It’s also more environmentally friendly than printing out a stencil,” said 3Doodler Co-Founder Maxwell Bogue.

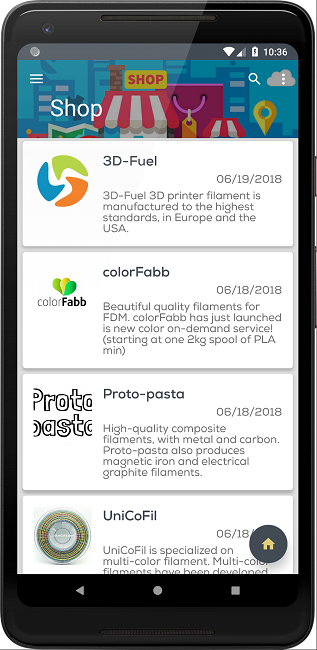
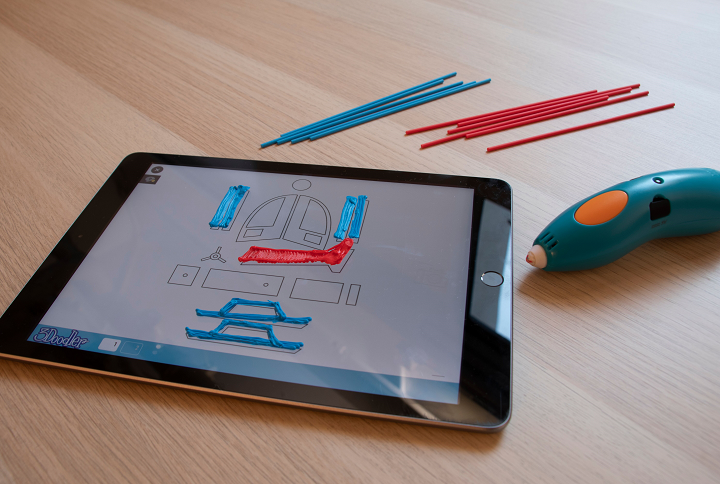
The new 3Doodler App, which will be launched in Q1 of this year, will initially have over ten tutorials and projects available, with more added each week. It also includes stencils, so you can actually use your device – be it a smartphone, iPad, or tablet – as a canvas for 3Doodling. Thanks to a seamless UX experience, the app is perfect for helping kids and adults alike make their own 3D projects in a mobile-friendly format.

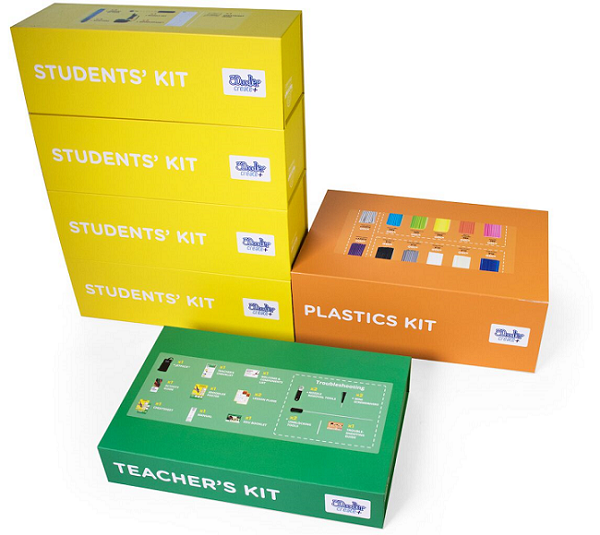
3Doodler is also focusing even more on education this year, and its EDU Learning Packs, only available through its website at first, are now being distributed, at prices ranging from $349-$1,199, across several major e-commerce and retail sites, such as Best Buy, Barnes & Noble, and Amazon. The kits were designed with feedback from teachers, and come with either 6 or 12 pens, lesson plans, a year’s supply of filament, and exclusive teaching materials. They are available for both the Start and the Create+ pens.

“Our goal is to become as ubiquitous as a Crayola or LEGO in terms of being synonymous with creativity and development from an early age. Our mission is to inspire and enable everyone to create, and firmly believe that education is the proper vehicle for this mission,” said 3Doodler’s CEO Daniel Cowen. “We’ve already seen countless examples of how 3Doodler can positively impact a classroom, and have now started to structure our company to meet that demand.”

Since 3Doodler was founded six years ago, its products have been used in over 8,000 classrooms, by more than 400,00 students, all around the world. In that time, crowdfunded educational platform DonorsChoose.org has also sent 3Doodler kits to over 1,000 middle- and low-income US classrooms. But now that the 3D printing pens are available through more well-known sites, this access can increase even further, providing such benefits to schoolchildren as:

  • Help teachers diversify teaching methods
  • Improve student concentration levels
  • Stimulate different learning methods for both kinesthetic and visual learners
  • Increase opportunities for special needs students
  • Level the playing field between male and female students
3Doodler’s Head of EDU Leah Wyman said, “In the classroom, 3Doodler enables hands-on, fun, easy-to-use experiences that create a lasting impact on every student. We’ve seen the raw and transformative effect of 3Doodler in classrooms of every size, and in every subject, whether in private schools, low-income schools, after school programs, makerspaces, libraries and more.”

In addition to the new app and wider availability for its EDU Learning Packs, 3Doodler is introducing two new Create+ Pen Sets to go along with its popular 3Doodler Create+ Essential Pen Set. The $149.99 Master Creator Pen Set includes a Create+ pen, six packages of filament, a Nozzle Set, Canvas, Project Book, and DoodlePad, while the Deluxe Pen Set for $99.99 includes four packages of filament, a DoodlePad, and a Nozzle Set. Additionally, the company’s Make Your Own Canvas Bookend Kit, with an SRP of just $29.99, lets users decorate and personalize with the Create+.

At this week’s Toy Fair, 3Doodler also debuted two new family-friendly kits for its Start and Create product lines: the ALPHADOODS Character Kit and the ROBOSUMO Activity Kit.


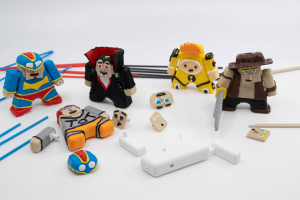
The former, with an SRP of $19.99, is a fun way to make your own animated ALPHADOOD action figure to take on adventures, including ones of the social media and stop motion variety. Each kit comes with two plastic packs, two ALPHADOODS canvases, a tracing sheet, and an activity guide.

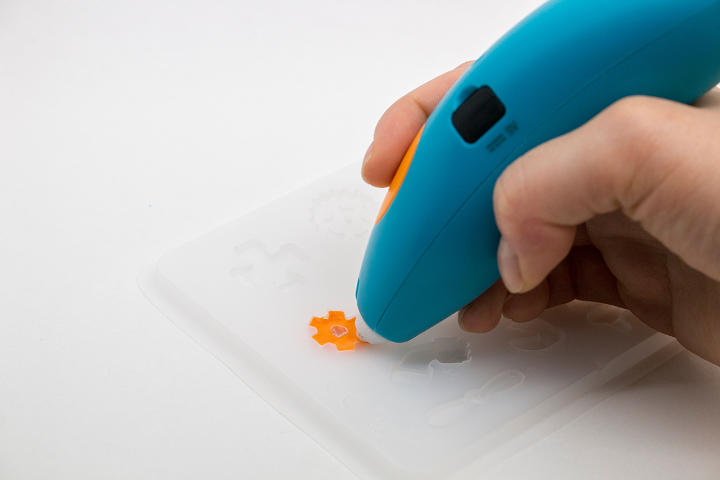
The $24.99 ROBOSUMO kit is an easy entry point into robotics for kids, where they can build their own mini sumo battle-bots and later fight them in the Sumo Battle Arena, which is included in the kit. The kit also includes two DoodleMolds, two packs of plastic, two motors, and an activity guide.

Finally, three more of the company’s fun and imaginative Activity Kits, which were originally brought to the market in Q4 2018, were officially debuted to retailers at the Toy Fair this week:

  • ANATIMO Activity Kit, $19.99
  • SCIENTIFICO Activity Kit, $29.99
  • ROBODINO Activity Kit, $29.99

Check out the funny video below for an introduction into the ALPHADOOD Character Kit:

Discuss this news and other 3D printing topics at 3DPrintBoard.com or share your thoughts in the Facebook comments below.

[Images provided by 3Doodler]

How to Turn a 2D design into a 3D print in three simple steps

Here at Shapeways, we believe everyone has the potential to create something amazing; all you need are the right tools and support to bring your ideas to life. That’s why we’re so passionate about making 3D printing more accessible with easy-to-use 3D modeling tools and apps. One of our favorites is our 2D-to-3D app, which converts images and drawings into fully fledged, printer-ready 3D models. So if you’re new to 3D modeling or simply want to mock up a new design quickly, keep reading for our expert guide on how to go from 2D to 3D with ease!

Upload buttonStep one: Upload Your Image
After opening the 2D-to-3D creator, the first step is to upload your design. You can upload anything from found illustrations to patterns and shapes. Tip #1: If you are making a drawing, black and white works best where the black is the outline of your design and the white represents the empty space. We also recommend using thick lines so your product can be printed in a greater variety of materials (minimum wall thickness for materials vary from 0.3 mm to 3.0 mm). Tip #2: If you are printing a word or a phrase, make sure the edges of the letters and characters are touching, so you can print in one piece instead of multiple ones. 

Customize button
Step two: Customize Your Design
Now that your design is in the creator, it’s time to adjust its size to your taste and needs. On the app, there are sliding scales and backing options that allow you to play with the design’s customizations. You can set your object to be as small as 5 millimeters or go all the way up to 100 millimeters. We suggest working with a ruler on hand in order to help you tangibly visualize sizes. You can also add one of two loop designs to make this a keychain, or choose “none” if you prefer to keep the design as is.

Print button
Step three: Print Your Original Design
Once you’re happy with your creation, it’s time to send it to our printers. Simply hit “Create My Keychain” to convert this into a 3D modeling file, then click on “View Model” to proceed to the next page where your model will be automatically checked to ensure printability in a range of materials suitable for your model size. If this is one of your first 3D printed products, we suggest using our Versatile Plastic, which is great for prototyping. Once you’ve selected your desired material and finish, follow the checkout page to complete the process. It’s really that easy!

Now it’s time for you to take what you’ve learned and actually create something. Test out your new skills by uploading a 2D design into our custom creator. Happy making!


The post How to Turn a 2D design into a 3D print in three simple steps appeared first on Shapeways Magazine.

Developer of Printoid App Introduces New App for Managing Your 3D Printing Filament Spools

Two years ago, Android software engineer and OctoPrint fan Anthony Stephan, who’s based out of France, developed an Android app for OctoPrint called Printoid that provides direct access to the OctoPrint server and has features such as video streaming and a 3D visualizer for G-code and STL files. Now, Stephan is back with a new project – RollingUp, an Android app that can help you more efficiently manage your 3D printing filament spools. The app, which aims to make life easier for makers, was launched about a month ago, and Stephan tells us that since then, over 2,000 users have joined the RollingUp community and “are very happy with the app.”

As he explained to 3DPrint.com, Stephan decided to make the RollingUp app for three reasons:

“firstly, I have a personal stock 50+ spools, and it is pretty hard to know how much filament I still have in this spool or this one. I maintained an Excel sheet with the input information each time I had to use a spool, but most of time I forgot to do this, and I had to power-on my computer…

“secondly, I am working with a pro here in France, who has also a high stock of spools (200+). And he needed a tool to manage his stock too.

“finally, there was no good tool to do this yet. Because the Printoid users was requesting me this feature since a while, I though that it was a good idea to provide a standalone tool for everybody!”

The RollingUp app is a 3D printer filament spool manager, which lets you easily add your spools to the app and input their usage. The app is only available on Google Play for now, though the iOS version is currently under development and should be available soon on the Apple Store.

In terms of making money, Stephan told us that the app does contain small advertisement banners, though these only show up for those who use the free version to manage just two spools of filament. The $4.99 Premium plan, accessible from an in-app purchase, doesn’t include any ads and lets you add and manage as many spools as you want.

When asked who he made the RollingUp app for, Stephan told us:

“For every makers/printers who want to track his own filament consumption. It is also a good start to make the makers/printers aware of the consumption of plastics / bio-plastics. I am currently working on new screens to display statistics to the users about their habits: how much ABS are you using against PLA? How much filament do you put in the trash? These informations will be available very soon, and I hope that we all will contribute to change our mind about the 3D printing universe: we can do amazing things, be we also have to think about our environment.”

Users can synchronize the app on multiple devices, as well as access its spools shop to get great deals on filament.

Stephan told 3DPrint.com, “I let the users filling their spool information by themself. But I am currently working with Filament.Directory, a huge spool database. They will provide me API in the next weeks to connect RollingUp with their database: users will be able to select their spools in a list instead of creating it by themself, and will also have an access to two kind of information: the best parameters provided by the manufacturer of the filament, and the best parameters observed by the users. Filament.Directory already work a lot on these informations, and it would be amazing to provide them in RollingUp.”

The app cannot currently be used to share pictures of your 3D prints, but Stephan has said he may think about adding a social media function to the next version of RollingUp. But the app has all sorts of other great features, including:

  • Easy management of your stock and various materials parameters
  • Spool consumption cost and input
  • Verify if a spool has enough filament left for a specific print job

“Very soon I will introduce new features, first in order to sensitise the users about eco-responsibility in the 3D printing world, and secondly to bind the app with the Filament.directory database (in order to create automatically spools in the app according existing spools on the market),” Stephan told us.


The app also lets users sort their filament spools by weight, material, and manufacturer, and, if you have the Premium version, access a special NFC tag-writing feature. This feature allows you to write out your spools on NFC tags, then access their status by scanning the spool with your Android device.

To take advantage of this feature, you first have to create your spool in the app. This is easy to do if you already use Printoid for OctoPrint – just choose a file in the file manager, then click the RollingUp icon to send its length and weight (in meters and grams) to the app, or directly input this information by clicking on the file name from the dashboard. Label the input and then open the ‘NFC Tags’ menu and click the ‘write’ button. Choose your spool, add your device to the tags, and voila! You can now stick the tags right on your spools.

One swift click on the spool in your app’s dashboard lets you input consumption, while a longer click will pull up its consumption history. A cost manager feature also shows how much money you’ve spent on each print.

In terms of crowdsource settings, Stephan explained to us that users will have the best settings for their own spools in the app, and will be able to contribute to the Filament.Directory database.

When asked by 3DPrint.com what he hoped to achieve with RollingUp, Stephan answered,

“Actually, I hope that the user base will grow a lot. Then, with the new features, for example the integration of the data from Filament.Directory, I hope that we will be able to improve a lot the best parameters information found in this website. Also, since users can create new spools in RollingUp, it’s also a good way to be informed about new spools on the market, which are the best parameters, etc. and so, feed the Filament.Directory database. This database is amazing and deserve to grow quickly, with the help of every makers/printers!

“Moreover, with RollingUp, I really want to give super-powers to the 3D printers and their spools. The NFC feature, for example, is easy to use, but very impressive and convenient!”

Will you try out the RollingUp app? Let us know! Discuss this and other 3D printing topics at 3DPrintBoard.com or share your thoughts in the comments below. 

[Images provided by Anthony Stephan]