
Edelkrone, a manufacturer of film equipment has launched a 3D printed tabletop dolly Skater 3D for DSLR and mirrorless cameras. Compatible with all tripod head and magic arms, the 3D printed dolly is designed to make the set up of curved and linear camera motion easier. As part of its co-manufacturing program Ortak, Edelkrone delivers […]
Make an Object Tracking Camera Slider #celebratephotography
From Saral Tayal on Instructables:
This project has been one of my favorite projects since I got to combine my interest of video-making with DIY. I’ve always looked at and wanted to emulate those cinematic shots in movies where a camera moves across a screen while panning to track the object. This adds a very interesting depth effect to an otherwise 2d video. Wanting to replicate this without spending thousands of dollars on Hollywood gear, I decided to build such a camera slider myself.
Read more and see more on YouTube

We #celebratephotography here at Adafruit every Saturday. From photographers of all levels to projects you have made or those that inspire you to make, we’re on it! Got a tip? Well, send it in!
If you’re interested in making your own project and need some gear, we’ve got you covered. Be sure to check out our Raspberry Pi accessories and our DIY cameras.
Mathieu Stern Made a Camera Lens with an Iceberg #celebratephotography
This is just way too cool. From Mathieu Stern on YouTube:
Now the facts :
– First of all the life-span of a lens made of ice is very short, so you can’t move very far from where you create the lens.
– Focusing is extremely hard because of the water melting on the lens itslef.
– Shaping one ” lens” takes 45 min because of the ambiant cold.
– If your lens breaks in the mold, you have to start all over again
– I hacked a Japanese cocktail ice ball maker to create half spheres.
– The housing of the lens was made using a home made 3D print model.
– All photos where shot during the 1 minute of the last ice lens.
– The video at the beginning of the video was shot in the last usable seconds of the last ice lens.
– No I didn’t ruined my camera with water damages, even if it was pretty dangerous, I managed to keep the inside dry.
Now if people asks me “Are you happy with the result ? it’s a bunch of blurry photos !?”, my response would be : “this project is a scientific, artistic and poetic project, I never imagined the result would look like the photos that comes from an ultra modern lens, but I was amazed by the strange beauty of the images I made with the first ever 10 000 year old lens.”
This is not a project for everyday photography, it was an adventure and a bet that when you have a crazy hypothesis, you should do everything to experiment it in the field.
We #celebratephotography here at Adafruit every Saturday. From photographers of all levels to projects you have made or those that inspire you to make, we’re on it! Got a tip? Well, send it in!
If you’re interested in making your own project and need some gear, we’ve got you covered. Be sure to check out our Raspberry Pi accessories and our DIY cameras.
High-Speed Cameras Used to Monitor 3D Printing Process

3D printing, particulalry laser-powder bed fusion or L-PBF, requires a great deal of monitoring to avoid defects and flaws in the final parts. In a thesis entitled “Process Monitoring for Temporal-Spatial Modeling of Laser Powder Bed Fusion,” a student named Animek Shaurya studies the use of high-speed video cameras for in-situ monitoring of the 3D printing process of nickel alloy 625 to detect meltpool, splatter, and over melting regions to improve the quality of the print.
“The quantities that can be measured via in-situ sensing can be referred to as process signatures and can represent the source of information to detect possible defects,” states Shaurya. “The video images are processed for temporal-spatial analysis by using principal component analysis and T2 statistics for identifying the history of pixel intensity levels through the process monitoring. These results are correlated as over melting and spatter regions. The results obtained from these studies will provide information about the process parameters which can be used for further validation of modelling studies or for industrial purposes.”
 Another objective of the research is to study meltpool locations and the types being generated during over melting, normal melting and under melting. There are two main types of meltpool: Type One, in which the meltpool area being processed is still within the heat-affected zone of the previous hatch scanning (or track processing); and Type Two, in which the meltpool area being processed is no longer affected by the heat from laser scanning of the previous track or hatch.
For the study, an EOS Direct Metal Laser Sintering Machine was used to 3D print nickel cubes. Experiments were designed to establish
a relationship between process parameters and part quality. A high-speed camera was used to perform an in-situ process monitoring to quantitatively analyze meltpool size and understand and analyze spattering behavior.
 It was shown that over melting occurs more frequently in the processing of Type One tracks than in Type Two tracks.
“Such high values are usually occurring since pixel in these areas are characterized by an intensity profile that is mainly different from the underlying pattern that describes the image stream,” says Shaurya. “The knowledge of spatial localization of these spikes is important from an in-situ perspective, because they can provide information about local anomalies that may result to defects happening in products.”
Spattering happens more in Type One tracks than in Type Two as well, the video evidence concluded.
“The results obtained from this study proves that the method is more than suitable in developing a self-learning assistance system which can help in detecting spatter as the product is being made layer by layer,” concludes Shaurya. “Also, the robustness of PCA methodology used in this study can be easily verified by associating it with a statistical descriptor called Hotelling’s T2 distance which gives a spatial mapping against the pixel location using principal components which contribute most towards the video file and restricting loss of the information too.”
Discuss this and other 3D printing topics at 3DPrintBoard.com or share your thoughts below.
The ‘Goodman Art Adapter’ is a 3D-Printed DOF Adapter for 35mm Lenses, Using Custom Frames & Screens

This is a brilliant and brilliantly simple blending of two technologies to create some really stunning and unique images without post-processing:


DIY Photography explains the adapter,
The way they work is quite simple, in principle. They’re not like regular lens adapters or speed boosters that project an image from the lens straight onto the sensor. That wouldn’t work with a phone because the lens can’t exactly be removed. Instead, the lens projects the scene onto some form of translucent material. The camera focuses on this material from the back side and records that.
Watch some footage shot with the Art Adapter:
via DIY Photography
3D Printing News Briefs: September 4, 2018
In the first 3D Printing News Briefs for this month, we’re starting with some education and business, followed by some how-to videos and a couple of things to ponder. PrintLab’s curriculum is going global, while the province of Victoria in Australia has invested in 3D printing. A Ukrainian company has introduced a new type of metal 3D printing, and you can learn how to cast concrete 3D printed molds and make an etched glass build surface for your 3D printer by checking out two new YouTube videos. There could be even more uses for construction 3D printing than previously thought, and a thermal view of a model being 3D printed on an Ultimaker begs an important question.
PrintLab Portal Available in Polish
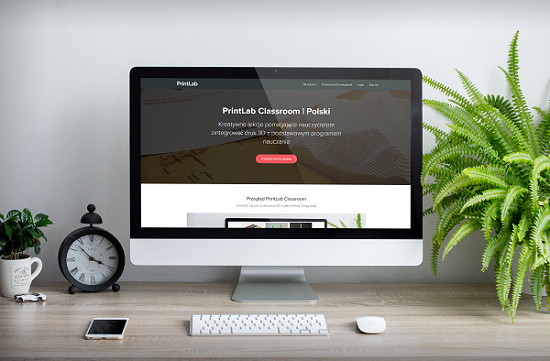 3D printing curriculum provider PrintLab, based in the UK, set up an online portal in January, called PrintLab Classroom, to help teachers better integrate 3D printing into their lesson plans. Now that the English version of the learning platform has been successfully launched, PrintLab is working to offer the curriculum portal in multiple languages. Now, thanks to a collaboration with Polish 3D technology and education supplier Paxer, a new PrintLab reseller, the platform is available in Polish, with translations in Spanish and Chinese in the works.
“After a great deal of initial interest and success, we are very pleased to be able to offer our curriculum to Polish students and educators. Our mission has always been to prepare the next generation for their future careers by addressing the widening skills gap and we are now able to do this across multiple regions. Our focus is on finding partners that share our belief and vision and in Paxer, we have found a motivated team that has technology in education at its core,” said Nick Mayor, Co-Founder at PrintLab.
“The aim is to inspire students and teachers around the world to adopt technology into lessons. We have started with Polish, however that is just the beginning. Spanish and Chinese translation is currently being undertaken which is part of our plan of inspiring minds on a global scale and providing teachers worldwide with comprehensive lesson packages, developed alongside teachers.”
New Virtual 3D Printing Hub in Victoria
 The manufacturing industry in Victoria, the second most populous state in Australia, contributes $27.7 billion to the Victorian economy. Now, businesses there will be able to connect with additive manufacturing technology and produce products more easily and quickly, thanks to a new dedicated virtual hub. Ben Carroll, the Minister for Industry and Employment, joined Member for Carrum, Sonya Kilkenny, at the Carrum Downs facility of 3D printing company Objective3D to make the announcement this week. The hub, supported by $2 million from the Victorian Government and delivered by Australian Manufacturing Technology Institute Limited – a national body representing manufacturing technology suppliers and users – should improve access for local companies to the state’s 3D printing infrastructure.
Carroll said, “3D printing is a game changer for manufacturing – which is why we’re backing the technology so more local companies can reap the benefits.
“This new hub will help local manufactures innovate, become more productive and excel in future industries.”
xBeam Metal 3D Printing
 Ukrainian company NVO Chervona Hvilya has a new form of metal 3D printing it calls xBeam, which it says “was born to make the best features of Additive Manufacturing available for wide industrial community and to prove that definition of Additive manufacturing as the Third Industrial Revolution is reality.” The company has spent roughly four decades developing electron beam technologies for multiple applications, and its exclusive xBeam technology was born from this experience.
With xBeam, the company says you won’t have to decide between high productivity, accuracy, and a defect-free metal structure – its patented solution delivers all three. xBeam is based on the ability of a gas-discharge electron beam gun to generate a hollow, conical beam, which can offer “unique physical conditions for precisely controllable metal deposition and forming of desired metal structure in produced 3D metal part.”
Using 3D Printed Molds to Create Cast Concrete Products
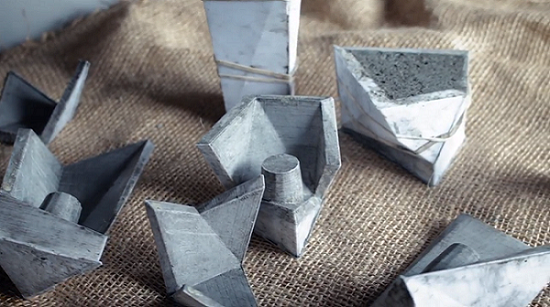 Industrial designer Rob Chesney, the founder of New Zealand-based bespoke design and fabrication studio Further Fabrication, recently published a tutorial on the studio’s YouTube channel about creating cast concrete objects and products with 3D printed molds and no silicone at all. For the purposes of the video, Chesney used 3D printed molds for faceted candle holders.
“In the first half of this video we’re gonna deal with the design and the creation of the molds using the computer and 3D printing,” Chesney said. “In the second half we’ll show you how you go about casting products with some tips and tricks thrown in there along the way.”
To learn how to make your own cast concrete candle holder with a 3D printed mold, check out the Further Fabrication video:
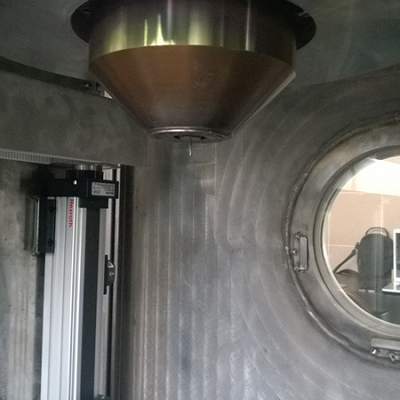
Etched Glass Build Plate
 Another new video tutorial, this time by YouTube user MrDabrudda, shows viewers how to make an etched glass build surface for a 3D printer. What’s even better, the plate does not require you to use tape, a glue stick, or even hairspray to get your prints to adhere to it.
“So I’m tired of having to respray the hairspray on my glass bed for my 3D printer, so what I’m doing is taking a 180 grit diamond stone and a tub of water, and I’m going around on here and roughing this up,” MrDabrudda said.
To learn the rest of the process, check out the rest of the video:
Construction 3D Printing Uses

A 3D printed Volvo CE workshop tool
While there are still those who may think that construction 3D printing is all hype, that’s not the case. Sure, maybe it’s not possible to create a fully 3D printed house in a day in every country in the world, but we’re already able to create large-scale, 3D printed objects, with impressive lifespans and tensile strengths, out of a multitude of materials. There are also other applications in construction 3D printing than just houses. Caterpillar has long been interested in 3D printing, and thanks to its early work in research engineering cells, prototyping, and 3D printing tools for the assembly line, it’s now moved into commercial production of nearly 100 components; however, all but one were made of polymers.
“We’ve made a lot of progress with this technology, but not to the point where we are comfortable putting it into, for example, safety equipment or the manufacture of large metal parts, although we are doing a lot of research in that area,” said Don Jones, Caterpillar’s General Manager, Global Parts Strategy and Transformation.
Another OEM with developed 3D printing capabilities is Volvo CE, which stands for Construction Equipment. As of right now, the company has 3D printed spare parts such as plastic coverings, cab elements, and sections of air conditioning units.
“It’s especially good for older machines where the parts that have worn out are no longer made efficiently in traditional production methods,” said Jasenko Lagumdzija, Volvo CE’s manager of Business Support. “Producing new parts by 3D printing cuts down on time and costs, so it’s an efficient way of helping customers.”
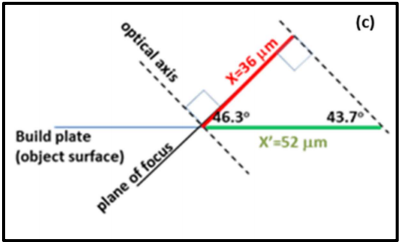
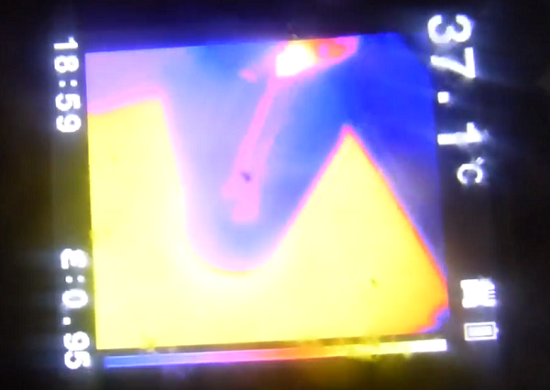
Can Thermal Imaging Improve 3D Printing Results?
 Usually when I think of thermal imaging, the movie Predator immediately comes to mind – the alien creature tracked its human prey by their body heat signatures. But this technology can also be applied to 3D printing. About two years ago, CNC machine manufacturing company Thermwood Corporation added real-time thermographic imaging as a standard feature on its LSAM (Large Scale Additive Manufacturing) systems. This imaging makes it far easier to adjust and control the entire 3D printing process, which will result in excellent 3D printed structures as a result.
Using thermal imaging can help create high-quality, large tools that are solid and void-free enough to maintain a vacuum, without any necessary surface coating or sealing. To ensure good prints, the temperature of the print surface needs to be controlled, which is tricky to do. But thermal imaging can help operators remain in the optimal range of temperatures. Thermwood seems to be ahead of the times with its thermal imaging capabilities.
A new video was recently posted by YouTube user Julian Danzer showing a large BFR winged rear section model being fabricated on an Ultimaker 3D printer; the video switches about 30 seconds in to a thermal view of the print job. The quality isn’t great, but it makes me think – should all 3D printers come standard with FLIR cameras now? If thermal imaging can really help improve the results of 3D prints, my answer is yes. What do you think?
Discuss these stories and other 3D printing topics at 3DPrintBoard.com or share your thoughts below.
#3DPrinted Olympus E-M5 MKII Camera Grip Remix #celebratephotography

From Feric on Thingiverse:
The original grip design is by Scott Garriott, you can find his model at https://grabcad.com/library/e-m5-mkii-diy-camera-grip-1
I know EM5mk2 is a 2015 camera, I use my design for a long time until my friend ask me to share it.I tweak some detail:
- The Garriott design bottom is 6 mm, so many tripod plate can’t reach. My design reduce to 2 mm. Of course it will become more fragile. So it is suggest to print with high strength material.
- So I increase the “front bumper” thickness
- Add groove for thumb
- Add slot for micro SD and micro sim. (I’ve tried large SD, it has solution, but ugly
)
We #celebratephotography here at Adafruit every Saturday. From photographers of all levels to projects you have made or those that inspire you to make, we’re on it! Got a tip? Well, send it in!
If you’re interested in making your own project and need some gear, we’ve got you covered. Be sure to check out our Raspberry Pi accessories and our DIY cameras.
#3DPrinted Nikon 18-140 Kit Lense Hood #celebratephotography

From donek on Thingiverse:
The Nikon 18-140 kit lens I got with my camera body did not have a lens hood. I couldn’t find one that fit or locked in place properly on thingiverse, so I designed this. The original black print was done 2 years ago on my Mendel Max in ABS at 0.06mm layer height. I decided to try it our on my Ender 3 at 0.2mm layer height (the yellow version) to see how it would work. It worked great with no adjustments.
We #celebratephotography here at Adafruit every Saturday. From photographers of all levels to projects you have made or those that inspire you to make, we’re on it! Got a tip? Well, send it in!
If you’re interested in making your own project and need some gear, we’ve got you covered. Be sure to check out our Raspberry Pi accessories and our DIY cameras.
Instax SQ6 Lens Swap #celebratephotography

From Kevin Kadooka on Hackaday.io:
The Instax SQ6 (and Fujifilm’s entire range of instant film cameras) are fun and capable toys that are held back by their lack of manual controls and simple one or two element plastic lenses.
Many tinkerers have already grafted medium or large format lenses to Instax Mini and Instax Wide cameras, but there is little documentation of the process. This project will seek to provide an in-depth guide to the lens transplantation process.
We #celebratephotography here at Adafruit every Saturday. From photographers of all levels to projects you have made or those that inspire you to make, we’re on it! Got a tip? Well, send it in!
If you’re interested in making your own project and need some gear, we’ve got you covered. Be sure to check out our Raspberry Pi accessories and our DIY cameras.