Today’s 3D Printing News Briefs is about materials and a 3D printed version of a real building. Titan Robotics and Braskem are partnering up to offer new solutions in 3D printed polypropylene, while 3DPRINTUK is expanding its materials and post-processing capabilities. Finally, the Coit Tower House in San Francisco now has a 3D printed miniature replica.
Titan Robotics & Braskem Announce Partnership
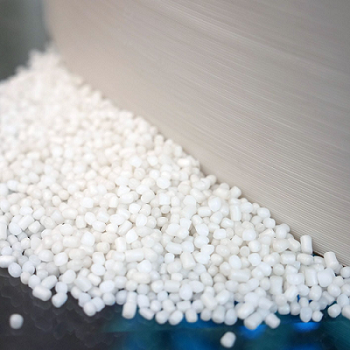
Braskem Polypropylene pellets for 3D printing
Production AM solutions provider Titan Robotics and petrochemical company Braskem have announced their strategic partnership, which has resulted in the launch of a new polypropylene (PP) resin that’s been optimized for 3D printing large-format production parts. The two companies spent over a year researching and developing the new material, which is the first commercially available grade of unfilled PP engineered specifically for 3D printing on Titan’s industrial Atlas 3D printers with pellet extrusion. The features of PP include chemical resistance, dimensional stability, impact strength, low density, recyclability, and thanks to this new partnership, Titan and Braskem will be able to offer improved industrial AM solutions.
“3D printing large parts using polypropylene resin has been a challenge for many years,” stated Rahul Kasat, Titan Robotics’ Chief Commercial Officer. “In collaboration with Braskem, a global leader in the polypropylene market, we have now solved that challenge. Our industrial customers will be able to print functional parts with this first of its kind polypropylene grade. We are also excited to continue to develop new polypropylene based solutions for our customers in collaboration with Braskem.”
Titan is also an authorized distributor of Braskem’s 3D printing pellet products.
3DPRINTUK Expanding Materials & Post-Processing
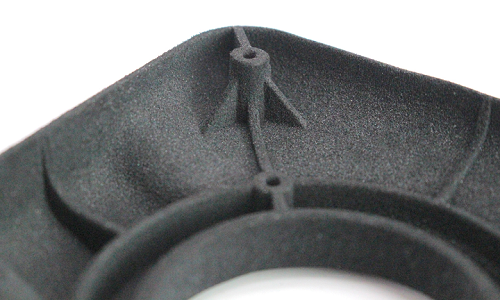
PEBA Dyed Close Up
SLS low volume production specialist 3DPRINTUK is branching out with its introduction of the flexible PrimePart 2301, a polyether block amide (PEBA) material with good chemical and water resistance, rubber-like characteristics not dissimilar to TPU, excellent detail resolution, and a higher melting point than most other resin-based elastomers. The material would be a good fit for batch production runs and rugged end-use applications, including handles, sports equipment, air ducts, and gaskets. Additionally, the company has invested in DyeMansion’s PowerShot S system, which uses a proprietary PolyShot Surfacing (PSS) process that allows 3DPRINTUK to offer a shot peening post-processing service that can improve the surface finish of 3D printed parts.
“At 3DPRINT UK we have honed and optimized the SLS 3D printing process over many years to achieve the best possible results off our machines for a wide range of relevant applications, that continue to grow in scope. However, the post processing of parts — from cleaning through to further optimised surface finishes — has always been a necessity for many of our clients. Expanding our post processing capabilities is a vital part of the business, and the DyeMansion PowerShot S system is an important next step in our expansion, enabling us to offer our many and varied clients the benefits of shot peened 3D printed parts from a single source,” said Nick Allen, the CEO and Founder of 3DPRINTUK.
3D Printed Coit Tower House
 The 210′ tall Coit Tower was built in the early 1930s in San Francisco’s Telegraph Hill neighborhood as a way to beautify the city. The art deco tower, a recognizable sight on the city’s skyline, was added to the National Register of Historic Places in early 2008, and 12 years later, Yuriy Sklyar, the founder, CEO, and head of design & marketing at design studio Threefifty, has 3D printed a replica tower that stands over 7′ tall…a 1/20 scale. Utilizing a Creality CR10S5, a Replicator 2, and a MakerBot system, Sklyar, who has been utilizing 3D printing since 2013, called this unique project a “great opportunity to leave a lasting mark on the best city in the world – and its art community.” It took a month to create the base of the tower, as he had to redo a lot of it, eventually installing a heated silicone bed and heat enclosure to reduce the amount of warping. The next month was spent printing “the 4 giant sections of the fluted tower design.”
“Each one of these four sections, just like the real tower, consists of 4 sub-sections – I wanted to be very accurate with such details. At first these were limited in height by the 3rd party 3D printer, so only 2 sub-sections were supposed to be printed at a time, and then joined together with metal plates and nuts/bolts, but since I was now working on my own terms, I decided to reduce the amount of work for myself, and at the same time reduce the number of bolts/nuts/plates to just 4 sets, instead of 8,” Sklyar wrote.
“Each one of these sections takes about 3.5-4 days to print using a single 1.1mm shell @ 10% infill, which created for a surprisingly strong structure, since I instructed the infil to have a 45% overlap with inner and outer walls.”
You can check out his post for the very specific details of the project, but I’ll leave you with just a few – including all of the hardware used, the 3D printed Coit Tower weighs a total of 24 kg, and took over 7.5 km of ColorFabb’s nGen filament, SUNLU PETG and Gizmo Dorks PETG filament to print. Sklyar designed the whole thing from scratch, and the columns are joined by steel plates secured by bolts and in-printed nuts.
The post 3D Printing News Briefs, August 5, 2020: Titan Robotics & Braskem, 3DPRINTUK appeared first on 3DPrint.com | The Voice of 3D Printing / Additive Manufacturing.