
3D Printing Industry reviews the CraftBot Flow IDEX XL 3D printer. Designed by Hungarian manufacturer Craftunique, the CraftBot Flow IDEX XL is a large-format independent dual extrusion (IDEX) FFF machine. Priced at $3,999, the system is targeted at engineers, designers, architects and artists looking to produce sizable professional-grade prints for functional, artistic or prototyping purposes. The […]
Review: The BCN3D Sigmax R19 – Independent dual extrusion, large volume FFF
3D Printing Industry reviews the BCN3D Sigmax R19 3D printer. Designed by Spanish manufacturer BCN3D, the Sigmax R19 is a large format dual extrusion FFF system aimed at SMEs and professionals in the design and engineering sectors. With a price tag of around €4500, the Sigmax R19 promises to deliver professional-grade prints in large numbers […]
Review: The Kodak Portrait 3D printer – a reliable dual extrusion machine
3D Printing Industry reviews the Kodak Portrait 3D printer. Designed by Smart International and licensed with the Kodak brand, the Portrait 3D printer is a desktop sized professional-grade dual extrusion FFF system. The printer is priced at $3,499 and aimed at engineering and design professionals with a set of precise motors and specialist features such […]
The Shield of Achilles: Greek Students Enjoy Learning Program Integrating 3D Printing Studies & Classical Studies
Angelopoulos and E. Solomou have authored ‘The Shield of Achilles using 3D Technologies to Support Teaching Scenarios of Homeric Epics,’ describing a recent interdisciplinary school program centered around the Homer’s Iliad, and an Informatics class. This new method of teaching occurred at the 1st Junior High School of Vrilissia, Athens (2017-2018 school year) as students aged 13-14 of the B grade created a 3D design project called ‘Shield of Achilles.’
It is a pretty well-known fact within educational circles that the need to involve more children in STEM learning is great. Classical subjects need more attention these days too, along with new and innovative teaching methods for teachers. Both types of studies complement each other perfectly:
“Students interested in classical subjects do not use scientific thinking, computational thinking, practice and methodologies based on the understanding of STEM subjects,” said the authors. “Also, students with interest in STEM subjects are less interested in classical studies which lessens their chances of developing comprehensive knowledge and literacy on issues such as history, philosophy, languages, religions, etc.”
The new learning program looks toward the year 2030 as teachers combine STEM, social science, humanities, arts, and classical disciplines; and while students who follow STEM-related careers usually end up with myriad options later, such classes are historically lacking in female students as well as the overall popularity desired by educators and prospective employers who would like to see the pool of prospective young graduates expanding for ongoing needs in the workforce.
“Connecting STEM and Classical subjects (Informatics and Ancient Greek in our case) is vital in ensuring that the general knowledge sector will benefit of much needed new talent in its various fields, and that students think and act not only like scientists-experts in their field, but also as integrated personalities, weighing evidence to draw conclusions, and learning how to navigate the claims bombarding us in our everyday lives,” stated the authors.
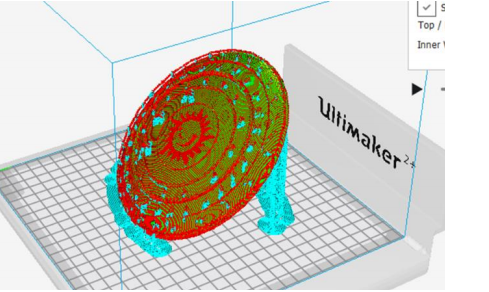
Model of the Shield of Achilles made by students in Layer view
The “Shield of Achilles” program is meant to offer the following:
- Create a ‘community of practice’ between the STEM and classical learning disciplines
- Implement integrated models
- Monitor acquisition of skills, student participation and performance, and enthusiasm level of students
For the Informatics class, the students were able to work on an Ultimaker 2+ 3D printer that had been donated to the school two years previously. Students also learned how to use both Tinkercad and Cura as they fabricated their own Achilles’ shield, encouraged to ‘freely express themselves and produce their own creation’ in 3D.
Upon completing a questionnaire at the end, students and teachers expressing having fun, although students would have liked ‘subjects to be taught in an interdisciplinary way together with IT and the support of 3D printing and designing technologies.’ They did, however, enjoy the cross-teaching approach integrating 3D design and printing. Students also expressed having a ‘positive view’ about Ancient Greek.
“Since the implementation of the program, it has been shown that students’ interest in both IT subject and the cognitive subject of Ancient Greek, was highly increased. In particular, enhancing interest was much greater for weak students in both Homer’s Iliad and IT,” concluded the authors.
“The use of three-dimensional technologies can make cognitive subjects more attractive to students, enhance the quality of teaching subjects, increase students’ interest in them and acquire skills [13] such as: problem solving, digital skills, teamwork, communication with my classmates, learn how to learn on my own, etc., skills that are necessary to improve the personality and education of the students.”
3D printing within educational systems around the world is playing a large role in how students shape their perception of STEM learning, and consequent careers in related fields. Teachers and students are often able to learn together regarding new technology, and classrooms are producing everything from prosthetics for animals to robotics, and far more.
[Source / Images: ‘The Shield of Achilles using 3D Technologies to Support Teaching Scenarios of Homeric Epics’]
The post The Shield of Achilles: Greek Students Enjoy Learning Program Integrating 3D Printing Studies & Classical Studies appeared first on 3DPrint.com | The Voice of 3D Printing / Additive Manufacturing.
3D Printing News Briefs: February 28, 2020
In today’s 3D Printing News Briefs, AMUG has announced the recipients of its two scholarships, Ultimaker is marking a milestone with a new online marketplace and new Cura features, and a company has created a revolutionary 3D printed helmet to help children with flat head syndrome.
AMUG Announces Scholarship Recipients
 The Additive Manufacturing Users Group (AMUG) just announced the two recipients of its annual scholarships, who will now be recognized at the AMUG Conference in Chicago next month. The Guy E. Bourdeau Scholarship is awarded to one college student with a passion for AM, and this year it went to Katherine (Kate) Schneidau, who is pursuing a master’s degree in mechanical engineering at the University of Louisville. Chris Kaminsky, the Lakeshore Fab Lab manager at Muskegon Community College, received the Randy Stevens Scholarship, which is awarded to one educator who emphasizes or focuses on AM. Schneidau learned about SL, DLP, FFF, SLS, DMLM, and other methods of 3D printing through her engineering co-op, and taught others how to use the equipment, in addition to developing new process parameters for plastic and metal materials. Kaminsky makes 3D printing and design accessible to others by co-founding the MI3D organization, and is also a guest speaker about the technology.
“I’m so excited to announce that Ms. Schneidau and Mr. Kaminsky have accepted the scholarships and will attend AMUG 2020,” said Brett Charlton, chair of the AMUG Scholarship Committee. “Once again, the pool of applicants was strong, and their experiences were vast. I’m certainly in awe—the experiences of our 2020 applicants in AM are astonishing, and it bodes well for AM’s future! The talent pool made it a challenge to select the right individuals, but both of our recipients are amazing and truly deserving of this honor.”
Ultimaker Introduces Marketplace and New Cura Features
 To celebrate its milestone of preparing 2,000,000 print jobs per week through Cura slicing software, Ultimaker launched a new online Marketplace, along with the release of Ultimaker Cura 4.5 and its additional features. Cura now has over 600,000 active users a month, and at the end of 2019, it was preparing twice as many print jobs per week as it had in 2018. Ultimaker Marketplace gives users access to plugins for standard software platforms, while the latest software release connects the Marketplace to Cura with new cloud functionality, which associates the plugins and optimized printing profiles directly with the user.
“Ultimaker Cura is continuously powered by its open source community and dedicated in-house software team. We see our user database is rapidly expanding every day with new students, makers and professional users. Where one user is more eager to manually tweak and test every setting available, others want to fully integrate 3D printing into existing workflows,” said Ultimaker’s CTO Dick Moerkens. “I am proud of our open approach and agile development strategy, which allows us to fully streamline and simplify the 3D printing workflow now and in the future.”
3D Printed TiMband Air Helmet
 UK company Technology in Motion specializes in plagiocephaly (flat head syndrome) solutions for babies and children – namely, remolding helmets that are 3D printed so they’re more lightweight and comfortable. According to research, orthotic helmet treatment is the best way to treat severe head shape deformity, and the customizable TiMbandAir helmet (also known as the Talee in EU countries) is made with patent-pending bio-responsive technology for a better, more breathable fit – allowing the head to correct as it grows over four to six months. It has a unique three shell construction: the inner layer is a soft easy-clean liner to minimize sweating, while the mid-layer is important for shock absorption and offers flexible, gentle pressure, and the outer layer holds shape, gives strength, and provides protection. Thanks to 3D printing, these shells are also thinner than in other similar helmets, and the helmet features a breathable design to promote ventilation. Technology in Motion takes a photographic 3D scan of the baby’s head, and 3D printing, provided by partners at Invent Medical, ensures a custom fit. In 2018, the company received the prestigious Red Dot: Best of the Best design award for its recently launched TiMbandAir helmet, available in Technology in Motion clinics across the UK.
“We are extremely proud of the TiMbandAir helmet. We have had an amazing response so far, with almost 50% of parents opting for the TiMbandAir since its launch,” said Steve Mottram MBAPO, Managing Director of Technology in Motion. “We understand the distress, uncertainty and confusion parents undergo and we are excited to offer parents an improved form of flat head syndrome treatment for the future.
Discuss these stories and other 3D printing topics at 3DPrintBoard.com or share your thoughts in the Facebook comments below.
The post 3D Printing News Briefs: February 28, 2020 appeared first on 3DPrint.com | The Voice of 3D Printing / Additive Manufacturing.
Teton Simulation’s Software Automatically Finds and Tests Optimal 3D Printing Parameters
In order to achieve successful 3D prints, you need optimal print parameters. Enter slicing software, right? But, most slicers do not have a capability that would make things even easier – physical part simulation, in addition to a recommendation system for choosing those parameters.

US additive manufacturing software startup Teton Simulation, headquartered in Wyoming, is in the latter phases of R&D, and working towards production commercialization, for a really interesting technology called Intelligent Slicing. Teton was one of eight companies selected to present at last year’s RAPID + TCT Innovation Auditions, and is planning to officially announce its technology at this year’s AMUG Conference in March.

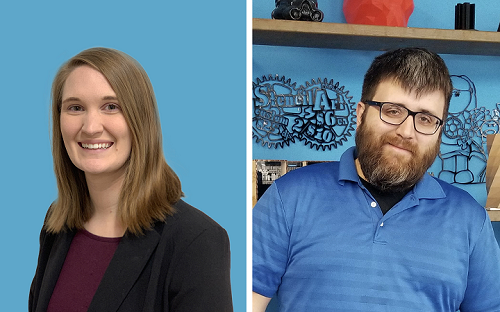
Doug Kenik
“The job of a slicer is simple: convert part geometry to instructions for 3d printers. Modern slicers do a great job of accomplishing this while providing the user with near complete control over how a part is printed,” Teton’s VP of Product Doug Kenik told 3DPrint.com. “However, while offering up these controls, slicers fail to provide any guidance into how these controls should be configured in order produce a part that must meet real-life performance requirements. This forces people into the tedious and time-consuming cycle of printing parts, testing them, then adjusting the print profile until they stumble upon a part that meets the requirements. At this point, they have a part that works, but have wasted countless days or weeks of productivity, machine time, and material.”

Physics-based Intelligent Slicing can be easily embedded into existing slicer programs. But, what exactly does Intelligent Slicing do?
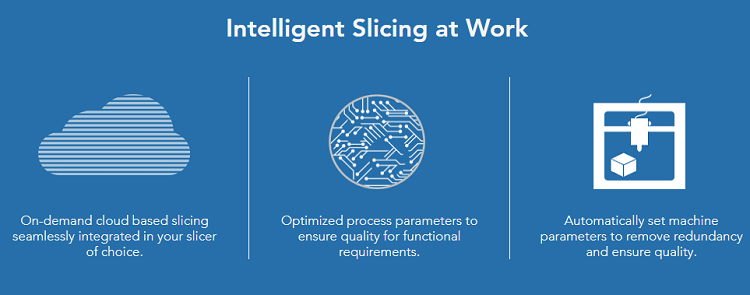
“Our technology addresses the gap in the design cycle by guiding the user as to which print parameters to use in order to meet performance requirements while minimizing print time and material usage,” Kenik continued. “The first integration of our technology will be with Cura, which is a great starting point since they are one of the world’s most popular slicers for FFF parts. As a user, all you have to do is define end-use requirements, and then our optimizations routines churn in the background and deliver a list of optimized print profiles that the user can choose from. Since our technology runs in the cloud, we are able to run many parallels simulations which result in blazing fast solution times. At the end of the day, our objective is to save the user time by eliminating print iterations, increase productivity and machine throughput, and reduce material waste.”
According to the Teton website, its proprietary software technology can help users quickly achieve “automatic validation and optimization” of parameters so that parts meet the necessary manufacturing and performance requirements.
“We are currently commercializing technology that will optimize FFF/FDM part print parameters for manufacturing and performance requirements while minimizing print time, with the aim to reduce manufacturing cycles by an order of magnitude,” Rick Dalgarno, the Director of Alliances and Operations at Teton, told us. “Our technology is being integrated into commercial slicing products with the intent of embedding “intelligence” into slicers that is simple to use and fast.”

Rick Dalgarno
Dalgarno tells us that Intelligent Slicing automatically selects 3D printing parameters for optimal structural performance of parts.
A common way to determine the best print parameters is what Teton refers to in a blog post as the “build/break cycle.” If a 3D printed part breaks during testing, you can go back, change some of the parameters, and try it again until you finally have a part that doesn’t break, meaning you’ve landed on a valid set of parameters. Obviously, 3D printing does speed up this process, but it still takes time.
Slicing software is, according to Teton, “entirely disconnected from the initial design requirements,” and also requires a “staggering” amount of print parameters, which are unfortunately necessary as they are responsible for influencing how the part will actually perform in the real world. And while simulation software can help predict how a part will perform without the need for a physical model, a lot of these solutions require a decent amount of prior knowledge. Additionally, even if the software can portray a part’s internal structures, the accuracy of the model is not always perfect.
Teton’s Intelligent Slicing technology can not only optimize and validate print parameters, but also predict their impact on a 3D printed part’s performance. The software offers an intuitive, repeatable, and simple process to slice parts and help lower print iterations.
“Our intent is to remove the ambiguity and confusion of defining slicing parameters by automating the process and identifying the best potential paths the user can take to make a superior part, faster – a process we refer to as Intelligent Slicing,” the website states.
The company provides a good example of how to use its physics-based simulation tool with a bicycle pedal fixture that needs to be optimized for 3D printing.
The simulation tool is embedded in the slicer in order to optimize print parameters and validate the part’s structural performance.
“Let’s focus on infill density for the moment. Imagine that a part is required to have a factor of safety equal to 2. We can think of this as requiring the part to be twice as strong as it needs to be in operation,” the Teton blog states. “What infill density should we use to obtain the desired part strength?
“Suppose that we would like to see if an infill density of 20% would suffice. This value would result in relatively faster print times and lower material usage, but that’s useless if the part doesn’t perform.”
The Intelligent Slicing solution allows users to leverage simulation in the slicer itself to virtually test the part before ever pushing “Start Print Job.” If you receive negative results, no problem – just change the infill density until you find one that works.
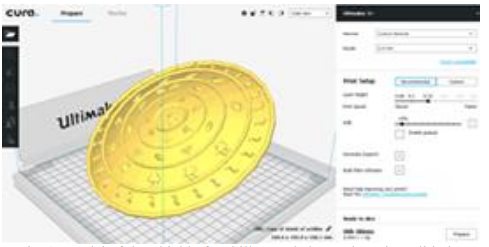
Model of the pedal fixture in the Cura slicer
Teton software’s optimization capabilities are great, because Intelligent Slicing can easily tweak multiple possibilities, like layer height and width, the number of walls, and how many top or bottom layers a print might need. Just add the part’s requirements and with the simple press of a button, the software will “intelligently” search all the possibilities until it’s landed on valid parameters.
“Let’s consider this approach for the pedal fixture,” the blog continues. “After setting the requirement for a factor of safety to 2 and specifying how the part will be loaded and anchored, Teton’s software can be used to validate a user-defined set of print parameters or search for optimal choices for valid print parameters. As before, we focus on changing only the infill of the model, but this time, we give the task to the optimization software. In addition to tuning the infill density, our software will also test local variations in infill density using modifier meshes. Such spatially-varying infill properties can be used to great effect for structural performance, as they allow us to target inherently weaker areas of the part.”

Sliced, optimized part: The modifier mesh is in the middle, surrounded by its own walls, which contribute to part strength.
For increased strength, Intelligent Slicing also added a modifier mesh to the middle of the pedal. This helped achieve a set of parameters that resulted in “significantly less time and material usage” than changing up the global infill density would have.
The infill density inside the modifier mesh (45%) is noticeably higher than in the rest of the part (20%); a result of the localization of material to improve structural performance.
“Most of the structural simulation tools on the market are “analyst-level” tools, and we recognized that most people simply don’t have the education or training to feel comfortable in analyst-level workflows. In order to serve a broader market, we decided to develop a tool that could be used by anyone. This means that we had to figure out a way to automate all of the tasks that would typically require an analyst skill set,” Kenik told us about Teton’s target audience. “The end results is a highly automated workflow that is so easy to use, new users can be up and running in literally minutes. A lot of sophistication goes into making engineering software simple but we are very pleased with how we have been able to create an optimization tool that is highly accessible.”
I’ll be curious to hear the reviews of Intelligent Slicing, and see if Teton’s software is as good as it sounds.
Discuss this and other 3D printing topics at 3DPrintBoard.com or share your thoughts below.
[Images: Teton Simulation unless otherwise noted]
The post Teton Simulation’s Software Automatically Finds and Tests Optimal 3D Printing Parameters appeared first on 3DPrint.com | The Voice of 3D Printing / Additive Manufacturing.
Peopoly releases Moai 200 3D printer – technical specifications and pricing
Peopoly, a Hong Kong-based 3D printing startup, has introduced its latest laser SLA 3D printer, the Moai 200. It is an upgrade of Peopoly’s original Moai, released in July 2017 after a successful Kickstarter campaign. The overall focus of the Moai 200 is low downtime and running costs, low cost of replacement parts, and greatly […]
Long Term Home Review of Ultimaker’s New S5 Professional 3D Printer
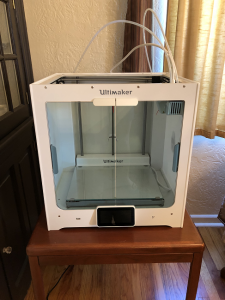
 At Hannover Messe this past April, desktop 3D printing leader Ultimaker introduced its first new 3D printer in two years – the S5, an expansion to its professional 3D printer portfolio. Ultimaker reseller Dynamism showcased the new S5 at RAPID + TCT that same month, as did Ultimaker itself. The desktop system, with a 330 x 240 x 300 mm build volume, has all kinds of great features, including dual extrusion, an intuitive touchscreen integrated into the front panel, and an enclosed front with tinted glass doors…so imagine my excitement when I learned that Dynamism would be shipping me a review unit!
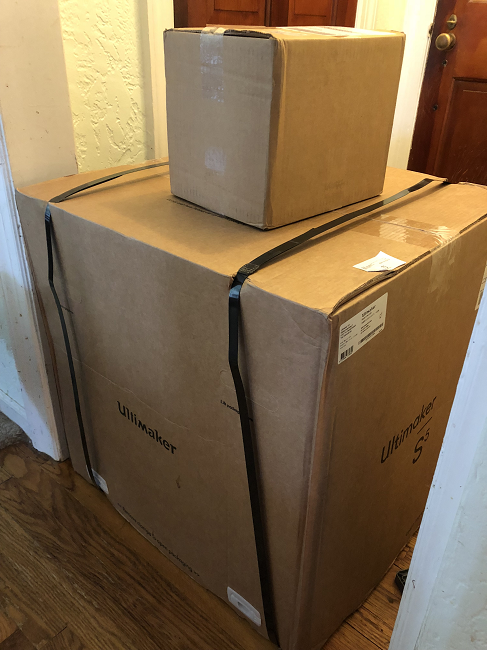
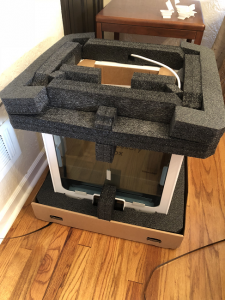
Full disclosure – while I’ve completed 3D prints before at Dayton’s 3D printing bar, this would be my first time setting up and operating a 3D printer all on my own. So when the gigantic box, and a smaller one of extra filament, arrived on my porch, I was a little…okay, a lot…intimidated. In fact, I was so concerned about not having anything pull focus from the unboxing and set-up process that the gigantic carton just sat in my dining room for a few days until the opportune moment. At 3DPrint.com we do not charge money for reviews. This is my own experience and my own opinion.
I’ll say this – the S5 was extremely well packaged. I was amazed at the sheer amount of used packing material I had at the end of the process, but also not surprised; I was dealing with precious cargo, after all. Another thing I will say, with complete honesty, is that while I write about technology all day every day, handling it is not my personal forte. So the fact that I was able to get this machine out of the box and set up with relatively few hiccups means that anyone can. The provided instructions were easy to follow, and if I needed more information, I just checked out the Ultimaker Resources.
The S5 came with a test print and a box of hardware accessories and tools, including two print cores, several nozzle covers, the glass build plate, a 2 mm Hex screwdriver, a glue stick, spool holder with a material guide, XY calibration sheets, a power cable, and a USB drive. The 3D printer also came with Tough PLA and PVA support material, the latter of which I am in love with…but more on that later.
Keeping my cats and dogs away!
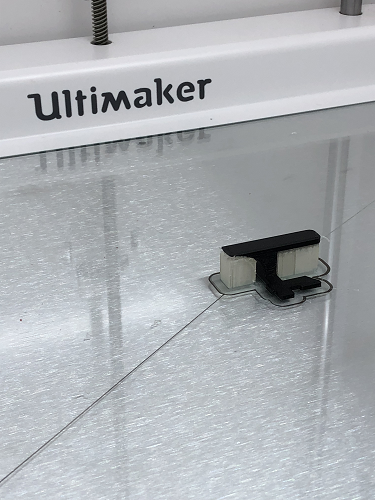
I found it fairly straightforward to set up most of the hardware, but I had a bit of trouble using the clips to secure the Bowden tubes; however, I think that was more user error than anything else. I had no issues installing the Cura software, or updating the firmware once the 3D printer was fully up and running, though it took me a couple of tries to get the 3D printer to connect to my WiFi. While there were no problems loading the materials, I had a harder time installing the BB 0.4 print core. I think this was mainly due to the fact that I was so insanely aware of just how expensive this machine was and was treating it with kid gloves, and a firmer hand is sometimes required when installing hardware. Luckily, the more I used the 3D printer, the more comfortable I became.
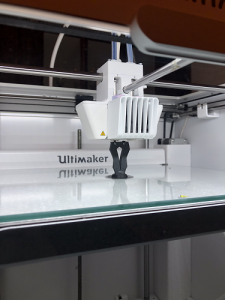
Speaking of actually using the 3D printer, when the time finally came to test it out, I got a little too excited and forgot about a very important step: calibration. I very quickly realized that there was a problem, as the print was stringing and not adhering to the build plate, even though I’d applied a thin layer of glue, and stopped the job about three minutes in. While I was sad that my first print was far from a resounding success, I resolved to make it right.
 I again waited a bit to try calibrating the S5, partly because I was busy but mainly because I was intimidated by it all over again. But once I took the time to sit down and figure it out, the calibration sheet that came with the 3D printer was a breeze to use, and I was on my way once again, ready to try 3D printing something that wasn’t just the calibration grid of straight lines.
My first successful attempt was one of the two sample prints that came on the included USB drive, which printed very quickly. I love the intuitive touchscreen on the front of the S5 – it’s very user-friendly, and I quickly figured out how to pull up a rough image of what the print would look like once it was complete, so I’d know that it was printing correctly. Once I pried the tiny print off of the plate (a very easy task thanks to a layer of glue underneath), I put it in a small container of water and let it sit overnight, so I could see how long it took to dissolve the PVA support structures.
I loved the Ultimaker water soluble PVA. It was just so easy – pop the print in water and let the material work its magic. It’s possible to simply crunch and pull the supports off by hand as well, but the immediate effect wasn’t as clean. Obviously, the larger and more complicated the prints were, the longer I had to let them sit in water, and I learned that unless I felt like getting gummy residue stuck to my fingers, it was best to just wait until the supports had 100% completely dissolved. It was also a little tough cleaning the build plate, as the PVA sort of bonded with the glue and became hard to scrub off. But I followed the advice of the Dynamism team and got a soft, non-abrasive sponge to help with this task.
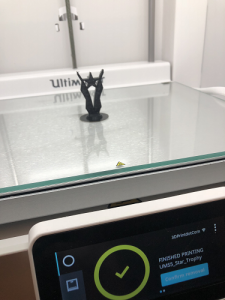
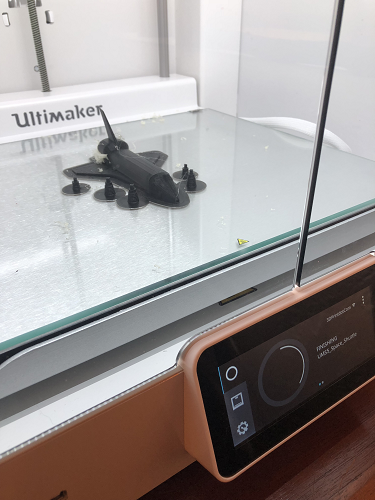
My next two prints were included Cura files: a star trophy and a rocket ship. Both of these were fairly straightforward prints, and gave me a chance to try out an extra form of bed adhesion with the addition of a brim; I can tell you now I much prefer a skirt, but I figured I would just give it a shot.
 The first print I completed that wasn’t already included in Cura or the USB drive was a Harry Potter Logo by Cults3D user 3DNaow, which turned out great. It’s definitely my favorite 3D print from this review, mostly because I love Harry Potter. Because I majorly scaled it down, the print took a lot less time to complete as well.
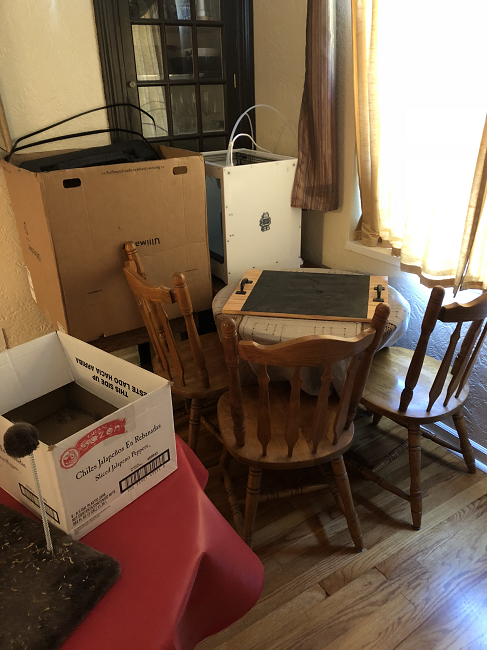
I’m going to take a moment here to rave about the remote monitoring. I didn’t download the app, but I did not have the S5 set up in my office. I live in an older Cape Cod house, and my office is in the half story upstairs, which doesn’t have great ventilation. So I decided it would be better to put the 3D printer on a table in my dining room, which is in a much more open part of the house. But this meant that I couldn’t keep my eye on it during the day. Having the option to monitor my print jobs from upstairs, thanks to Cura and the camera located above the auto-leveling bed, provided me with peace of mind.
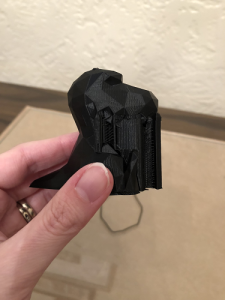
I would have called this adorable Low Poly T-rex by Thingiverse user slavikk my favorite, had I not screwed it up so badly. I had been messing around in the custom settings in Cura, just to try and put the system through its paces by changing up things like the infill and layer height, and I somehow managed to change the support material from Extruder 2 – the Natural PVA – to Extruder 1 – the Tough PLA. It took me about a quarter of the way into the print to realize my mistake, and by then it was too late. So this dino is still pretty cute, but I think he will be much better-looking when I take the time to get an X-Acto knife and cut away the black supports from the front.
![]()
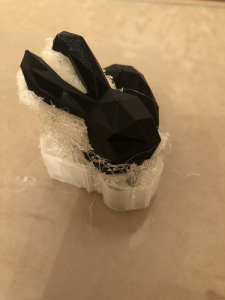
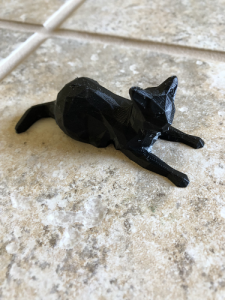
In completing my small collection of low poly animals from Thingiverse, I chose to 3D print a Low Poly Cat – another print by slavikk – and a Low Poly Stanford Bunny by johnny6. I put both the cat and the bunny on the build plate at the same time for a 7.5 hour print. This is where things started to get a little rocky.
About four hours in, an error message popped up on the touchscreen: “One material appears to be empty. Please change it to a new material to continue printing.” I wasn’t home (this became the only time I left the house during a print job) and my husband texted me about it, but said that it didn’t appear that the filament was empty. Once I got home and took a look, it was definitely very obvious that neither filament was empty, so I just took a shot in the dark and pressed ‘Ok’ below the error message to confirm that I had changed to a new material, even though I hadn’t, just to see if it would start up again.
I got lucky and the prints resumed…for about 20 minutes. Then, the same thing happened again, I tried the same fix, and things continued on, though the support material was looking pretty stringy. About an hour later, the connection went out and I lost the monitor view upstairs, but the S5 just kept rolling along.
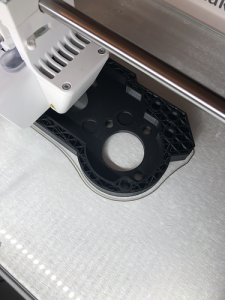
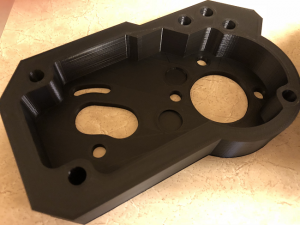
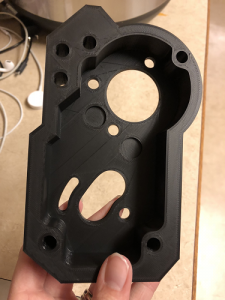
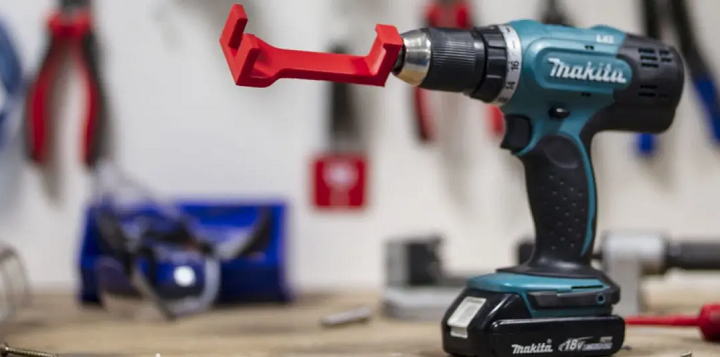
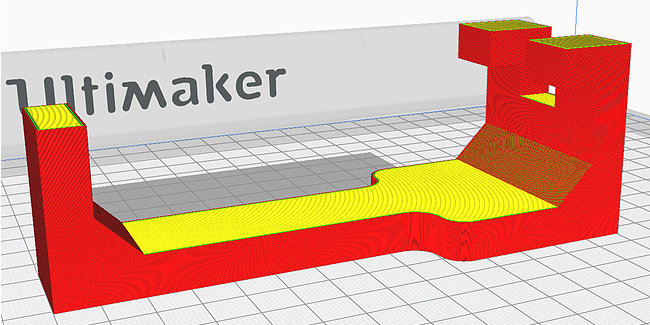
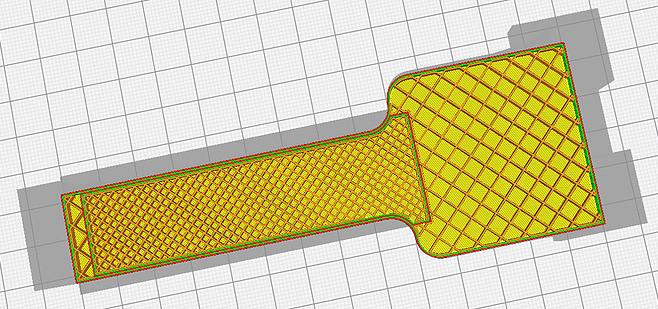
My next print was an STL file that the Dynamism team had sent me of a generic sample spare part, which took about 15 hours to print, with no supports, when scaled to 100%. It was a good illustration of just how important professional 3D printers, like the S5, can be for businesses in need of prototypes or models. The level of quality and accuracy of the prints produced on the S5 is just stellar, in my opinion. Maybe you should take my opinion with a grain of salt, because as I noted earlier, I’m not an expert on using 3D printers, but that’s up to you.
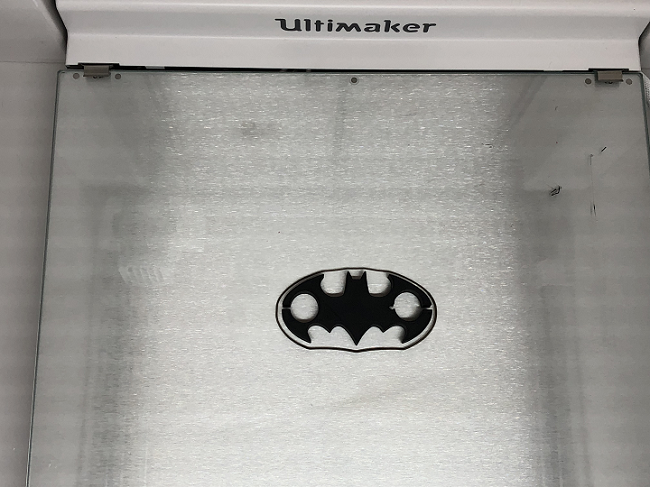 Realizing that not a single one of the items I’d 3D printed so far were at all useful, I went back to Thingiverse and found this batman earphones holder by itlaor, which quickly printed without any supports and is now being used by my husband, with great appreciation, to keep his earbuds from getting tangled up all the time.
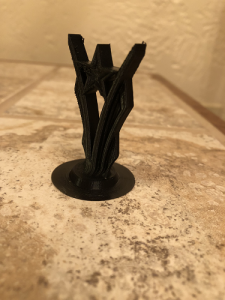
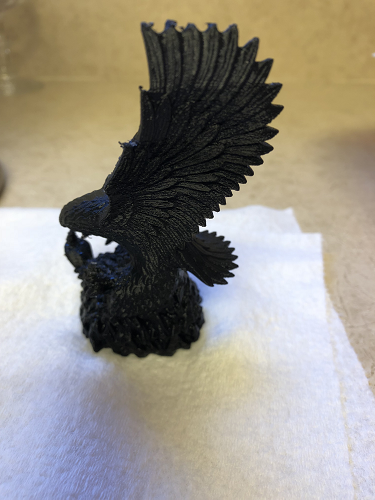
I also decided to 3D print this very detailed Eagle Sculpture by Thingiverse user 3DWP for my husband, who is an Eagle Scout and has a small collection of eagle figurines and sculptures. With this one, I couldn’t get my computer upstairs to connect to the 3D printer downstairs. I turned the WiFi off on both the computer and the printer and then immediately back on, and still nothing. So in the interest of saving time, I simply saved the STL file to the USB drive and printed it that way. About 10 hours in to the 16.5 hour print, I got the same error message I’d received with the low poly animals, and “fixed” it the same way. It seemed to only occur on prints with PVA supports for some reason.
I enjoyed trying out the Ultimaker S5 3D printer from Dynamism. I had it for far longer than I planned, but thoroughly enjoyed using it. What I knew already from writing about this technology daily, and have now had the chance to truly experience for myself, is that 3D printing takes time, which is something I don’t always have in the evenings – I do a decent amount of church and theatre volunteer work. So I kept searching for quick print jobs to try with the S5 because I just do not often have 15-24 hours where I am at my house the entire time. But as for the quality and ease of use – that was top notch.
The Ultimaker S5 is available for purchase on the Dynamism website starting at $5,995.
Discuss this and other 3D printing topics at 3DPrintBoard.com or share your thoughts below.
[Images taken by Sarah Saunders for 3DPrint.com]