The Benefits of 3D Printing Architectural Concept Models

A concept model is crucial for being able to visualize an architectural structure as accurately as possible. Having a model makes it possible for every member of the team to be on the same page as well as allowing communication with clients in greater detail. Concept models have traditionally been made by hand by cutting out the shapes in paper, cardboard, foam-core or timber and it can take anywhere from days to weeks to complete a large context model. Many firms’ model shops have now been switching over to 3D printing to create their models instead for a number of different reasons.

Easing Communication Between Designers and Clients

When it comes to
communicating complex design ideas, the clients need to be able to fully
visualize what they are signing on for. If a design is overly theoretical or
technical that the client cannot fully understand it this could lead to
problems later on. 3D printing produces cleaner and more contemporary looking
tangible models with as much detail as possible and allows clients to make
informed decisions and give better feedback. It allows the client to more
directly visualize information like materials, colors and design elements.

Efficiently Testing, Editing and Refining Designs

Many times a model
needs to be reiterated a number of times to allow for alterations. Where the
typical process for producing a model takes time and can be quite expensive, 3D
printing the model makes it much easier to change the 3D design and then
rapidly create a new prototype within a couple of hours. This makes testing and
refining designs a much quicker process. Saving the designs also cuts time out
for future projects, if any of the information for previous designs becomes
useful again.

Improving Quality in Details and Materials

3D printing also
allows for an extremely high level of intricacy and details that are much more
difficult to produce by hand. Designers can use 3D printing to demonstrate
connections between structural elements (interlocking, overlapping, for
example) in multiple configurations to develop site plans in the most accurate
way possible. It is also easier to create more complex structural details like
domes and arches. 3D printers can use different materials for different aspects
of the models to further illustrate their concept. Some popular choices include
Nylon Plastic, transparent resin or metal. 3D printed models are much more
durable than paper or cardboard.

Extending 3D Printing to Prototypes and Specific Design
Elements

The usability of 3D
printing extends past full concept model making as well. Using a 3D printer, it
is possible to print concept models of specific parts of the buildings being
designed, like facades for different walls and other textures to further
illustrate design ideas. Parts can be 3D printed in full, but casts can also be
printed to create the prototype of a ceramic tile, for example, much easier and
quicker. Prototypes of the structure can then come to life long before the
build is complete.

When it comes to designing anything, especially such large scale entities like buildings or landscapes, 3D printing helps to streamline the process by visually communicating these ideas. Many architecture firms have begun acquiring their own desktop 3D printers to be able to produce models and prototypes quickly and at low cost. As 3D printing is still a relatively new technology there can be a learning curve in the transition to using it which makes outsourcing to specialized 3D printing companies like Shapeways a constructive alternative.

Shapeways offers consultations with 3D engineers to ensure efficiency and printability of the design in question at the highest quality, making the printing process as smooth as possible. Even as the use of desktop printers becomes easier it can be beneficial to outsource to printers like Shapeways who can deliver a specialized level of precision, print with a wider range of materials and guarantee efficiency in order to create top quality, high detail models for client showcases or trade shows. Creating models with as much detail and accuracy as possible is of the utmost importance not only for showing manufacturers but also for engaging clients.

The post The Benefits of 3D Printing Architectural Concept Models appeared first on Shapeways Blog.

How to Apply Material Science Principles to Optimize For Strength in 3D Printing

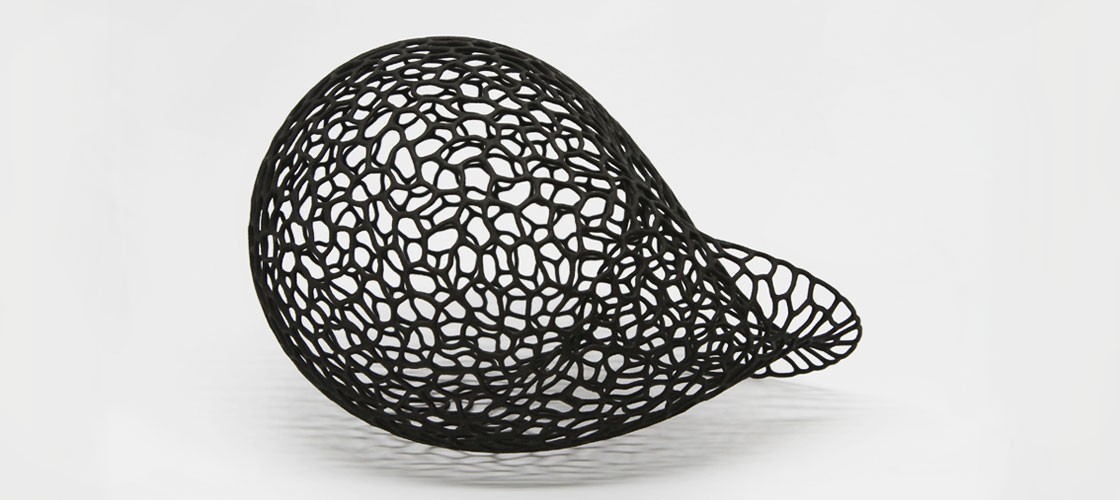
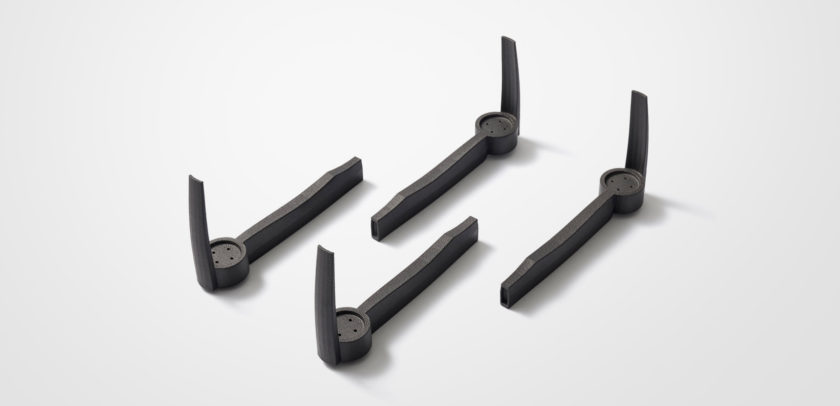
3D printing can be used to manufacture all kinds of objects. It’s a very versatile process, and it can handle even the most complicated designs without much issue. When printing functional parts, strength is an important factor, and you might question if 3D printing is really your best option. With smart design and proper material selection, it’s surprisingly easy to make strong and durable 3D printed parts.

Basic Definitions

In the world of engineering and material science, “strength” has a specific meaning. So do other words like “toughness” and “stiffness”. Let’s make sure we’re all on the same page here and quickly go over some commonly used terms.

Yield strength is a material property that quantifies how much stress (internal pressure) a material can withstand before permanently deforming. Let’s consider a paperclip. If you bend it very gently, it will spring back to its original shape. If you bend it with considerable force, it will not spring back entirely, and it will stay bent. Usually, we don’t want parts to permanently deform like this, so for strong parts, it’s important to choose materials with high yield strength.

Toughness tells us how much energy a material can absorb without breaking. A material with high toughness is usually desirable in impact-absorption applications, but it comes with certain tradeoffs such as increased ductility.

Ductility is a measure of how far an object can deform without breaking. For example, paperclips must be made from a ductile material so they can be bent into shape without snapping.

Brittleness is the opposite of ductility. If an object is brittle, it will fracture after deforming only a small distance. Glass, for example, is brittle even though it has a relatively high yield strength. Brittleness is usually undesirable.

Stiffness measures how rigid a material is. Materials with high stiffness are very good at keeping their shape even under load, and stiff materials are usually used in load-bearing applications. A stiff or rigid material will deflect less than a flexible material under the same load.

Hardness measures a material’s resistance to scratching and surface indentation. Hard materials will scratch softer materials, but not vice-versa.

Material Choice

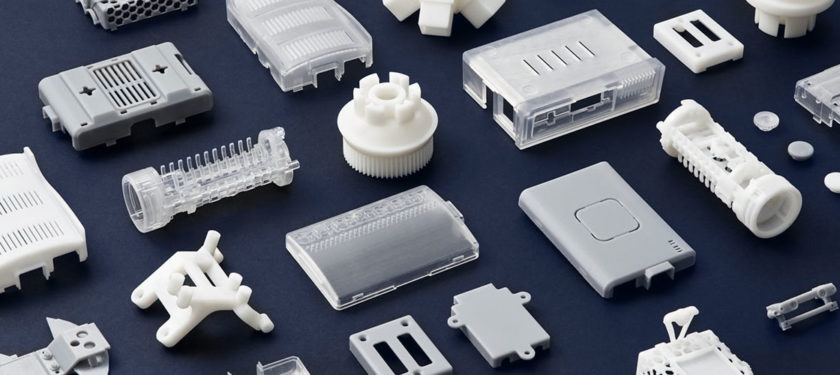
The material you choose significantly influences the strength of your part. You will normally choose a material depending on which material properties are most important to you. Shapeways offers a wide variety of materials, and each material has a unique set of properties that should be taken into consideration when you want a strong 3D print.

Thermoplastics

Thermoplastics are quite common in 3D printing. These plastics soften with heat and can be remelted once they have been printed. Some common thermoplastics are Acrylonitrile Butadiene Styrene (ABS), Nylon or Polyamide (PA), and Thermoplastic polyurethane (TPU). Of these common thermoplastics, Nylon has the best balance of strength, toughness, and stiffness. Shapeways has several options of industrial-grade Nylon, two of these are: PA12, and PA12 GB.

PA12, also known as Nylon 12 is a tough, high-strength thermoplastic. It is printed with multi-jet-fusion (MJF) technology and can be smoothed to make parts watertight. As an added benefit, PA12 offers good chemical resistance.

PA12 GB is very similar to PA12 but this material is infused with lots of tiny glass beads. Since this material is 40% glass-filled, it has improved stiffness and resistance to warping.

Both of these thermoplastics have near-homogeneous properties. Due to the MJF printing process, these parts have comparable strength in the X, Y, and Z directions.

Thermoset Plastics

Thermoset plastics cannot be remelted once they have been cured. The 3D printing method used to print thermoset plastics is called stereolithography or SLA. In this process, a laser scans over a liquid bath of light-activated photopolymer resin, hardening the areas to be printed and leaving the rest as a liquid.

Parts printed with SLA have an extremely smooth and high-quality surface finish. They usually have a high yield strength, and are quite stiff. They tend to be more brittle than thermoplastics, so they are not ideal for high-impact applications. There are, however, certain resins which have been formulated to provide a mix of strength and stiffness as well as toughness.

Accura Xtreme 200 is our strongest SLA resin. It has a higher yield strength and similar stiffness to PA12 GB. For a rigid SLA material, it is exceptionally tough, and well-designed parts should be able to handle moderate impact loads.

Metals

Yes, metals can be 3D printed! While typically more costly than plastics, parts 3D printed in metal are by far the strongest. We offer a wide variety of metals for 3D printing, including steel, aluminum, and a variety of precious metals.

For industrial load-bearing applications, aluminum is a top choice because parts are printed using a process known as selective laser melting (SLM). This process uses a computer-controlled laser to fully melt aluminum powder. Aluminum is also corrosion-resistant and has exceptional electrical and thermal conductivity.

Steel is also available but it’s not recommended for heavy-duty industrial applications because it is printed very differently than aluminum. It is printed using an adhesive binder, which is later replaced with bronze. This process results in a part that is 60% steel, and 40% bronze. It’s still a very strong material, but for the best mechanical performance, aluminum is a better choice.

3D printed aluminum is one of the strongest 3D printing materials. It has an impressively high strength-to-weight ratio, and is perfect for creating parts that are strong, tough, and also lightweight such as drone frames. It has a yield strength 4-5 times higher than our Accura Xtreme 200 SLA resin and based on elastic modulus, it is over 20 times stiffer!

Material Data Sheets

Every material offered at Shapeways comes with a detailed material datasheet. These datasheets provide useful information including a comprehensive list of mechanical and thermal properties. These datasheets can be found at the bottom of every Shapeways material information page. For example, here’s the datasheet for PA12 GB.

Thermal and Environmental Factors

Sometimes you’ll want your parts to be able to withstand exposure to heat, light, and moisture. Some 3D printing materials are specifically formulated to be resistant to these conditions, and others should be avoided. Thermal and environmental factors must be taken into account to ensure parts will remain strong in harsh conditions.

Temperature Resistance

When parts will be used close to a heat source, or in a hot environment, it’s important that they do not deform or melt due to heat. 3D printed metals have the best temperature resistance by far.

SLA prints do not remelt, but they tend to become soft at relatively low temperatures. Accura Xtreme 200 has a heat deflection temperature of only 42°C (at 1.82 MPa) while PA12 GB has a heat deflection temperature of 114°C (at 1.82 MPa). Metals behave differently from plastics, so they do not have this characteristic. For comparison, 3D printed aluminum parts have a melting temperature of 570°C.

Keep in mind that parts that are darker in color will absorb more radiation energy, so for parts exposed to sunlight, white or translucent plastics are the best color choices.

Moisture Resistance

Some materials are slightly porous after being 3D printed so they will absorb moisture, and this can change their mechanical properties. Thermoplastics such as Nylon will absorb some amount of water, leading to minor swelling. Moisture exposure can cause a small reduction in strength and stiffness to some thermoplastics. Waterproof coatings, such as polyurethane spray, can be applied to some plastics to prevent moisture absorption.

SLA and metal 3D prints are not affected by moisture exposure.

Smart Design

3D printing is extremely versatile, but there are still a few general design guidelines that must be followed to ensure parts are printed properly. Every material available on Shapeways includes detailed material information as well as a set of design guidelines.

In order to maximize part strength, here are some general rules of thumb.

Increase Wall Thickness

Wall thickness greatly affects part strength. No matter what 3D printing method you use, having thicker walls will greatly increase the strength of your part. Although most 3D printing methods can print walls 1 mm thick, if strength is important to you, walls should be at the very least 2-3 mm.

Optimize Layer Orientation

Depending on how they are printed, some 3D printed parts are weaker along the layer lines. Parts are more prone to breaking along these planes, so if strength is required in all directions, it will be beneficial to reinforce areas that will be printed vertically.

Some methods of 3D printing such as SLA and multi-jet-fusion have been proven to have close-to-uniform strength in every direction.

Prevent Warping

As parts are being 3D printed, they will expand and contract due to temperature differences. This can cause warping, and this may weaken the structure of your part. Long, thin parts will experience this effect the most, so be sure to reinforce critical areas by increasing wall thickness or adding supporting features such as ribs.

Avoid Sharp Internal Corners

Be sure to use generous fillets if your part has any load-bearing sharp internal corners. Sharp internal corners can lead to highly localized internal stress concentrations, causing failure at loads lower than expected.

Conclusions

3D printed parts can be surprisingly strong! Your parts can be made for industrial-strength applications by understanding the basics of material science, selecting a suitable material, and following smart design guidelines. 3D printed parts can be strong enough to support heavy loads, absorb big impacts, and resist deformation in a variety of harsh conditions. Due to advances in 3D printing technology, and specifically engineered material formulations, we’re seeing more 3D printed end-use parts every year.

For more information, and our entire selection of materials, check out our materials page!

The post How to Apply Material Science Principles to Optimize For Strength in 3D Printing appeared first on Shapeways Blog.

5 Ways 3D Printing is Key to the Future of the Lighting Industry

As 3D printing becomes increasingly popular and integral to multiple industries, the efficiency of utilizing this new process becomes more apparent. One industry that’s being revolutionized by 3D printing is the lighting industry. In fact, 3D printing is helping to completely transform the current state and future of modern lighting design. Here are 5 ways how. 

Creating Unique Pieces

Gone are the days when every lamp or lighting fixture in your home looked the same. With 3D printing, you can make a completely unique piece of lighting design. You’re able to create a new shape — however traditionally unusual or “out there” it may be — that can be used to illuminate different parts of your home, whether it be a chandelier or floor lamp. With 3D, there’s no end to the possibilities of customization. Additionally, not only do these then serve as sources of light, but also as accent pieces to place around your home. 

Increased Variety

Additionally, 3D printing increases the variety of lighting options on the market. This helps to create trends within the industry and to discover what consumers want more and less of. For instance, some designs may be too wild for the average consumer while other modern designs may be super popular. Through this process, you’re able to determine the direction in which the market is heading, seeing which products to create more of and which to step back from. 

Decrease Complexity

Crafting lighting pieces can be a complex process depending on the intricacies of the design. However, with 3D printing, you’re able to perfect every aspect of the design before printing a final product, allowing you to test out new ideas and work out kinks that will make the piece the best that it can be. Additionally, with 3D printing, the process of assembling after printing is much easier. 

Reduced Waste Materials

For larger lighting factories, the utilization of 3D printing will help to decrease the amount of waste they produce. As efforts to go green and be environmentally conscious become more apparent, this is an effective and surefire way to increase production times and output while decreasing waste. 

Lower Costs

Of course, 3D printing also lowers the cost of manufacturing different lighting pieces. If you’re 3D printing your own lighting design, this will allow you to prototype and try out a few designs before choosing a final one. If a lighting design company were to use 3D printing, this would help cut down on overall costs spent while increasing revenue. It’s a win-win situation either way!

Want to see how 3D printing can help innovate your industry? Learn how Shapeways can become your manufacturing partner and help you from prototype to large scale production.

The post 5 Ways 3D Printing is Key to the Future of the Lighting Industry appeared first on Shapeways Magazine.

How the Military and Army Are Implementing 3D Printing

As the usage of 3D printing becomes increasingly mainstream, more and more industries are beginning to integrate it into their processes. One of these is the United States Army and Military which as of recent has taken advantage of 3D printing and its many benefits in order to advance their missions and duties in an efficient way. 

Here are 4 ways how the military and army has begun using 3D printing to great results. 

To Construct Barracks

Barracks play a very important role in the military, but constructing them can be difficult and take long periods of time. Thanks to 3D printing, however, that process got much simpler. Last September, the US Marine Corps Systems Command used 3D printing to create a prototype concrete barrack at the US Army Engineer Research and Development Center in Champaign, Illinois. According to New Atlas, the barrack was constructed in just two days. The barrack was 500 sq. ft in size and clearly showed how 3D printing will be incredibly useful going forward. 

To Create Essential Motor Parts

While 3D printing a 500 sq. ft barrack is a big deal, the army is also using 3D printing for smaller tasks. For instance, in Korea, the army uses Mine-Resistant Ambush Protected vehicles that include fire extinguisher nozzles that blow off when fire is detected. These vehicles are essential to the army’s survival and safety on mine-invested territory. But one issue that the army began to face was in regards to the caps on the fire extinguishers nozzles that would blow off when they were in use. 

According to the U.S. Army’s website, each vehicle utilizes 20 of these caps. Without them, the vehicle is unusable. But the wait time to construct and order new ones is lengthy: an estimated five months! With 3D printing, however, the army was able to construct these at a must faster rate and at an affordable cost of $2.50 a piece. 

Both the military and army have been using 3D printing to create other small parts essential to everyday missions and success, like the fire extinguisher caps. 

To Make Repairments and Print Parts

3D printing is not only useful to print new parts, but also to repair broken ones. Mike Nikodinovski, a mechanical engineer and additive expert with the Army’s Tank Automotive Research, Development and Engineering Center, explained in an interview that the army has begun using 3D printing to do just that, which increases efficiency in repairing and readiness. 

Printing Surveillance Submarines

Underwater surveillance is essential to the Navy’s safety, as well as our own. And to do this, they use many small surveillance submarines. Why couldn’t 3D printing be used to make them as well? The US Navy’s Disruptive Technology Lab teamed up with the Manufacturing Demonstration Facility to do this, printing a submarine that was 9.1m long. 

The process, of course, saved the Navy much time and money. While the initial version was not able to go underwater and perform task perfectly, it showed how 3D printing could aid in the construct of submarines in the future once more kinks were worked out. 

Pushing the military and army towards the future

It’s no surprise that the military and army have taken such a liking to 3D printing: Their work must always be forward-thinking and preventive, and 3D printing falls right in line with that. As they continue trying out the process of 3D printing, it will be no surprise if it becomes integral to their missions in the future.

The post How the Military and Army Are Implementing 3D Printing appeared first on Shapeways Magazine.

Replacing Your Drone With 3D Printing

While drones have been used by the United States military since practically the start of the century, they’ve become increasingly popular amongst average consumers only in recent years. In fact, different variations of drones can be found for sale online or even in local malls. So it’s no surprise really that the 3D printing community is trying to find ways to take drones to the next level.

If you’re a proud drone owner, you probably know how easy it is for something to go wrong or malfunction—or it may simply just fly into something you didn’t see—leaving you with having to find a way to replace certain parts of it. Thankfully, because of 3D printing, you can easily replace and repair your own drones. Here are a few ways how. 

3D printing will cut costs drastically

First off, if you’re not swayed enough quite yet to use 3D printing to replace your drone, consider this: Doing so cuts cost heavily. While some smaller drones may be easy to put together, many of them are complex and because of that, can quickly rise in price. 3D printing will help you cut down the costs associated with replacing your drone parts or repairing it when needed. 

It allows you to customize 

In addition, 3D printing allows you to customize your drone to your own liking. And when you want or need to make adjustments, you don’t need to reach out to a manufacturer to do it—which can be a lengthy, stressful process. Instead, you can can make all changes, adjustments and repairs on your own, at your own pace and to your own liking. 

3D printed drones are faster and lighter

Two qualities that consumers always want to improve when it comes to drones: speed and weight. Obviously the lighter a drone is, the faster—and easier—it can fly. And with 3D printing, you can accomplish just that

You can easily repair many drone parts

When something malfunctions or breaks, it’s important to first figure out what part of your drone needs to be replaced. It’s likely that you’ll be able to easily replace that piece using 3D printing. Here are a list of pieces that can easily be repaired through 3D printing: propellers, drone frames and equipment housing, landing gear, protective guards, exoskeleton attachments, antenna holders, and mounts for cameras and other payloads. 

You can 3D print accessories for your drone

And when it comes to customization, here’s a list of the accessories you can easily 3D print for your drone: Carrying cases, radio signal enhancers, targets, landing pads, and cones, tables and displays, repair tools, sun shades for mobile device controllers, remote control unit housings, and landing gear extenders.

Ready to take your drone to the next level? Find out how we can help support your next project and bring the power of industrial 3D printing to your drones.

The post Replacing Your Drone With 3D Printing appeared first on Shapeways Magazine.

The Benefits of Making Your Robotics With 3D Printing

Brainstorming, designing and ultimately creating robots is a thrilling process. However, it can also feel like a complex and daunting project at first due to all the intricacies involved. A lot goes into making the perfect final product, and the process leading up to that can be quite lengthy. Thankfully, creating robots has never been simpler and more efficient thanks to the benefits of 3D printing. Here’s how. 

It’s Cost Effective

One of the best reasons to use 3D printing to create your robots is because of how cost effective it is. Because designing robotics is often a complicated process, costs can quickly build up and pile high. This may prevent you from having the flexibility to try out new ideas, play around with your robots and to have an in-depth editing process. However, because of the cost effective benefits of 3D printing, you’re now able to cut down on prices drastically, allowing you to not break the bank during your robot-creating process and production.

It’s Fast

Speediness is always an added benefit of 3D printing. Whereas traditional manufacturers may take weeks or even months to bring your design to life, 3D printing cuts production times down drastically. Because of 3D printing, you’re able to edit your robot at a much faster pace and ultimately can have it ready for production much sooner than if you’d chosen to use some form of traditional manufacturer.  

It Allows You to Prototype Easily

Prototyping is vital to creating a great robot. After all, with so many moving parts involved, errors are almost inevitable. Because of the efficiency of 3D printing (in addition to the cost efficiency and quick printing times), rapid prototyping is much simpler and conducive to your designing process. With 3D printing, you are able to prototype many times in order to work out every detail of your robot before you put it into production. 

You’re Able to Customize

3D printing also gives you the opportunity to customize your design to your liking. There are no rules or limitations: It’s all up to you. Unlike traditional design and production methods, you are able to choose every detail yourself, making your robot personalized to your liking. This also gives you the opportunity to make a truly unique, forward-thinking and game-changing robot, one that could really put you on the map as an impactful robotics professional. 

Making Complex Ideas Simple

Ultimately, the best part of using 3D printing to create your robotic parts is the fact that it will make this difficult and complex production process much simpler. Simplicity allows for a smoother outcome, and also alleviates a lot of stress that comes with bringing your idea to life.

Now that you’ve gotten a quick look at the benefits of using 3D printing to create your robotics, why not try it for yourself? Print your parts today and see how quick and easy it is to customize your robotics projects.

The post The Benefits of Making Your Robotics With 3D Printing appeared first on Shapeways Magazine.

Create, Repair and Optimize Your 3D Files With Shapeways & ZVerse

Seeing a physical product come to life with 3D printing is exciting, but it all starts with the 3D file. For some, that step of the process can be a challenge, as creating a 3D file requires a specific set of skills. Over the years, we’ve worked to refine that process, offering design services that paired our users with expert designers who could bring their ideas to life. We’ve taken that idea even further and are happy to announce our new 3D File Design service, powered by ZVerse’s CAD as a Service (CADaaS) platform!

Through our new partnership with ZVerse, every Shapeways user will now have access to expert 3D design solutions for any project. ZVerse’s CADaaS platform combines machine learning with expert designers to provide the fastest path from idea to 3D printable file. Here’s how it works:

  • Ideation: To begin a project, simply describe your concept on our easy to use customer portal and receive a same-day design quote.
  • Design: ZVerse’s CAD as a Service design platform combines AI with a certified Designer Network to provide the fastest path from idea to a manufacturable file.
  • Production: Once your design is completed it will be instantly added and ready to order from your Shapeways cart.

In addition to file creation, this new service now offers options to repair and optimize your files, making it friendlier to users who just need help making their files printable.

Create

Our file creation service will turn your idea into a 100% manufacturable 3D file for virtually any application, file type, and process. We offer a wide array of services here, including:

  • 3D CAD Design
  • 3D Scanning
  • Reverse Engineering
  • Functional Parts
  • Prototyping
  • Lattice Design
  • Parametric Modeling
  • Mesh Modeling.

Repair

If you already have a 3D file, we now offer services that can help fix them. Our Certified Designer Network can repair and convert your pre existing 3D files for guaranteed manufacturability. Our repair services include:

  • 3D File Repair
  • 3D File Conversion
  • 3D Scanning Repair

Optimize

When it comes to optimizing files for 3D printing, even the best designers need help sometimes. Through extensive research and development, ZVerse’s designer network can optimize files to specific machines, processes, and materials, so you get the best design possible for your chosen production method. Our optimization services include:

  • Optimizing for Specific 3D Printing Processes
  • Optimizing for CNC
  • Optimizing for Injection Molding
  • Optimizing for Material


In the past, ZVerse’s designer network and AI-enabled CADaaS platform have allowed users to create anything from architectural models, medical devices, mechanical components, and product designs. We’re excited to bring those expert solutions to all Shapeways users and make it easier than ever to bring your ideas to life.

Ready to get started? Head over to shapeways.layr.co to start your project today, or contact our experts at shapeways@zverse.com to learn more about our new design services!

The post Create, Repair and Optimize Your 3D Files With Shapeways & ZVerse appeared first on Shapeways Magazine.

Reviving an Early 20th Century Printmaking Practice With Modern Technology

The mission of thepostdigitalprintmaker community, founded by Phyllis and Victor Merriam, is to share the work of printmakers who have taken up the challenge of incorporating emerging technologies into their artistic practices. After 4 years, it has grown to a community of over 7, 000 artists worldwide. Their personal practice incorporates the traditional methods of etching, woodcut, paper lithography and photopolymer plates with the more recent technologies of stereolithography, fused deposition modeling, laser cutting, and CNC routing. They constantly wrestle with the integration of technology in a way that allows them to remain in control of the artistic process. Phyllis and Victor teach their techniques at the Manhattan Graphics Center, NYC and The Robert Blackburn Printmaking Workshop, NYC. As part of the workshops, they teach how to use a service bureau to fabricate 3D printed plates.

Can you explain chromatic wood type?

Chromatic wood type became very rare after the early 20th century; much of it was destroyed. William H Page was the major manufacturer of chromatic wood type — letters relief-printed from multiple blocks that overlap to make additional colors — in the mid to late nineteenth century.

Could you please describe your work with Purgatory Pie Press?

Purgatory Pie Press is one of the longest running artist presses, founded by letterpress printer Dikko Faust. He and artistic director, Esther Smith make limited editions and artists books. Esther designed and produced a reprint of W H Page’s 1874 Specimens of CHROMATIC WOODTYPE with Rizzoli publishers. We decided to collaborate to recreate a W H Page chromatic typeface. Dikko researched Page and found his original drawings of Etruscan. Dikko also found examples of the typeface printed in period British circus posters. There are no examples of original Etruscan type surviving today that we know of.

Why did you decide to use 3D printing and Shapeways?

We wanted to develop a process that was consistent and economical. We were faced with problems that could only be solved by repeated experimentation. We had prototypes made and remade until we had a working piece of type that could be used on a traditional letterpress. You can imagine the excitement of successfully printing the piece for Esther and Dikko’s talk at the Metropolitan Museum in 2018 — a 3D printed piece of type and traditional wood type both designed in the 1870s printed together on a press from the 1940s. Many antique wood type collections are incomplete and unusable. The process we developed can be used to create the missing type with 3D printed blocks in any size needed.

What stages of the process did you use Shapeways for?

We used Shapeways for our early and final stage prototyping. In order for the type to work, it had to integrate seamlessly with the original vintage type.

What challenges did you face in regards to finding the right materials?

We needed to be able to create prototypes in different materials and test them on the press. We needed a material that could reproduce fine detail with a truly smooth surface. The press produces a sizable force on the plastic typeface. In order for the type to work properly, it must be strong and dimensionally stable. The plastic must also be durable to stand up to repeated use.

How did Shapeways help you address these challenges?

Shapeways provided us with the ability to test with diverse materials with rapid turn around so that we could develop a working repeatable process. The ability to test different materials and manufacturing methods in one place in a cost-effective manner was a tremendous benefit. Shapeways gave us access to industrial scale printers in the prototype phase so that we could scale up the process without having to repeat testing. The result was impressive: We printed over 200 BID bookmarks with no noticeable degradation of quality and the block is still usable for future use.

Want to learn how Shapeways can support your business with rapid prototyping and high-quality 3D printing? Partner with Shapeways to elevate your project with on-demand 3D manufacturing.

The post Reviving an Early 20th Century Printmaking Practice With Modern Technology appeared first on Shapeways Magazine.

What Drone Parts Can You 3D Print?

Drones are quickly becoming a standard fixture in skies throughout the world. While most drones are small and portable — akin to the common radio-controlled toy plane — aerospace companies and tech firms are building larger, more robust drones to take on all manner of tasks, from delivery to security.

3D printing stands to play a substantial role in how drones are manufactured and deployed in the future. And if the forecasts are correct, there will be a huge demand for 3D printed drone accessories as the robots become more mainstream and we find new, exciting applications for their technology. Here’s a rundown of the ways you can modify your drones with 3D printing.

3D Printing Drone Parts

If you intend to use 3D printed drones as part of your business, or if you’re merely interested in what it would be like to make one, here are a few of the essential drone parts you can make with even a basic 3D printer:

  • Propellers
  • Drone frames and equipment housing
  • Landing gear
  • Protective guards
  • Exoskeleton attachments
  • Antenna holders
  • Mounts for cameras and other payloads

There are numerous benefits to 3D printing these types of drone parts, aside from the cost. Accidents happen, and if you break a piece of your drone, there’s no need to order a new part if you have a 3D printer available.

If you decide to upgrade your drones with new printable parts, you don’t need to send your drone away to be worked on. Simply print out the latest upgrades and integrate them.

3D Printing Drone Accessories

Of course, there are plenty of other things related to drone use which you can 3D print, aside from the essential components of your drones, including:

  • Carrying cases
  • Radio signal enhancers
  • Targets, landing pads, and cones
  • Tables and displays
  • Repair tools
  • Sun shades for mobile device controllers
  • Remote control unit housings
  • Landing gear extenders

Depending on how you intend to use your drones and what you learn in the field, you can even come up with your own accessories to add to your 3D printing list.

Creating Opportunities with Drone Accessory Production

With so many different types of drones on the market and more coming out all the time, there’s more opportunity than ever for businesses to get a piece of the drone industry. Whether you intend to use drones to deliver services to customers, or if you want to be a drone provider yourself, 3D printing can help you harness the benefits of next-generation automation.

Overall, 3D printing provides five key opportunities:

  • Reduced costs
  • Reduced timelines
  • Reduced errors
  • Agility in the face of competition
  • On-demand production

Whichever way you apply drone technology in your business, you should consider 3D printing options so you can take advantage of these benefits. By tapping into 3D printing early, you’ll have more opportunities to take advantage of the next iteration of this technology.

There’s no better time to deploy new 3D printed drone accessories, whether you intend to sell them yourself or incorporate them into your existing business.

The post What Drone Parts Can You 3D Print? appeared first on Shapeways Magazine.

Top Questions Answered: Multi Jet Fusion Plastic PA12

As part of our month-long feature on Multi Jet Fusion Plastic PA12, we’ve asked you, our readers, to submit your questions about this material. Here are the top questions and answers to help you better understand the properties and applications of MJF PA12.

Top Questions Asked

Q. Is PA12 certified non-allergenic?

A. Yes, here is a certification for biocompatability for skin-contact applications, such as jewelry.

Q. Do you have any colored MFJ materials available?

A. Colors for MJF is not in our near-term roadmap, but we will consider this for the future.

Q. I’m curious about the price of printing in this material.

A. Please upload a model through our model upload page, select Multi Jet Fusion Plastic and your desired color and finishing to see the price for your model; or reach out to our sales team and we would be happy to help!

Q. What type of glue is recommended for use with this material?

A. An off-the-shelf epoxy material will work well.

Q. My product has a moveable part. Is PA12 a good material that can withstand constant bending of this moveable part without breakage?

A. PA12 is a good option. PA11 also has great elasticity and may have slightly better long-term wear properties.


More from the Material of the Month Series: PA12

Part One: Material Overview
Part Two: Material Comparison: Nylon Plastics
Part Three: Business Example: PA12 used in the virtual reality industry
Part Four: Tutorial: Post processing PA12


The post Top Questions Answered: Multi Jet Fusion Plastic PA12 appeared first on Shapeways Magazine.