
Researchers at the University of Hamburg in Germany, have proposed a novel way of slicing 3D printed objects to create smoother results. By 3D printing nonplanar layers close to the horizontal, this slicing method removes the stair-stepping effect typical to FDM surfaces. In addition to the aesthetic benefits, objects 3D printed this way have shown […]
Kodak Launched New Design to Print Service, Showcased 3D Printing Ecosystem
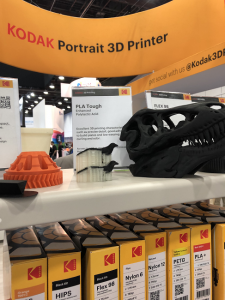
 Just a couple of short years ago, Kodak entered the AM market with its 3D Printing Ecosystem, which includes specialized software, the dual extruder, professional Portrait 3D printer, and a line of premium, low moisture content filaments. I learned a lot about this ecosystem while visiting Kodak’s booth at the recent RAPID+TCT show in Detroit, as the Portrait, and a wide array of example prints made on it, were being showcased.
On to new business first – the company launched its new Design to Print Service, which Kodak’s CCO and and co-founder Demian Gawianski told me is helpful for “customers who find designers’ time very valuable.”
“This can go from converting any 3D model into a 3D printable file to tuning the parameters on how to print those files,” he told me. “Basically, if you have complex geometry that wouldn’t go with our preset parameters, because it may have some bridges or overhangs or something like that, we would create the profile for the user, and our designers will actually print out the part to make sure it works.”

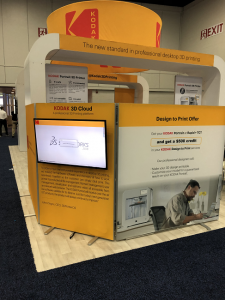
The company was offering a launching offer for its new service at the show – any customer who purchased the Portrait 3D printer at RAPID would also receive a $500 credit for the Design to Print Service.
 This valuable service is an easy three-step process: first, share your project on your Kodak 3D Cloud account. Then, interact with the company’s professional designers in order to get a quick quote for the project, in addition to an estimated completion date. Finally, have your part optimized for a guaranteed result, printed, and tested by the Kodak team. You will then receive an STL file from the company that’s been modified for successful 3D printing. The service is available in English and Spanish, from 8 am to 5 pm EST, for a standard rate of $45 an hour; a priority job is available for an hourly rate of $90.
“We want to make sure that the user has a very successful experience, with any level of knowledge they may have about 3D printing,” Gawianski continued. “We want to have a comprehensive approach.”
 This includes providing users with the right materials and hardware, empowered by good software, and Gawianski believes that Kodak’s design solution offers this unique, comprehensive approach.
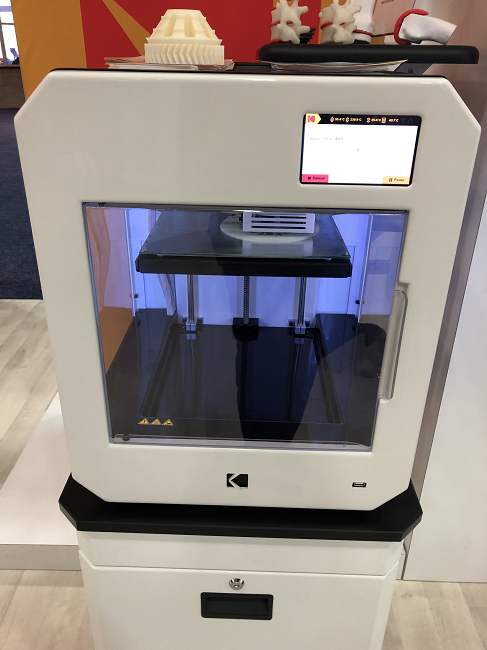
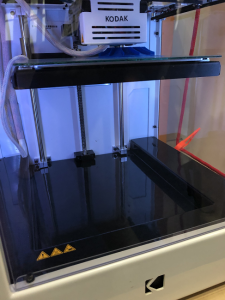
Then we moved over to the Portrait 3D printer, which features a compact 215 x 210 x 235 mm build volume with a magnetic, heated build plate and dual extruders. With an intuitive color touchscreen that supports multiple languages, HEPA filter with activated carbon, automatic bed leveling, and live print monitoring via a built-in camera, I can see why Kodak calls it “the new standard for ‘desktop’ professional printing.”
 Gawianski noted the “fully enclosed chamber,” which helps enable a “high level of control,” stability, and accuracy. He also pointed out the dual extrusion system with automatic nozzle lifting. The #2 hotend on the left is Teflon for high temperature materials, while the one on the right is metal for lower temperatures. The part being printed while we were standing there was out of white ABS.
“It would be difficult to achieve this level of quality on another printer with ABS, because it would warp and have all kinds of problems,” he explained.
Then we walked over to a setup in the corner of the booth that had caught my eye when I first arrived. A Portrait 3D printer – which was currently operating and weighs about 35 kg – had been placed on a rather thin-looking wooden platform, which was suspended by ropes that were attached to nylon hooks 3D printed on the Portrait itself.
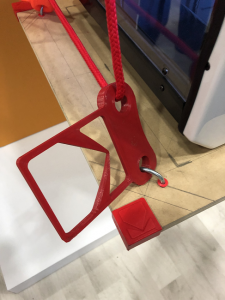
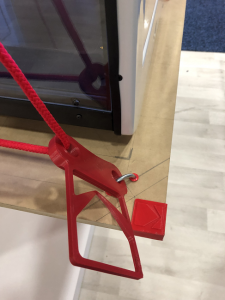
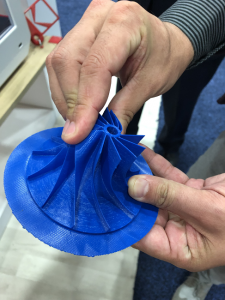
The nylon hooks were strong enough to keep the platform stable, so the print could continue uninterrupted with “the same level of quality” while it was fabricating a blue part out of strong but flexible Nylon 6.
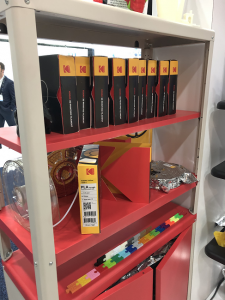
“The printer comes with two filament cases. You open the back of a filament, and place the filament in the case,” Gawianski said. “It has a silica gel that continues to protect the filament all the way from the manufacturing plant to the printed part.”
This case protects the filament from absorbing dust or humidity. Kodak is open to Portrait customers using third party materials, but these clear cases are only for its own filament.
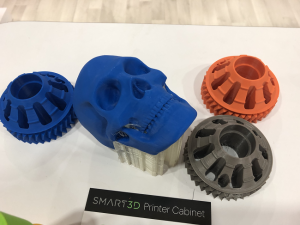
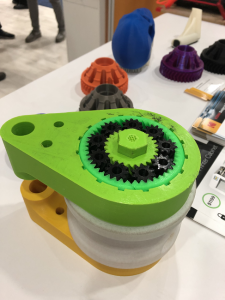
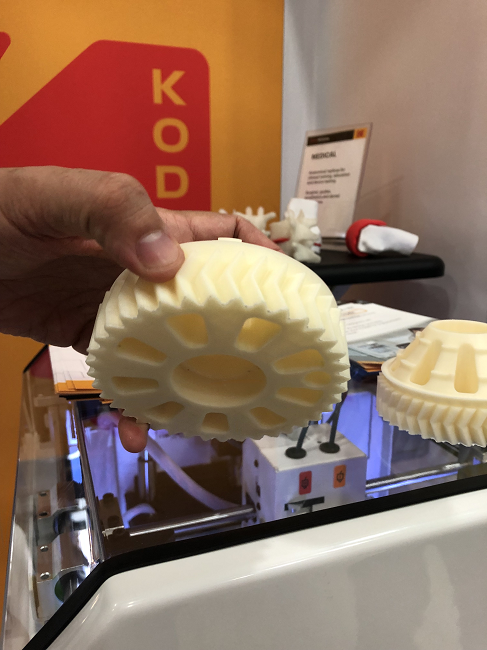
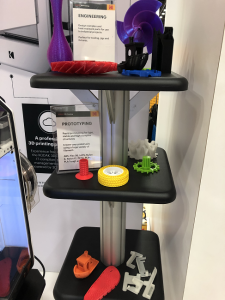
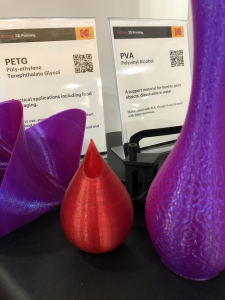
He then started to show me various parts made out of Kodak’s other materials, such as a blue skull printed out of PLA Tough with water-soluble PVA supports, an engineering part made out of ABS with HIPS supports that dissolve in Limonene, and a large part with a green top that can lift 700 lbs of weight.
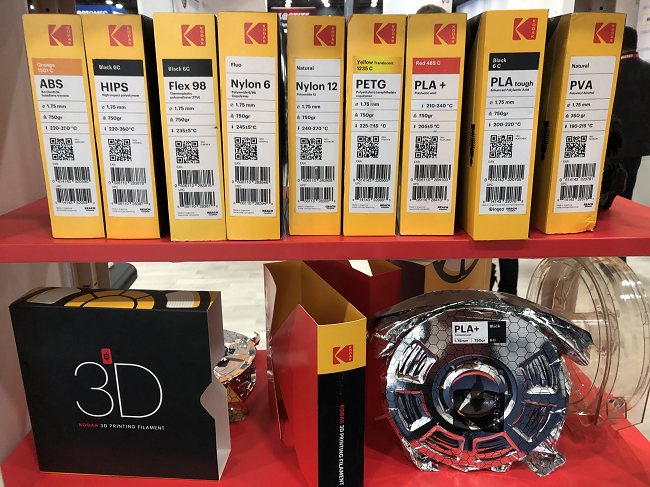
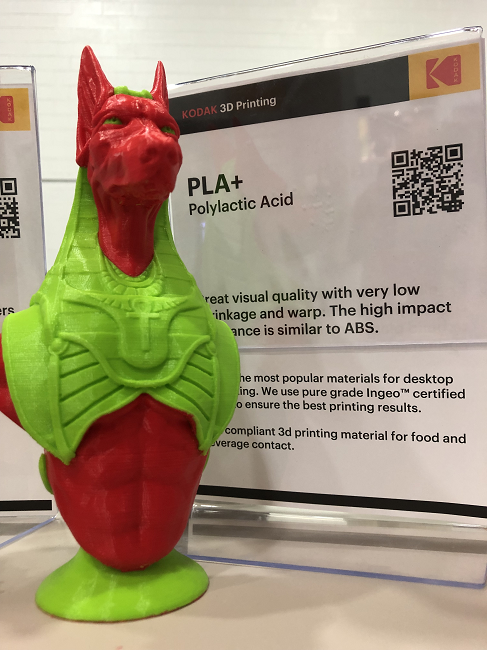 Kodak offers 11 different materials, including strong, food-safe PETG and semi-flexible Flex 98 with high abrasive resistance. Gawianski brought out a 3D printed part that was a good example of the Portrait 3D printer’s dual extrusion. The figure, which bore a strong resemblance to the Egyptian god Anubis, was made with PLA+ (green) and PLA Tough (red), which are the two materials that come with the Portrait 3D printer out of the box.
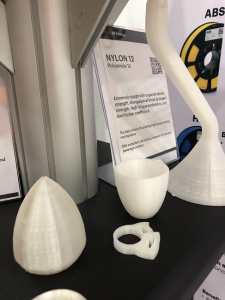
“We also have Nylon 12, which is FDA certified and has high resistance to impact,” Gawianski said, showing me two parts in translucent white.
“We also have some further ABS parts – this is a delamination test,” he continued, scratching the side of a small container. “It’s difficult to achieve this with an open printer, you need an enclosed one.”
Kodak will soon be releasing some new materials to the market, such as acrylic, which I also got the chance to see.
Our conversation ended by discussing Kodak’s 3D printing software.
“We have a desktop solution, which is the Kodak 3D Slicer,” Gawianski explained. “And we have the Kodak 3D Cloud, that is a cloud management system that enables you to manage an unlimited number of printers in unlimited locations from a single data place. So from your computer, phone, whatever, you can manage this fleet of printer.”
I asked if the company had anything new on the horizon, and aside from new filaments, Gawianski also said we can expect to see a new 3D printer model by the end of the year.
Take a look at some more of my pictures from the Kodak booth at RAPID+TCT 2019 below:
Discuss this story, and other 3D printing topics, at 3DPrintBoard.com or share your thoughts in the Facebook comments below.
[Images: Sarah Saunders]
RAPID 2019: BigRep to Unveil New-Generation STUDIO G2 Large Format 3D Printer
 News is already flooding in regarding the Rapid+TCT event in Detroit, Michigan being held from May 20-23. Berlin’s BigRep will be attending in full-force, ready to unveil the BigRep STUDIO G2, a new generation 3D printer joining the STUDIO lineup.
The STUDIO G2, available to order now, 3D prints ‘engineer-grade’ materials while also encompassing all the same features of the original STUDIO hardware created for fabricating large parts.
BigRep’s STUDIO 2 3D printer was created for industrial applications but is suitable for everyday use, offering the following new features:
- Unmatched speed and resolution in large format 3D printing
- Ergonomic design
- Height of 1765 mm
- Fully enclosed, insulated build envelope (500 mm x 1000 m x 500 mm)
- Fast heating print bed reaching 100°C
- Temperature-controlled filament chamber
- Dual extruder with two 0.6 mm ruby nozzles
- Layer heights as little as 0.1 mm for abrasive engineering-grade materials like PA6/66
“We are excited to host the world premiere of the STUDIO G2 at North America’s most influential AM event – RAPID+TCT. We believe that both customers already relying on the original machine and new ones will appreciate the many advanced features of the STUDIO G2,” said BigRep CBO, Frank Marangell.
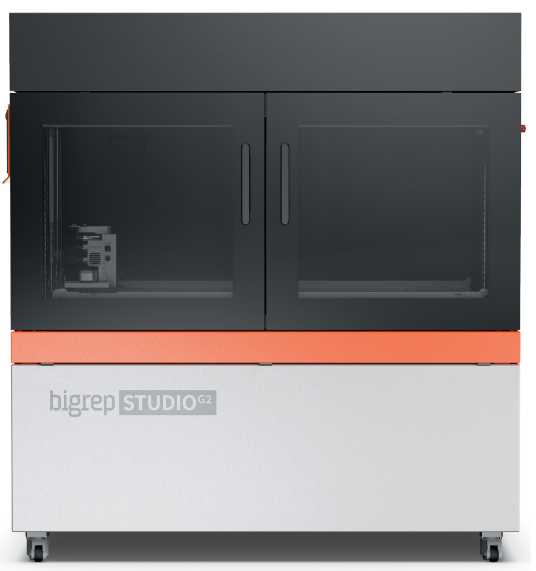
The Studio G2 3D printer

BigRep will be releasing other 3D printing materials (also engineering grade) in the future, to include carbon/glass fiber composites, and ASA. The STUDIO G2 will also feature the new proprietary BigRep BLADE slicer software, which BigRep states will offer accurate printing times and tools for improved production such as material use calculations.
“The new generation STUDIO G2 is a great addition to our expanding industrial portfolio of large-format printers. Based on proven, successful technology, the STUDIO G2 is upgraded with key features that industrial users need,” said BigRep CEO, Stephan Beyer, PhD. “We’ve built it for printing with the abrasive, engineering-grade materials that the industry demands in a next-level, space-saving printer for large-format parts.”
The BigRep Pro will also be on-site, running BigRep’s MXT® Metering Extruder Technology, and a state-of-the-art Bosch Rexroth motion control system. Designer Marco Mattia Cristofori will also be at the show to present NERA, a completely 3D printed e-motorbike that was created in only 12 weeks.
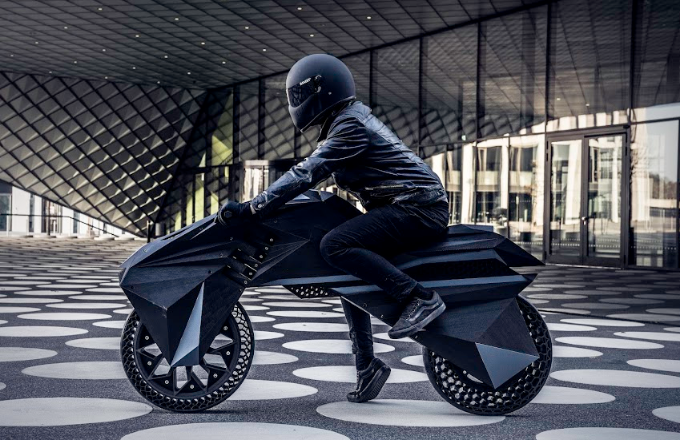
The 3D printed NERA motorbike

Founded in 2014, BigRep also has offices in Boston and Singapore. Catering to engineers, designers, and manufacturers, they also partner with Bosch Rexroth, Etihad Airways and Deutsche Bahn. Key investors are BASF, Koehler, and Klöckner and Körber. We have followed the German company extensively, from the unveiling of the BigRep ONE to the PRO and the EDGE 3D, along with following their extensive partnerships and contributions to additive manufacturing research.
What do you think of this news? Let us know your thoughts! Join the discussion of this and other 3D printing topics at 3DPrintBoard.com.
[Source / Images: Big Rep Press Release]
E3D Skunkworks releases Pathio, a new slicer for FDM/FFF 3D printing
Award winning OEM E3D Online has released its skunkworks slicer Pathio for FDM/FFF 3D printer. A first for the UK-based company that typically makes hotends, Pathio is, “A totally new core slicing engine that ‘does things right’ from the outset, built around a 3D first approach and a solid understanding of how extrusion-based 3D printing works […]
UK Researchers Inspired by Astrophysics to Improve Imaging for 3D Printed Models
 Like cancer, heart disease and the many conditions surrounding it (along with other related systems in the human body) can often cause fatal complications, leading researchers around the world to continually look for better methods in diagnosing, treatment, and surgical procedures. UK researchers, I. Brewis and J.A. McLaughlin, at Northumbria University have recently explored 3D imaging in reference to cardiovascular health care, publishing their findings in ‘Improved Visualisation of Patient-Specific Heart Structure Using Three-Dimensional Printing Coupled with Image-Processing Techniques Inspired by Astrophysical Methods.’
Brewis and McLaughlin are working in the realm of astrophysics in creating new image-processing techniques for viewing the human heart, transferring the data to an .stl file and then 3D printing a medical model. These new techniques allow for better modeling from scans, especially improving on the clarity of smaller features.
Traditionally, CT and MRI scans have supplied data for 3D printed models. As the authors of the study point out, these are ‘relatively accurate’ but still produce errors. Not only that, image processing can be a high-maintenance venture, consuming both time and money. Currently there are a range of techniques in use, including:
- Vignetting
- Boxcar smoothing function
- Dilation
- Edge detection
- Pixel plate scale development for charge-coupled devices on spacecraft
Brewis and McLaughlin examined whether using techniques generally used in astrophysics could reduce the margin of error, along with faster turnaround time in rendering. The basic steps in arriving at a 3D model must include acquiring data, segmenting, converting files, fixing and design, and 3D printing. For the purposes of this study, the scientists used data from one anonymous patient, obtaining 856 CT images. In segmentation they were able to identify the ‘region of interest’ to be 3D printed: the heart tissue.
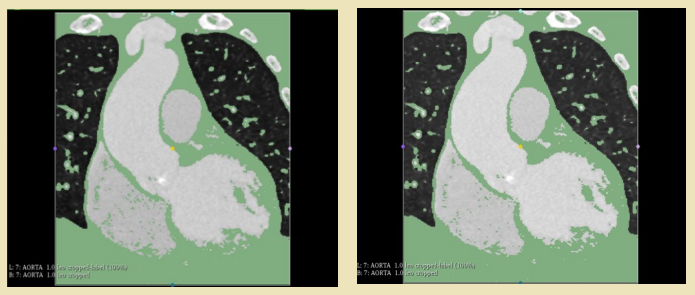
Segmented heart data following first thresholding of right heart region (left) and segmented heart data following second thresholding of right heart region (right). The right ventricle (bottom left) shows improved clarity of internal chamber segmentation following second thresholding
The team used Slicer to view the chest cavity from multiple angles and cut all extraneous data for a better view.
“Initial thresholding highlighted all heart tissue, with the inclusion of deoxygenated blood in both the right atrium and right ventricle,” stated the researchers in their paper. “Areas of deoxygenated blood were found to be removed by applying a second threshold in the range [-600, 70] to the chambers of the right heart.”
A second pass of thresholding resulted in converting data from 2D segments into a 3D rendering.
“This method, whilst modelling the majority of the heart’s internal structure, omitted small-scale features such as valves. In order to extract these small-scale features from the DICOM data available, an alternative approach was introduced,” stated the researchers, upon using vignetting to eliminated added interference in the background.

Netfabb image processing stages from left to right initial and divided models
Further highlighting and enhancement allowed the research team to see areas of aortic valve cusp occlusion and areas of bad pixels more clearly.
“For both the full heart and the aortal valve, the total time taken for image segmentation was on the order of tens of minutes, where some parts of the segmentation process were, naturally, more time-consuming than others,” stated the researchers. “For the method presented here, the main time-consuming step was whilst utilizing Slicer 4.8.1’s in-built eraser and draw tools.”
Once the researchers had the files for both the heart and aortic valve models ready, they used Netfabb to prep for production with an SLA 3D printer.
“The SLA printer produced more sturdy 3D models yet could not produce models which did not require additional support in order to maintain the desired structure of the internal heart chambers (i.e. free standing models) during printing,” stated the researchers. “For a simple and relatively flat structure however, such as the aortic valve, the free standing issue was not a concern and the stronger resin-based model proved to be ideal for producing thin and delicate structures such as the tricuspid valve.”
Ultimately, the team produced a 3D printed heart model with four clearly defined heart chambers, along with the aorta, superior vena cava and the pulmonary vein and artery. The patient whose data the researchers were using as an example had an aortic aneurysm that is accurately depicted in the model, seen as an area of depression in an aortic side wall. Calcification can be clearly observed too, and this type of accuracy means surgeons can operate more precisely and efficiently, saving on time in the operating room.
“The use of 3D renderings of patient data improves on traditional imaging techniques where surgeons are required to visualise a three-dimensional picture of heart defects based on a series of 2D scans by reproducing exact, real three-dimensional cardiovascular anatomy,” state the researchers. “The use of 3D modelling can also improve the physician’s understanding of individual patient anatomy such as in the case of valve replacement16 or in procedural planning for the treatment of congenital heart disease.”
What do you think of this news? Let us know your thoughts! Join the discussion of this and other 3D printing topics at 3DPrintBoard.com.
[Source / Images: ‘Improved Visualisation of Patient-Specific Heart Structure Using Three-Dimensional Printing Coupled with Image-Processing Techniques Inspired by Astrophysical Methods’]
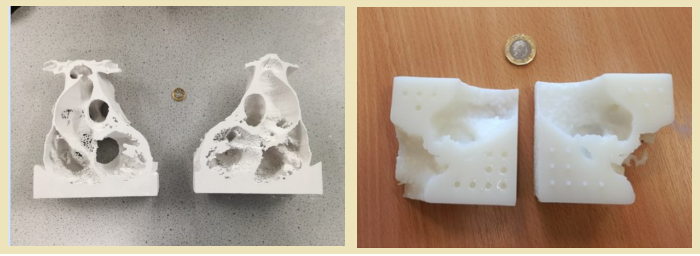
3D printed heart models. (left) complete heart model, (right) aortic valve
model). UK one pound coin for scale.
Thesis Focuses on Using Cooperative 3D Printing with Robots to Improve the Technology’s Scalability
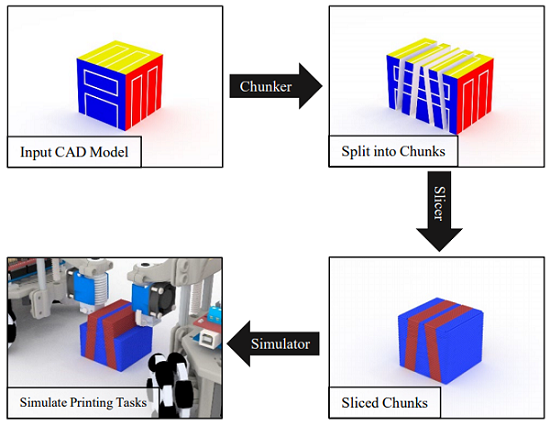
Illustration of the slicing strategy for cooperative 3D printing.
Obviously, the size of your 3D print is limited to the size of your 3D printer…you wouldn’t try and 3D print a building, no matter how small, using a desktop system, right? Jace J. McPherson from the University of Arkansas put it more exactly in the honor’s thesis he wrote and submitted for his Bachelor’s degree in Computer Science and Computer Engineering:
“More specifically, an object cannot be printed if it is wider than the full horizontal movement range of an extrusion nozzle or if it is taller than the maximum height of the extrusion nozzle above the printing surface (i.e., the “print bed”).”
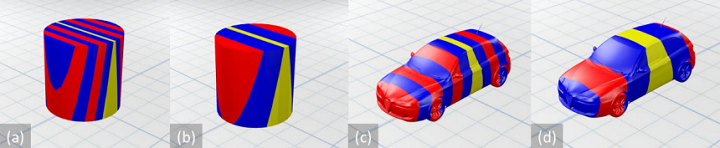
Chunker results with a cylinder and a car model.
According to McPherson’s thesis, titled “A Scalable, Chunk-based Slicer for Cooperative 3D Printing,” print jobs’ size limitations can hinder the technology’s goal of being “fully dynamic.” In the thesis, he focused on the issue of 3D printer scalability – limited by print bed size and use of a single printhead – and lack of manufacturing automation, and the idea of cooperative 3D printing, and a new slicing strategy for this technology, as a combined solution.
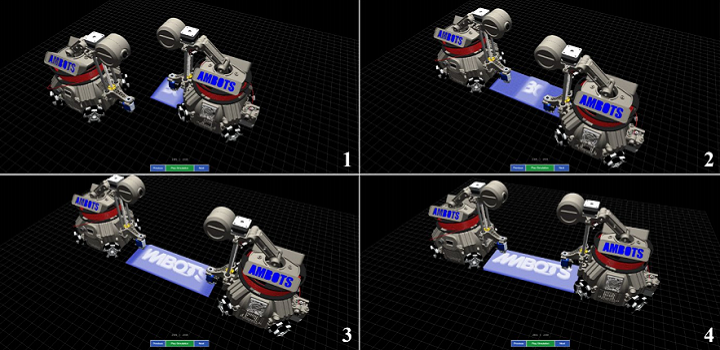
The abstract states, “Cooperative 3D printing is an emerging technology that aims to increase the 3D printing speed and to overcome the size limit of the printable object by having multiple mobile 3D printers (printhead-carrying mobile robots) work together on a single print job on a factory floor. It differs from traditional layer-by-layer 3D printing due to requiring multiple mobile printers to work simultaneously without interfering with each other. Therefore, a new approach for slicing a digital model and generating commands for the mobile printers is needed, which has not been discussed in literature before. We propose a chunk-by-chunk based slicer that divides an object into chunks so that different mobile printers can print different chunks simultaneously without interfering with each other. In this paper, we first developed a slicer for cooperative 3D printing with two mobile fused deposition modeling (FDM) printers. To enable many more mobile printers working together, we then developed a framework for scaling to many mobile printers with high parallel efficiency. To validate our slicer for the cooperative 3D printing process, we have also developed a simulator environment, which can be a valuable tool in visualizing and optimizing a cooperative 3D printing strategy. This simulation environment was also developed to export the visualization in a generic format for use elsewhere.”

Large-scale cooperative 3D printing. Many robots cooperate to produce a single object that does not require assembly upon completion. The final product in this figure is a topographical map of the state of Arkansas.
Cooperative 3D printing is made up of multiple independent, free-roaming robot 3D printers that receive instructions on how to print one part, or chunk, of a whole object. The mechanism makes it possible to autonomously complete large print jobs, with no interruptions, in a single piece, without human interaction. The parts are actually 3D printed on top of each other so they’re joined during the process and not after.

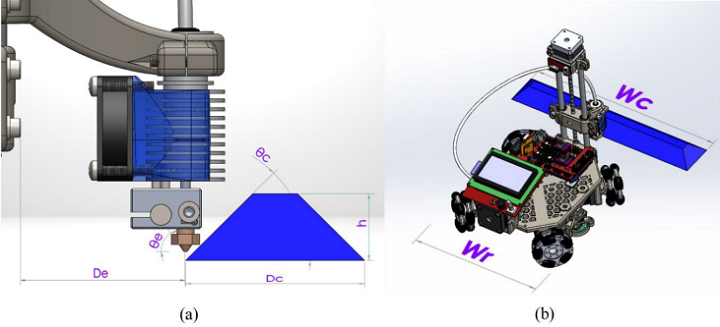
(a) Illustration of the chunk’s dimensions and printing limitations on the slope, and (b)a comparison of chunk width with robot width.
“Cooperative 3D printing solves physical scalability with the premise that multiple independent 3D printers can be used to produce a single object. These printers need to “cooperate” to produce objects that would normally exceed the size limitation of a traditional 3D printer. They must have the freedom to navigate a large area, such that their print range is limited only by the size of the print surface, as opposed to a fixed range imposed by the extrusion nozzle’s mechanism. To summarize, assuming the print surface is easy to scale, the potential print size will also be highly scalable,” McPherson wrote.
“This new mechanism also solves time scalability assuming new 3D printers that enter the fray can decrease the overall print time. Given that the number of printers is dynamic, we can quantify the time scalability as a function of the parallel efficiency from using any number of robots.”
The chunker design subdivides 3D models into chunks, which are then split up between the robots for 3D printing. The slicer converts these chunks into print commands for the robots, and the simulator creates a visual, using the slicer commands, that shows how real robots would complete their tasks. It’s important for the simulator to be properly designed, as it’s used to validate the chunker and slicer algorithms – if the simulator is not accurate, the rest of the process isn’t either.
In the rest of his thesis, McPherson describes how the slicer makes it possible to subdivide models so that chunks can be 3D printed in parallel, as well as demonstrating how to scale the slicer for more than two robots for additional degrees of spatial freedom.
“Results show that the developed slicer and simulator are working effectively,” McPherson wrote.
McPherson hopes that this project can help “lay the foundation for scalable Cooperative 3D printing,” which could open up a whole new direction of research for scaling 3D printing, and potentially even “revolutionize the way manufacturing processes are structured.”
“This thesis has presented, in detail, a feasible process for managing ?? 3D printing robots operating in parallel on a single print job, taking into account the geometric constraints, the communication requirements between robots, and the necessary pre-processing needed to properly subdivide a model for chunk-based printing,” McPherson concluded.
Discuss this research and other 3D printing topics at 3DPrintBoard.com or share your thoughts below.