Solvent Recycling for 3D Printers With Sidewinder Power

When you first launch your 3D printing business, you may not know about all the unique responsibilities you are taking on.  However, as soon as you dive deeper into the finishing process of printed products or parts, your knowledge of risk grows.  When you purchase any type of solvent for the finishing process, you become completely responsible for its safe handling, use, and disposal.  In order to minimize risk and save yourself a lot of money, a 3D printing solvent recycler would be a smart investment.

Over time you may accumulate gallons of unique solvent types such as IPA, Acetone, MEK, and Methyl Isobutyl Ketone.  Which will create a new task of proper disposal of these chemicals. None of these chemicals can simply be washed down the drain or tossed in the garbage.  There are both federal and state laws that determine the appropriate course of action with different types of solvents.  Whether you own and operate a large shop or manufacturing plant or are simply a small 3D printing business owner, you need to follow these laws or risk considerable repercussions that may include fines and incarceration.  Therefore, you should consider recycling your 3D printer solvents.

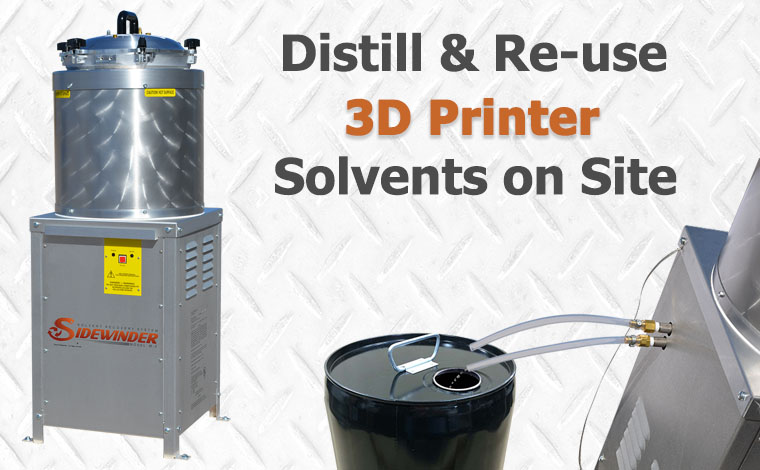
Purchasing a 3D printing solvent recycler will enormously reduce the difficulties of legal disposal.  The Sidewinder Model M-2 Solvent Recovery System was specifically designed and manufactured to help anyone interested in the 3D printing world reclaim their solvents responsibly and affordably.

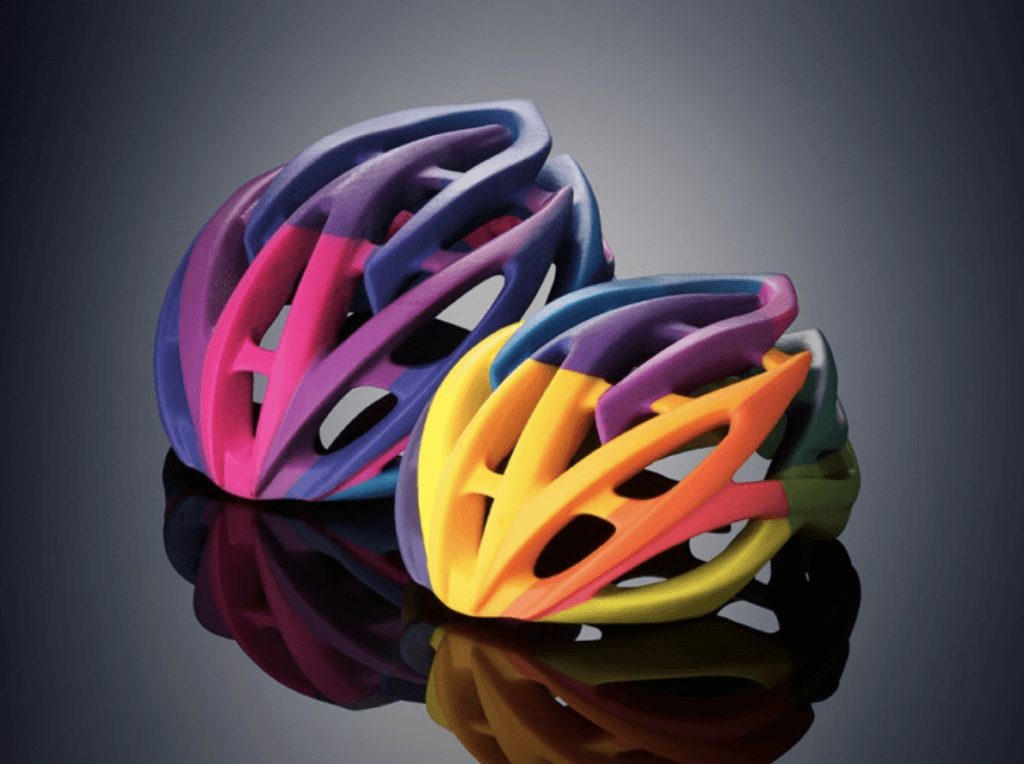
It does not matter if you currently use ABS, PLA or resin to print your products or parts.  Different types of solvents are used to smooth and finish your projects.  The flexibility of the Sidewinder unit allows you to handle many types of solvents effectively while minimizing risk overall.  You do not have to transport them to another facility, pay for expensive hazardous waste removal, or even find a location to bring them to.

Instead, you can engage in safe and effective reclaiming of your solvents. The Sidewinder refrigeration reclaimer can handle acetone and other solvents used for smoothing and finishing your 3D printed projects. It is the only UL listed solvent recycler machine on the market which means it is a certified safe machine for indoor use. 

Sidewinder Solvent Recycler is Hassle-free and Easy to Use

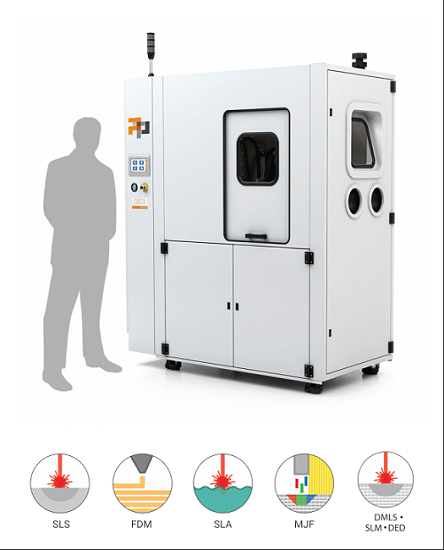
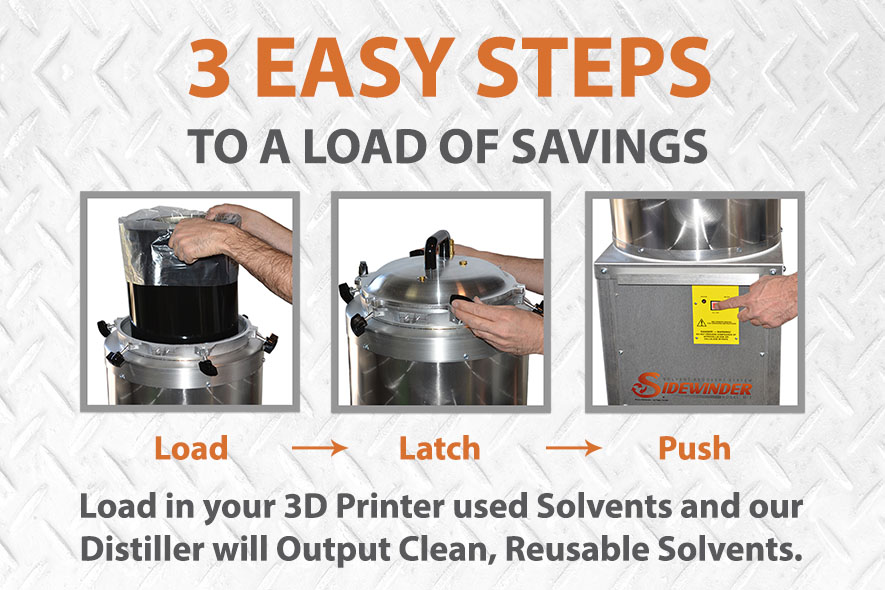
As a 3D printer business owner, you probably prefer spending your time designing new 3D printed products and choosing materials rather than recycling solvents.  However, solvent recycling for 3D printers is a simple process when using the Sidewinder Model M-2.  It only takes three easy steps: 1. Load your used solvents; 2. Latch the lid securely; and 3. Press the On button.  The machine will manage the entire distillation process and output clean, usable solvent that can be used again and again.

Not only do you eliminate a lot of the disposal issues that come with using solvents for finishing 3D printed projects, but you also reduce your expenses when it comes to buying new solvents.

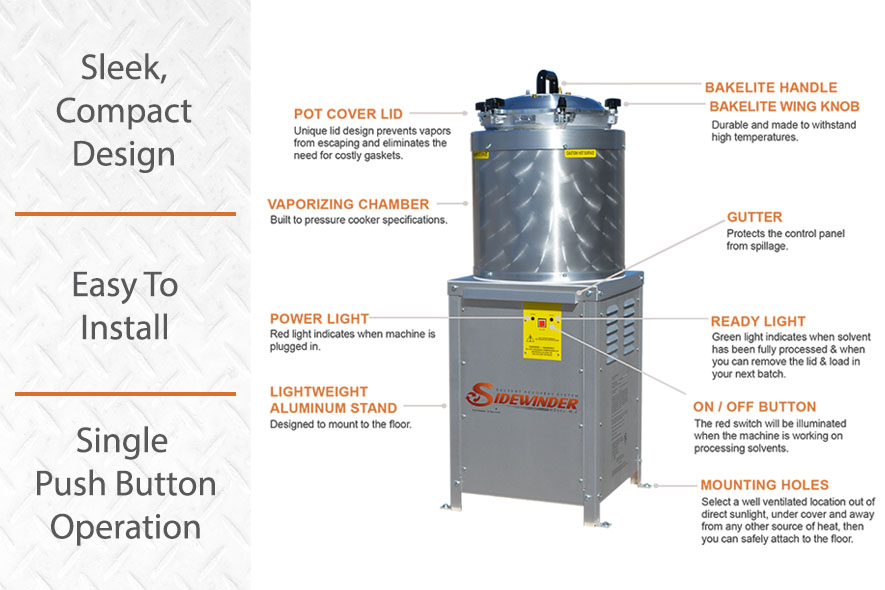
Ideally, the Sidewinder solvent recycling unit is for anyone who uses approximately 5 to 70 gallons of solvent per week.  Its sleek, efficient and compact design only requires a small footprint in your workshop or manufacturing facility.

According to the manufacturer, the Sidewinder can easily process about 50 gallons per week.  Although different variables are involved such as what solvents you are recycling and how dirty they are—along with humidity and barometric pressure—it may take a couple of hours to heat up, and then it should distill approximately one gallon per hour.  The manufacturer provides free phone support.

Enjoy Safety and Savings With Solvent Recycling

In order to maximize safety, this machine shuts itself off automatically once the recycling process is done.  It is UL listed and meets all applicable US standards required for solvent distillation machinery.  It does not require any special water hook-ups and can be cleaned with ease.

When it comes to saving money, recycling always makes more sense than paying for disposal and purchasing brand-new solvent for every project.  Although costs vary across the country the legal disposal of solvents usually runs around five dollars per gallon.  Therefore, the return on investment for the cost of the Sidewinder unit is around 3 to 4 months for anyone using 50 gallons of solvent per week.

How Does It Work?

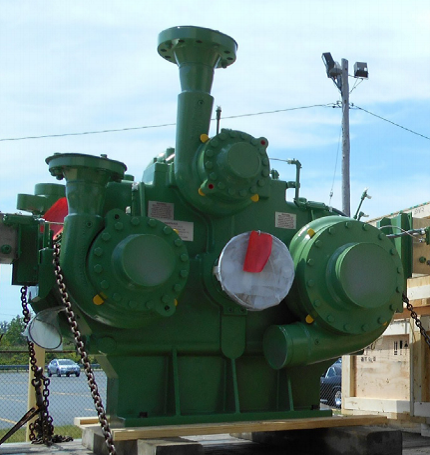
A standard 5 gallon metal bucket of waste is placed in the chamber. Waste solvents are vaporized and re-condensed, making the solvent reusable. Vapors expand in the chamber, displacing air, and then fall through a refrigerated heat exchanger. After that, they condense and flow into the clean solvent receptacle. Waste stays behind in the cooking bucket. You can also use Sidewinder’s custom fitted processing bags which fit into the buckets like liners.

It’s important to note that this ‘cooker’ is meant only for commercial and industrial use by trained personnel. You never want to process unidentified compounds or anything containing acid. Do not process items containing nitrocellulose or cellulose nitrate. Always keep in mind that caution handling of hazardous waste is of utmost importance. You should find the Sidewinder to be simple and hassle-free, but also enjoy knowing that it comes with a one-year warranty. Is this a device you are interested in trying?

The post Solvent Recycling for 3D Printers With Sidewinder Power appeared first on 3DPrint.com | The Voice of 3D Printing / Additive Manufacturing.

Is This the Best Way to Manually Post-Process an FDM 3D Printed Part?

Researchers Jinjin LiuHai GuBin LiLu ZhuJie Jiang, and Jie Zhang from the Nantong Institute of Technology and Jiangsu Key Laboratory of 3D Printing Equipment and Application published a paper, titled “Research on Artificial Post-Treatment Technology of FDM Forming Parts,’ about using manual post-processing on 3D printed parts made with FDM technology, which has a low molding accuracy that can cause stair-stepping.

“Due to the “step effect”, the printed parts have rough surface, obvious stripes, poor surface quality, and cannot meet the customer’s or specified requirements, so post-processing is very important. This paper mainly studies and summarizes the manual post-processing technology of FDM printed parts, and provides the specific implementation method of post-processing, providing reference for the post-processing of FDM formed parts and other forming processes,” the researchers wrote.

Figure 2. The vase model.

In order to “further improve the surface quality and strength” of 3D printed models, post-processing is often necessary. Some of the more common methods of post-processing FDM formed parts include:

  • Chemical treatment with organic solvent
  • Heat treatment
  • Mechanical treatment with a sander or grinder
  • Surface coating treatment

In this paper, the researchers focused on a manual post-treatment process, which requires several items to work properly, such as a spray pen air pump with air storage tank, a coloring pen and tool set, gloves, a mask, water-diluted solvent in a solvent bottle, quick dry small fill soil, 80 to 3000 mesh sandpaper, a cleaning agent, a file, and others.

The team fabricated a post-treatment vase model as an example, using PLA material and an Einstart 3D printer. Once the vase was printed, they removed the plate with the model on it from the printer.

Figure 4. Model finished printing. Figure 5. Demolition of support.

“…the model is smoothly removed from the bottom plate with a shovel, and then to check whether there is strain concentration model, relatively weak parts with small first stripping knife to spin out the model and the support, and then has a long nose pliers clamping a direction support, applying a constant force, the location of the tiny support can use the file to remove,” they wrote.

To clean up a rough surface, the researchers noted that you can use low mesh sandpaper to sand and polish it. The model and the low mesh sandpaper should be immersed in water and sanded along the model’s texture, as this can both extend the sandpaper’s life and smooth out the model’s surface.

Then, they moved on to a technique called quick dry small fill, which involves the addition of a small amount of filling material to gaps in the model; then, the fill is evenly daubed with a hard scraper.

Figure 7. Apply small patch of soil evenly. Figure 8. Polished to make it smooth.

“Then wait for 30 seconds, after filling soil has hardened, using 1200 mesh to 1500 mesh sandpaper in, as shown in figure 8, If there are still tiny grooves and repeat the above steps,” the researchers wrote. “To be in addition to the groove after no large-area fill soil, feel smooth, can proceed to the next step.”

The next step is spray can water fill soil spraying. First, the model’s surface should be washed with water, and then the spray pot is used to fill the soil, before the model is wiped with a non-woven cloth and sprayed at “the ventilated position,” keeping the nozzle at about 20 cm and uniformly spraying the model one to three times, quickly.

“Generally, choose gray spray pot water to fill the soil, because gray is a neutral color,” the team explained.

Figure 10. High mesh sandpaper grinding.

Once the water is sprayed and the soil is filled, air drying takes place. Then, 2000-3000 high-mesh sandpaper is applied for “slight grinding” along one direction, before moving on to the coloring phase.

The 3D printed, polished and processed model should first be washed and dried before pigments are applied. A spray gun can be used to add either a base color or one that covers a large area of the model; you’ll need a 1:2 ratio of diluent to pigment for spraying, and you should be able to adjust the amount of air injection while you’re spraying.

“Brushes of different thicknesses and sizes can be used to paint the details,” the team wrote. “It is accessible to use 00000 pens to paint the detailed parts of the figures, or use different widths of the cover tape to cover and then spray the spray gun to paint.”

Once the paint and spray paint have dried completely, you can uniformly spray protective paint on the model; the research team used B603 water-based extinction for their 3D printed vase.

The team shared a few more notes on making the post-treatment process run smoothly, such as the importance of using software to reduce the amount of unnecessary support structures, coating the print plate with a thin layer of glue to prevent deformation, and observing the model while it’s being printed.

Figure 13. The vase is finished after processing.

“Secondly, in the manual post-processing should look to the protection work, grinding water mill is the best way to model processing, be patient, 80-2500 mesh, use each mesh sandpaper required time from long to short, low mesh sandpaper grinding along the texture of the model, high mesh sandpaper grinding should be turned around,” the researchers concluded. “When mixing colors, you should understand in advance the relationship between light and shade, brightness and purity of various colors, warm and cold color selection, etc.”

They noted that “the degree of difficulty” for post-processing methods, and the methods themselves, can vary with different 3D printing technologies – what works for FDM may not necessarily work for SLA, and so on.

Discuss this and other 3D printing topics at 3DPrintBoard.com or share your thoughts in the comments below.

The post Is This the Best Way to Manually Post-Process an FDM 3D Printed Part? appeared first on 3DPrint.com | The Voice of 3D Printing / Additive Manufacturing.

5 Professional Finishing Options for FDM parts

Despite the advances of other technologies, Fused Deposition Modeling (FDM) remains the go-to 3D printing process for prototypes and simple plastic parts. It’s fast, it’s cheap, and there are thousands of filament options to account for projects of all kinds. When people talk about 3D printing, they’re often talking about FDM.

But there are limitations to extrusion-based printing technologies. While FDM is a highly effective and versatile process, it has often lagged behind comparable technologies — Stereolithography, SLS, etc. — in terms of surface finish. Layer lines can be severe, and FDM parts aren’t always usable when taken straight from the print bed.

Fortunately, FDM parts don’t have to remain in their as-printed form. There are several professional post-processing techniques that can be used to remove layer lines, improve the overall surface finish of a part, or even add color and other aesthetic features.

3ERP, a global rapid prototyping company that specializes in on-demand 3D printed parts, recommends the following five finishing options, all of which can turn ordinary FDM parts into high-quality components.

Sanding

It might not sound complicated, but sanding is one of the most important techniques for achieving a professional finish on FDM printed parts.

Using textured sandpaper, it is possible to smooth the surface of a part in a way that clears imperfections (such as support marks) and removes visible layer lines. It is a manual process, however, which means care must be taken to apply the sandpaper evenly across the part.

Sanding 3D printed parts generally involves using sandpapers of varying grit levels. This means starting with a coarse sandpaper (100 grit or higher) that will remove large bumps and blemishes and gradually moving up to a very fine sandpaper (up to 5,000) to achieve a polished finish.

Although sanding is difficult when dealing with finer details or thin walls, it is highly effective for improving part smoothness and is a great way to prepare parts for coating or painting.

Bead blasting

While sanding is widely used for improving the smoothness of FDM parts, the process of bead blasting may offer a more comprehensive solution, especially for complex parts with hard-to-reach areas.

The bead blasting process involves firing an abrasive substance at the plastic part in a controlled manner, rather than rubbing it manually with sandpaper. It is much faster than sanding, and is also adjustable in terms of pressure and bead hardness.

The abrasive substance is blasted at the FDM part with a motion similar to spray painting, allowing for an even coating across the part.

Polishing

Polishing is an important finishing procedure for aesthetic parts, and follows naturally from sanding: once a part has been sanded with a very fine grit, it is ready for polishing if necessary.

While sanding is used to improve the smoothness of an FDM part, polishing takes things further by giving the plastic a shiny or mirror-like appearance. This may be necessary for aesthetic parts such as models, or for functional parts that require minimal friction.

During the polishing process, a cloth or buffing wheel is used to consistently apply polish to the surface of the part, giving the plastic a durable shine. Although it can take some time, the polishing process effectively transforms FDM parts, giving them the appearance of injection molded components.

Painting

There is a huge variety of materials available for FDM 3D printing, from standard PLA and ABS to more specialist engineering composites designed for functional applications. Many of these materials are available in a range of colors.

Nonetheless, FDM parts often require a coat of paint after the 3D printing stage. This might be because the filament is unavailable in a specific shade, or because a part requires different colors in different sections.

At 3ERP, we offer a variety of painting options, including matte, satin, high-gloss, textured and soft-touch coatings. Shades can be color-matched for branding purposes, while priming (before) and polishing (after) is also provided.

Painting should be considered for any parts used in consumer products, with the only potential pitfall being a slight adjustment to dimensions. (Mechanical parts with exceptionally high tolerances may be better left unpainted.)

Metal coating

A dramatic rise in metal additive manufacturing technologies has made 3D printed metal parts more accessible to companies of all sizes. However, thin metal coatings can also be added to plastic parts made with FDM — a cheaper option when a metallic appearance is the main requirement.

There are several options for adding a metal coating to FDM parts, many of which are difficult or impossible to achieve without professional equipment. These include metallization, chroming and zinc plating, all of which can radically transform the appearance of a printed part.

Electroplating options use a vat of plating solution and an electric current add the metal surface layer, producing a professional-grade metallic surface finish in a very short space of time.

Contact 3ERP to find out how your 3D printed FDM parts can be improved with post-processing treatments.

The post 5 Professional Finishing Options for FDM parts appeared first on 3DPrint.com | The Voice of 3D Printing / Additive Manufacturing.

Maker and Veteran Tim O’Sullivan Completes Third Life-Size 3D Printed Movie Character Suit

O’Sullivan with Stan Lee (may he rest in peace)

A project that began as an ambitious therapeutic task for military veteran Tim O’Sullivan after he returned home wounded from combat has evolved into something so much greater. In 2016, O’Sullivan was looking for something to occupy his time after returning home from fighting overseas, and decided to try his hand at 3D printing. He purchased the files for a full-body Iron Man suit, and over the next eight months completed the 3D printed, wearable suit on his desktop Robo R1 +Plus. The end result was amazing, and O’Sullivan was hooked, telling 3DPrint.com at the time that the Iron Man suit would likely not be his last big project.

He took everything he’d learned from the 3D printed Iron Man suit, and by the summer of 2017, O’Sullivan had finished his next 3D printing project: a voice-activated War Machine Mark III suit from Marvel’s Captain America: Civil War. The life-size suit, 3D printed on his SeeMeCNC Rostock Max V3, featured some custom modifications to the files he purchased, and was made out of PETG, with fiberglass added to make the suit stronger. But this additional strength wasn’t for just any old reason – O’Sullivan was finally able to follow through on his original plan and wear the War Machine suit to visit sick children in the hospital.

Tim O’Sullivan with Anthony Daniels

Just like me, O’Sullivan happens to live in Ohio’s Miami Valley region, and I was lucky enough to meet him at the Dayton Mini Maker Faire not long after he completed the 3D printed War Machine suit, which I got to see in person. It was as cool as it looked in pictures, and to my great excitement, O’Sullivan told me that his next 3D printing project would be C-3PO from my beloved Star Wars series.

He reached out to us recently to say “mission accomplished,” and also to share some more exciting news – he and his 3D printed C-3PO suit made an appearance in Chicago for the Star Wars Celebration with George Lucas’s son Jet Lucas, and Anthony Daniels, the actor who portrays the golden droid in the movies.

“Was quite the reward after almost 10-12 months of hard work,” O’Sullivan told us.

“Alot of work went into the suit, much of the suit is a combination of 3D print, real brass accessories (Arm Pistons, eye grills and hand pistons etc.).”

O’Sullivan told 3DPrint.com that it was “an experience of a lifetime” when he was wearing the 3D printed suit at the Star Wars Celebration and got the chance to meet Daniels.

“It seemed to be well recieved based on his expressions,” O’Sullivan told us. “Unfortunately, I never got the chance to explain to him following the encounter on how the suit was made or how it had been a major part of my personal road to recovery.”

Two years ago, the military veteran turned maker told us that working on his 3D printed character suits has been the “best therapy” for him when he was having a hard time sitting still. O’Sullivan also really enjoyed wearing the 3D printed War Machine suit to visit kids in the hospital, and earlier this week he made an appearance at the Dayton Children’s Hospital in his 3D printed C-3PO suit.

“It was absolutely a touching experience for both the parents and children. We walked 2 floors of the hospital,” O’Sullivan told me in an email today. “The suit is the most difficult to wear and always leaves a few bruises, but well worth it.”


O’Sullivan’s detailed Star Wars droid suit is really something, incorporating a voice modulator and 25 watt amp that projects an emulation of the original C-3PO voice. In fact, it’s so realistic that it was accepted and certified by the Ohio Rebel Legion Apollo Base!

“For the upper torso, I had used a 3D scan of the original suit available on Thingiverse and then modified it using Zbrush to clean up imperfections,” O’Sullivan told 3DPrint.com. “I also used a high quality laser triangulation 3D scan of my body from a Human Solutions scanner to match my body frame. The legs were a challenge so I had commissioned Skylu Props who is actually a product engineer to design the 3D model of them to my body scan and have them function/articulate properly.”

O’Sullivan said that Kurt Heydenburg modeled the 3D printed arms of the suit, while Gordon Tarpley modeled the fingers.

“Almost all of the main body parts were 3D printed with the exception of the shorts and feet which were vaccum Formed plastic,” O’Sullivan told us.

To complete chroming on all of the suit’s 3D printed parts, O’Sullivan himself used a hydrochroming process (Angel Guilding Products), which is essentially “real silver sandwiched in between 2 layers of clearcoat on top of the 3D print,” with a layer of gold-tinted clearcoat to cover on the top.


While most of the 3D printing for C-3PO was completed on Rostock Max V2 and V3 printers, I learned that he has just upgraded to SeeMeCNC’s new Boss Delta system. I wonder what life-size 3D printed suit he’ll make with it…if he’s taking suggestions, I’m voting for Batman!

Discuss this story and other 3D printing topics at 3DPrintBoard.com or share your thoughts in the Facebook comments below.

[Images provided by Tim O’Sullivan]

3D Printing News Briefs: February 22, 2019

We’ve got some exciting dental news to share first in today’s 3D Printing News Briefs – Stratasys just announced its new full-color dental 3D printer at LMT Lab Day. Moving on, Farsoon has been busy developing an advanced pure copper laser sintering process, and Aether is working with Procter & Gamble on a joint development project. DyeMansion has announced a new UK distributor for its products, and three researchers address the challenges of adopting additive manufacturing in a new book about best practices in the AM industry.

Stratasys Introduces Full-Color Dental 3D Printer

This week at LMT Lab Day Chicago, the largest dental laboratory event in the US, Stratasys has introduced its new full-color, multi-material J720 Dental 3D printer which lets you have 500,000 color combinations for making very high resolution, patient-specific models. Its large build tray can print six materials at the same time, and it’s backed by GrabCAD Print software.

“Labs today operate in a very competitive space where differentiation counts on mastering the digital workflow and expanding into new products and services. The J720 Dental 3D Printer is designed to change the game – allowing levels of speed, productivity and realism the market has never seen,” said Barry Diener, Dental Segment Sales Leader for Stratasys. “This powers laboratories to meet the demands of a competitive market and push the boundaries of digital dentistry.”

See the new J720 Dental 3D printer at LMT Lab Day Chicago today and tomorrow at Stratasys Booth A9. It’s expected to be available for purchase this May.

Farsoon 3D Printing Pure Copper

Pure copper heat exchanger

Two years ago, after Farsoon Technologies had introduced its metal laser sintering system, the company’s application team began working with industrial partners to develop an advanced 3D printing process that could additively produce components made of pure copper. Copper is a soft, ductile metal with both high electrical and thermal conductivity, and it’s often used in industries like shipbuilding, electronics, automotive, and aerospace. But most additive copper is based on alloys, and not the pure metal itself, which is hard for lasers to regularly and continuously melt and can cause problems like thermal cracking and interface failure.

That’s why Farsoon’s work is important – all of its metal laser sintering systems can successfully create cost-effective, high-quality pure copper parts. The company’s process and unique parametric design is able to meet custom needs of customers, and to date, it’s launched 13 process parameters for metal powder sintering, including pure copper. Some of the parts that have come out of Farsoon’s recent collaborations include a pure copper heat exchanger, which featured a 0.5 mm wall thickness, complex spiral geometry and was printed in a single piece. Farsoon is open for additional partners seeking to further develop the 3D printing of pure copper and other specialized materials.

Aether and Procter & Gamble Begin Joint Development Project

Aether CEO Ryan Franks and Director of Engineering Marissa Buell with an Aether 1

San Francisco 3D bioprinting startup Aether has entered into a two-year joint development agreement with Procter & Gamble (P&G) in order to develop 3D printing and artificial intelligence technologies. The two will use the multi-material, multi-tool Aether 1 3D printer as a technology creation platform, and will create several hardware and software capabilities that hope to automate and improve P&G’s product research applications and develop a next-generation Aether 3D printer. An interconnected network of computer vision and AI algorithms aims to increase automation for multi-tool and multi-material 3D printing, while high-performance cameras will enable new robotics capabilities. Aether is also working on additional software that will help P&G automate and speed up image processing.

“Aether is working with P&G to completely redefine 3D printing.  It’s no longer going to be just about depositing a material or two in a specific pattern. We’re building something more like an intelligent robotic craftsman, able to perform highly complex tasks with many different tools, visually evaluate and correct its work throughout the fabrication process, and constantly learn how to improve,” said Aether CEO and Founder Ryan Franks.

DyeMansion Names New UK Distributor

3D print finishing systems distributor DyeMansion, headquartered in Munich, announced that Cheshire-based 3D printing services supplier Europac3D will be the UK distributor for its range of machines. Per the agreement, Europac3D will now offer all of the AM finishing systems in DyeMansion’s Print-to-Product workflow, which includes its Powershot C powder blasting system, DM60 industrial coloring system, and the PowerShot S, which delivers homogeneous surface quality to 3D printed, powder-based plastics. Because of this, Europac3D is one step closer to achieving its mission of being a one-stop shop for 3D printing, scanning, and post-processing services.

“DyeMansion’s post-production systems are worldclass and add the all important finish to additive manufacturing,” said John Beckett, the Managing Director of Europac3D. “Their systems are perfect for companies or 3D print bureaus that have multiple SLS or HP 3D printers and allow us to extend our offer by providing market leading additive manufacturing finishing systems for 3D-printed polymer parts.”

New 3D Printing ‘Best Practices’ Book

We could go on and on about the many benefits offered by 3D printing (and we do), but there are still industry executives who remain unconvinced when it comes to adopting the technology. But a new book, titled “Additive Manufacturing Change Management: Best Practices” and released today, is here to provide some guidance for those still holding back. The book, which addresses some of the challenges of adopting 3D printing, was published by CRC Press as part of its Continuous Improvement Series and written by Dr. Elizabeth A. Cudney, an associate professor of engineering management and systems engineering at the Missouri University of Science and Technology, along with Divergent 3D’s VP of Additive Manufacturing Michael Kenworthy and Dr. David M. Dietrich, who is an Additive Manufacturing Engineering Design Fellow for Honeywell Aerospace and Dr. Cudney’s former doctoral student.

Dr. Cudney said, “If company leaders are interested in bringing additive manufacturing online, this book can help them decide if it makes sense for their industry.

“There’s often a lack of planning, a lack of understanding, a resistance to change and sometimes fear of the unknown. Our hope is that this book will provide a good road map for managers to advance additive manufacturing at a faster pace.

“We wanted to take a look at how companies can roll out a new technology, new processes and equipment and integrate that in such a way that you have a good product in the end.”

In the 17-chapter book, the authors present what Dr. Cudney refers to as a ‘road map’ for business leaders looking to adopt 3D printing. The eBook format costs $52.16, but if you want that shiny new hardcover version, it will set you back $191.25.

Discuss these stories and other 3D printing topics at 3DPrintBoard.com or share your thoughts in the Facebook comments below.

PostProcess Technologies Uses Hybrid DECI Duo Solution to Achieve Excellent Surface Finish for 3D Printed Shrouded Impellers

Exacting Surface Finishing of Complex 3D Printed Metal Geometries.

PostProcess Technologies, which expanded its channel partner coverage in North America this spring, is well known for its software and post-printing solutions. With its automated Hybrid DECI Duo solution, PostProcess helps its customers achieve excellent surface finish standards and replicable results for complex metal parts.

Recently, PostProcess demonstrated in a new case study how well its technology can help other companies. The subject was Ingersoll Rand, a $14 billion global industrial manufacturing company that specializes in compressed air technologies. The company uses 3D printing for its shrouded impellers, which improve the performance of a compressor package more than open impellers because there is no clearance between the stationary inlet and the impeller, so no slip losses occur as a result of compression gas recirculating in the space.

The design for shrouded impellers, which rotate 60,000 RPM, has very tight tolerances in order to meet aerodynamic testing. In addition, the blades need excellent surface finishing, and it takes months to build using conventional forms of manufacturing. So Ingersoll’s engineering team, needing to commercialize its shrouded impeller design, turned to 3D printing because of its complete design freedom; the technology also makes it possible to build the part as monolithic, so no welding is required. But, in order for 3D printed parts to meet performance thresholds, they do require outstanding surface finishes.

Ingersoll 3D prints its shrouded impellers out of titanium and nickel alloy, but they unfortunately come off the print bed at an Ra (roughness average) value that doesn’t meet the engineering team’s specifications. The team has tried everything from manual sanding and grinding tools to chemical etching, but the results were inconsistent and did not have the necessary, repeatable quality needed to produce end parts within the required specifications.

The company needed to find a replicable process that would provide them with the necessary surface finish for its shrouded impeller’s complex geometry, in order to, as PostProcess wrote in its case study, “drive a measurable increase in efficiency for its advanced air compressors.”

So, Ingersoll turned to PostProcess in hopes that the company could work with complex metal part geometries, like organic shapes and internal channels, and help achieve repeatable results and excellent surface finish standards for its shrouded impellers.

Automated DECI Duo for Post-Print Support Removal & Surface Finishing.

PostProcess delivered a “transformative outcome” for Ingersoll’s 3D printed titanium and nickel alloy parts, thanks to its patent-pending, automated Hybrid DECI Duo solution. The Hybrid DECI Duo – a single, multi-functioning, data-driven system – promises fast cycle times for even the most complex of parts Designed to optimize production floor space, the system also includes noise reducing features for a low dBa, an LED lighted chamber, and a manual mode for hands-on part finishing when needed.

The system also uses PostProcess’ proprietary AUTOMAT3D software, in order to optimize energy and exclusive chemistry, which includes detergents and suspended solids so the geometries maintain their fine-feature details while still receiving the desired surface finish.

“We have chosen the DECI Duo because of its repeatability, minimal setup, processing times, and cost of ownership. Photochemical machining, extrude honing, and micro polishing or micro machining all yield very good results when applied correctly, however extensive tooling and equipment costs, setup times, and required DOE’s prior to applying the surface finishing method to obtain a repeatable process have made the DECI Duo a better option,” said Ioannis Hatziprokopiou, Mechanical Engineer, New Product Development, Ingersoll Rand Compression Technologies and Services.

“In addition, some of aforementioned finishing techniques unevenly remove material inside the flow path of the impeller, whereas the DECI Duo uniformly treats the entire surface of the flow path. The final geometry of the flow path must remain as unaltered as possible after post-processing of any kind.”

3D printed shrouded impellers were
implemented on the last 3 stages of this 6 stage 6R3MSGEP+4/30 engineered air booster machine.

The PostProcess solution established operating settings that were in line with Ingersoll’s standards using benchmark parts. Then, the DECI Duo was able to consistently finish metal parts that were able to successfully pass exacting aerodynamic tests.

Ingersoll came to PostProcess with a need for high quality and requirements in consistency and repeatability. But, it’s also achieved additional advantages from working with the company, such as cost savings and ease of operation.

In addition, the DECI Duo also produced an average of 70-80% reduction in Ra for parts run for 20 minutes or less.

Discuss this story and other 3D printing topics at 3DPrintBoard.com or share your thoughts below. 

[Images: PostProcess Technologies]