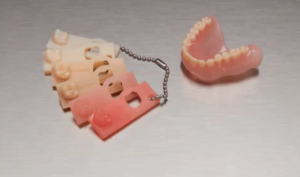
More than 36 million Americans do not have any teeth, and 120 million people in the US are missing at least one tooth. With these numbers expected to grow in the next two decades, the market for 3D printed dentures is expected to grow significantly.
Sam Wainwright, Dental Product Manager at Formlabs, suggested during the company’s latest webinar that he wouldn’t “be surprised to see 40% of dentures in America made with 3D printing,” claiming that it makes sense “at the technology level because there is no loss of material.” The expert delved into some of the techniques that have proven to work for aesthetically better 3D printed dentures. The webinar, titled Can 3D printed dentures look good?, offered dentists, technicians, and anyone interested in using 3D printing to improve dentures, tips on how to cut material costs by up to 80% (compared to traditional denture cards and acrylic); perform fewer steps to attain high-quality results, and overall prevent teeth from looking unnatural.
“This is an ever expanding market with many options. 3D printed dentures are a very new thing, especially for removable prosthetics (something that has never been digitalized) so it is going to take some time for labs, dentists and patients to become used to it. The material is indicated for long term use but the most rapid adoption of this technology will be immediate conversion and provisional dentures, which have lower risk allowing dental professionals to walk not run into this new technology. We also expect the resins to get better, stronger and more aesthetic in time,” said Wainwright.
 In fact, in the last year, Formlabs has already managed to upgrade the resins it sells for medical professionals to make oral prostheses, called Digital Dentures. These new FDA-approved resins not only resemble traditional dentures but they are also cheaper than other options. At $299 for the denture base resin and $399 for the teeth resin, the company estimates that the total resin cost for a maxillary denture is $7.20. Moreover, Formlabs also recently released the new Form 3 printer, which uses light touch supports: meaning post-processing just became much easier. Support removal is going to be quicker on the Form 3 than the Form 2, which translates to fewer materials costs and time.
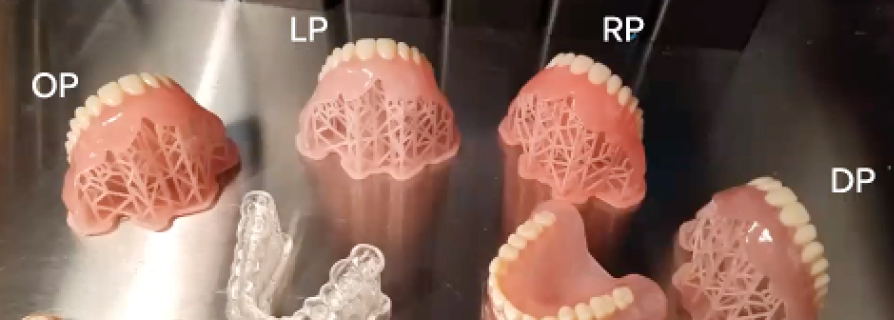
“We are trying to prevent teeth from looking unnatural, and sometimes with these 3D printed dentures, the aesthetics are really suffering from it. We like to think that dentures should have life-like gingiva, natural cervical margins, individual looking-teeth, and be easy to assemble,” Wainright said.
The general basic workflow proposed by Wainright is to follow the traditional workflow until the final models are poured and articulated with wax rim, that set-up needs to be made digital with a desktop dental 3D scanner allowing for the digital design in any open CAD dental system, followed by 3D printing the base and teeth, and finally post-processing, assembling and finishing the piece.
“After making so many parts, printing a ton of denture teeth and bases, and assembling them, we’ve come 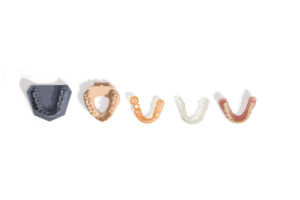 up with three techniques for an aesthetic 3D printed denture. What we want is to avoid some of the outcomes of today’s digital dentures, like products with an opaque base or gingiva, which is a bit of a mess in my opinion. Or you come about a semi transluscent base which leaves the roots exposed, and lastly when you use the splinted tooth workflow you can end up with a bulky interproximal connection. And since the papillae are a really thin printed parts, it’s really easy to see the teeth connecting, looking unnatural.”
The three aesthetic denture techniques suggested by Wainwright include:
- Natural gingival connection and cervical margin are based on the CAD output for optimal result
- Splinted arch ease of assembly without a bulky interproximal
- Life-like gingiva, inspired by “Brazilian Dentures”
 Wainright suggests that for his first aesthetic dental technique, users can control the depth of penetration of the tooth as well as the angle it comes in or goes out, by using a new function in the 3Shape Dental System CAD software (version 2018+). The option is called coupling mechanism, and gives the user much more control than before, something which comes in very handy considering that “the more subgingival length the tooth has, the stronger the bond is with the base.”
“The reason why 3D printed dentures are different than traditionally made dentures is that resins for the base and the teeth are like cousins. When the parts come out of the printer and you wash them, they are almost soft and even sticky, because they are only partially cured, between 25 and 35 percent. But during the final UV curing process, the tooth and the base become one solid part.”
In fact, the dentures specialist indicates that users should cure the combined base and teeth with a handheld UV cure light, moving towards the interior, just to really hold the parts together. Once the user has checked that all the cavities have been filled up and removes any residual base resin, the denture is complete and ready to be submerged for 30 minutes in glycerine at 80 degrees celsius, for a total hour of cure time. At that point, the piece can be finished up with a UV glaze or wheel for a high shine polish.

The second recommended aesthetic denture technique involves a splinted arch ease of assembly without a bulky interproximal.
Wainright explained that he sets up “these cases up in CAD so they are 100% splinted together because it is so much easier to have consistent placement of teeth, instead of doing it one by one which can be labor-intensive. I first export the arch splinted, but the question here is how to make the connection between the teeth interproximally look natural, especially when you have a very thin papilla. So before assembly, during our support removal part of the process, we’ll take a cutting disk and reduce the interproximal connection down from the cervical margin up towards the incisal. This really helps the aesthetics of the denture without worrying about any spaces.”
He also recommends that during the assembly process, users can easily brush in gingiva resin in the spaces to make sure there is no air, gaps or voids, maintaining the strength.

“Keep your eye out for bubbles,” repeated Wainright many times, explaining that “if you do minimal interaction to get the resin in the spaces, it really reduces the bubbles.”
He also added that the key is to “flow in more resin at first, instead of just wetting it, and when it’s squeezed together it will flow into that area. Finally, the overflow can be wiped away with a gloved finger.”
“It seems quite simple but this are the things we learn over time. I repeated many of these processes a handful of times and got better, today it may take me up to 10 minutes at the most to finish up one denture. Moreover, if you think about the soft touch supports in the Form 3, post processing will be even easier, as anyone will be able to rip them off and add very little finishing to the product.”
 For the last aesthetic denture technique, Wainwright suggested following up the “Brazilian dentures” example, which offers an inspiring way to create life-like gingiva. He says he noticed Brazilians have become experts in creating dentures, adding translucent resins in the base that allow for the patient’s own gingiva color to show through. He proposed the LP resin Formlabs resin is also quite translucent, but when tested on a model or patient’s mouth, “it adds a nice depth to the gingiva itself giving a reflection of light useful in aesthetics.”
“When the denture is seated intraorally, the patient’s natural gingiva shows through making the prosthetic come to life.”
Formlabs is known for creating reliable, accessible 3D printing systems for professionals. According to the company, in the last decade, the dental market has become a huge part of the company’s business and that Formlabs is trusted by dental industry leaders across the globe, “offering over 75 support and service staff and more than 150 engineers.”
It has shipped over 50,000 printers around the world, with tens of thousands of dental professionals using Form 2 to improve the lives of hundreds of thousands of patients. Additionally, using their materials and printers in more than 175,000 surgeries, 35,000 splints and 1,750,000 3D printed dental parts. One of the aims at Formlabs is to expand the access to digital fabrication, so anyone can make anything, this is one of the reasons why the company is making webinars, to help everyone get there.
 Wainright also revealed that Formlabs will be releasing two new denture bases, RP (reddish pink) and DP (dark pink), as well as two new denture teeth shapes, A3 and B2, that will complement the already existing A1, A2, A3.5, and B1.
If you are a big fan of webinars, make sure to check out more at 3DPrint.com’s webinars under the Training section.
Discuss this article and more on 3DPrintBoard.com or comment below to tell us what you think.
[Images: Formlabs]
The post Formlabs Tells Us How to Make Good Looking 3D Printed Dentures appeared first on 3DPrint.com | The Voice of 3D Printing / Additive Manufacturing.

“As pioneers of jetting-based additive manufacturing solutions, we are excited to help Inkbit bring their technology to the factory floor. Vision-based feedback control and artificial intelligence will take additive manufacturing to a whole new level and will help to enable its widespread use for production,” said Ronen Lebi, Vice President of Corporate Development at Stratasys.
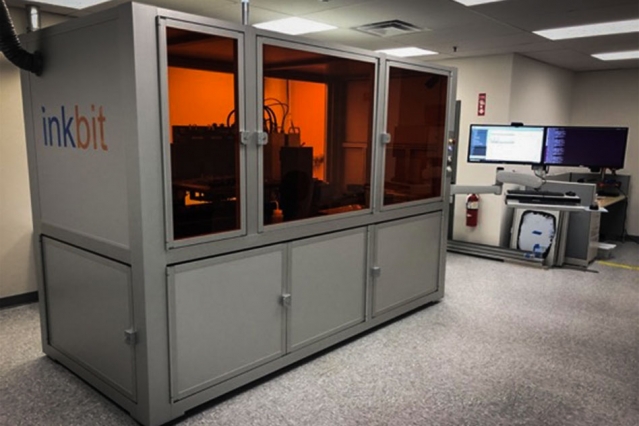
“Materials always play a major role in industrializing breakthrough technologies and in additive manufacturing they become absolutely critical. We are delighted to have Inkbit in our investment portfolio and look forward to helping them develop the best materials for customers world-wide,” said Pieter Wolters, Managing Director of DSM Venturing.