Today we will be looking into the basics of image processing and coding within Python. We will start with 2D images and learn some elementary skills in terms of setup and coding with image processing. With all of the research being done in this metrology series, it will be fun to do some interactive and project-oriented learning that focuses our attention to the different subject matter we have touched so far. Be prepared to deep dive a bit more with me today.
The first step in coding is choosing and setting up one’s developing environment. This choice is done through knowledge of what language you are using, as well as personal preference. I myself have basic scripting skills within Python. My first inclination for coding is the Python language. This limits the scope of development tools that are available to me. I also am coding with the intent of doing image processing work. This dictates my workflow and environment.
Command Line Example
I decided to develop with the Anaconda environment for Python. The steps for downloading and running Anaconda can be a bit confusing if you do not have previous experience with a command line. A command line is the space to the right of the command prompt on an all-text display mode on a computer monitor (usually a CRT or LCD panel) in which a user enters commands and data. Commands are generally issued by typing them in at the command line and then pressing the ENTER key, which passes them to the shell. For someone completely new to coding though, there are various tutorials and online resources that are instruction based. I will layout the process that I used to get my development environment setup:
Download the Anaconda package through here.
When the installer gives you the option to add this to your environment path be sure to do so. It is important for later interactions with your computer’s command line.
Use the following conda command in your command line when Anaconda is installed:
conda install jupyter
Once this command is entered, your computer will unzip the jupyter notebook package from the web. A jupyter notebook is where one can place their Python code. It can also be executed and tested within this environment. It is an awesome tool for developing.
Use the following conda command in your command line after completing the previous installation:
conda install pillow
Once this command is entered, your computer will unzip the pillow package from the web. The pillow package is a great package for Python because it imports functions that are specific to image processing techniques. Once those installations are done, open a new command line and type in the following command:
jupyter notebook
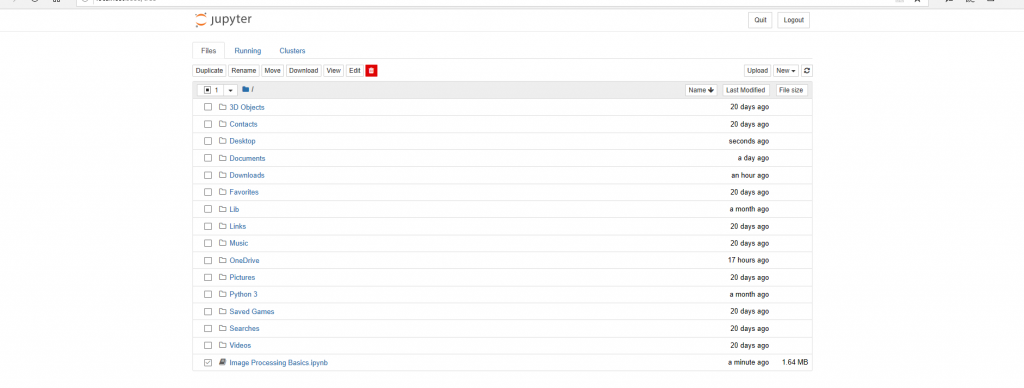
Jupyter First Glance
This will open up a jupyter notebook environment within one of your browser tabs automatically. From there we are now able to start coding and have some fun. There is a button on the upper right hand corner that says new. Click this and press Python 3 for the ability to make a file for developing. The initial popup window should correspond to how your desktop environment is setup in terms of files.
Now that we have all of this setup, please take a look at this online tutorial here. In this tutorial it is one should copy and type all of the text that appears within the code posted. Without exact formatting, various errors may pop up as you run your program. This is the more challenging part of programming. Being able to spot errors and bugs when we are creating projects is the essence of a succinct programmer. There will also be various items, words, and functions that seem complex. It is important for one to learn everything that seems foreign to them if they want to become an excellent programmer.
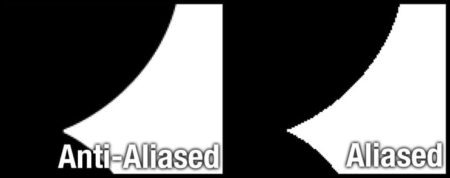
I myself had no real understanding of the word antialiasing. It is something I have seen before in my camera settings of a DSLR I use, and I have seen it within programs such as Photoshop, but I really did not understand what it was. Once I saw it in the context of code, I really had to understand what it meant. In the particular code snippet I copied from the tutorial, the goal was to create images that were at a certain size and shape. In order for images to be compressed, antialiasing is an important factor. Antialiasing is a technique used to add greater realism to a digital image by smoothing jagged edges on curved lines and diagonals. This is a computer graphics technique that allows for sharper resolutions for a photo based on precise geometry. Some of the “imperfections” of an image may be distorted or destroyed due to this. I am certain that in order to do processing such as photogrammetry and image stitching, a computer would have to have exact geometries that can be added together to form a 3D image. This causes the 3D image to have less precision overall in terms of actual dimensions. I wonder what is the margin of error for a 3D image when photogrammetry techniques are accounting for antialiasing.
Lastly, I learned about an alpha channel. Alpha channels are color components that represent the degree of transparency (or opacity) of a color (i.e., the red, green and blue channels). They are used to determine how a pixel is rendered when blended with another. It now begs the question of how precise are metrology and laser scanning devices in terms of picking up color. These are follow up questions I will be researching more in depth.
Overall, this is the first step into the world of image processing. I am excited to continue research as well as build out fun projects that will show off this field a bit more.
The post What is Metrology Part 16: Introductory Coding appeared first on 3DPrint.com | The Voice of 3D Printing / Additive Manufacturing.


18 Replies to “What is Metrology Part 16: Introductory Coding”
Comments are closed.